다양한 리치 텍스트 편집기를 사용해 본 적이 있는데 그 중에 아주 편리한 기능이 있습니다. 이미지를 복사하여 텍스트 상자에 붙여넣으면 해당 이미지가 업로드됩니다. 구현?
원리분석
추출 작업: 복사=>붙여넣기=>업로드
이 작업 중에 우리가 해야 할 일은 붙여넣기 이벤트 듣기 => 클립보드에서 콘텐츠 가져오기 => 업로드 요청 보내기
다음 내용을 쉽게 이해하려면 먼저 몇 가지 사항을 이해해야 합니다.
테스트 코드와 스크린샷은 다음과 같습니다.
크롬:
<textarea ></textarea>
<div contenteditable style="width: 100px;height: 100px; border:1px solid">
</div>
<script>
document.addEventListener('paste', function (event) {
  console.log(event)
})
</script>
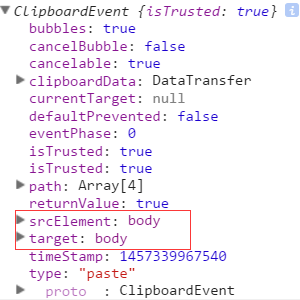
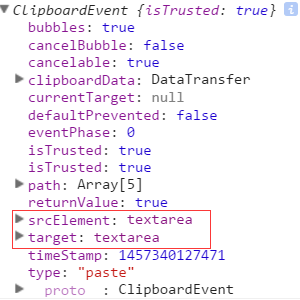
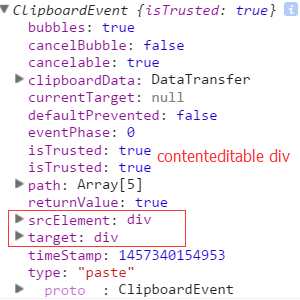
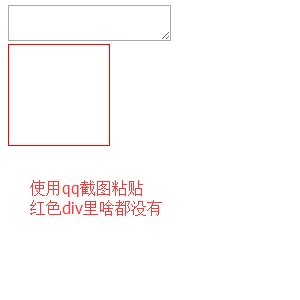
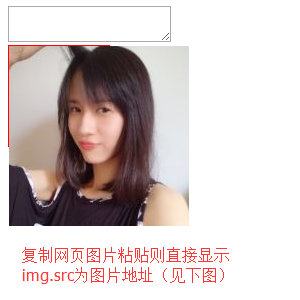
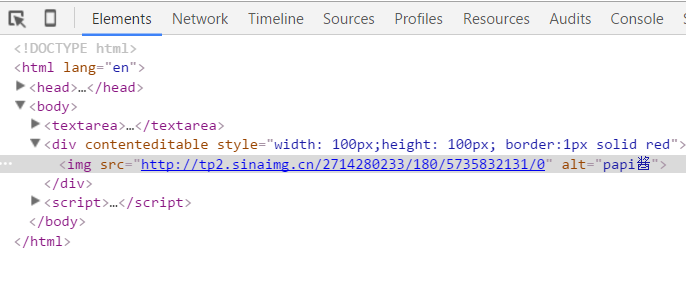
firefox:
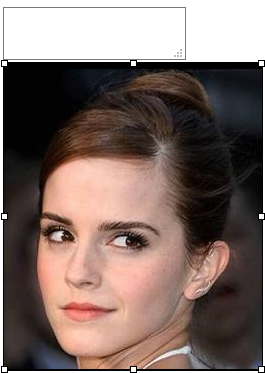
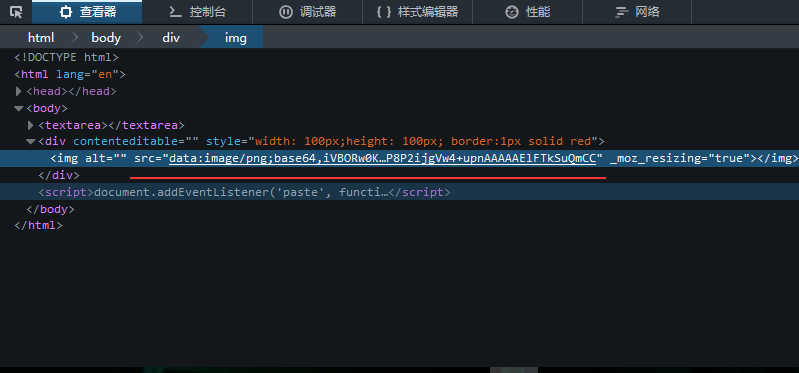
ie11:(不截图了,可自行试验,其他浏览器同理<( ̄▽ ̄)/,因为懒...)
监听了paste事件,也知道了表现形式,接下来就是如何获取数据了:
chrome有特定的方法,利用clipboardData.items、getAsFile()、new FileReader()等api可以在paste回调函数里获取到剪贴板里图片的base64编码字符串(无论是截图粘贴的还是网页图片复制粘贴的),ie11,firefox没有这样的api,不过依然有办法可以获取,因为数据已经表现在img的src里了,对于截图粘贴的,直接取img的src属性值(base64),对于网页粘贴的,则把地址传给后台,然后根据地址down下来,存在自己的服务器,最后把新地址返回来交给前端展示就ok了。为了保持一致性便于管理,统一将所有情况(截图、网页)中的img的src属性替换为自己存储的地址。因此可以得到以下核心代码(注释很全哦~~):
html展示:
<head>
<meta charset="UTF-8">
<title>Document</title>
<style>
body {
  display: -webkit-flex;
  display: flex;
  -webkit-justify-content: center;
  justify-content: center;
}
#tar_box {
  width: 500px;
  height: 500px;
  border: 1px solid red;
}
</style>
前端js处理逻辑:
document.addEventListener('paste', function (event) {
  console.log(event)
  var isChrome = false;
  if ( event.clipboardData || event.originalEvent ) {
    //not for ie11  某些chrome版本使用的是event.originalEvent
    var clipboardData = (event.clipboardData || event.originalEvent.clipboardData);
    if ( clipboardData.items ) {
      // for chrome
      var  items = clipboardData.items,
        len = items.length,
        blob = null;
      isChrome = true;
      //items.length比较有意思,初步判断是根据mime类型来的,即有几种mime类型,长度就是几(待验证)
      //如果粘贴纯文本,那么len=1,如果粘贴网页图片,len=2, items[0].type = 'text/plain', items[1].type = 'image/*'
      //如果使用截图工具粘贴图片,len=1, items[0].type = 'image/png'
      //如果粘贴纯文本+HTML,len=2, items[0].type = 'text/plain', items[1].type = 'text/html'
      // console.log('len:' + len);
      // console.log(items[0]);
      // console.log(items[1]);
      // console.log( 'items[0] kind:', items[0].kind );
      // console.log( 'items[0] MIME type:', items[0].type );
      // console.log( 'items[1] kind:', items[1].kind );
      // console.log( 'items[1] MIME type:', items[1].type );

      //阻止默认行为即不让剪贴板内容在div中显示出来
      event.preventDefault();

      //在items里找粘贴的image,据上面分析,需要循环
      for (var i = 0; i < len; i++) {
        if (items[i].type.indexOf("image") !== -1) {
          // console.log(items[i]);
          // console.log( typeof (items[i]));

          //getAsFile() 此方法只是living standard firefox ie11 并不支持
          blob = items[i].getAsFile();
        }
      }
      if ( blob !== null ) {
        var reader = new FileReader();
        reader.onload = function (event) {
          // event.target.result 即为图片的Base64编码字符串
          var base64_str = event.target.result
          //可以在这里写上传逻辑 直接将base64编码的字符串上传(可以尝试传入blob对象,看看后台程序能否解析)
          uploadImgFromPaste(base64_str, 'paste', isChrome);
        }
        reader.readAsDataURL(blob);
      }
    } else {
      //for firefox
      setTimeout(function () {
        //设置setTimeout的原因是为了保证图片先插入到div里,然后去获取值
        var imgList = document.querySelectorAll('#tar_box img'),
          len = imgList.length,
          src_str = '',
          i;
        for ( i = 0; i < len; i ++ ) {
          if ( imgList[i].className !== 'my_img' ) {
            //如果是截图那么src_str就是base64 如果是复制的其他网页图片那么src_str就是此图片在别人服务器的地址
            src_str = imgList[i].src;
          }
        }
        uploadImgFromPaste(src_str, 'paste', isChrome);
      }, 1);
    }
  } else {
    //for ie11
    setTimeout(function () {
      var imgList = document.querySelectorAll('#tar_box img'),
        len = imgList.length,
        src_str = '',
        i;
      for ( i = 0; i < len; i ++ ) {
        if ( imgList[i].className !== 'my_img' ) {
          src_str = imgList[i].src;
        }
      }
      uploadImgFromPaste(src_str, 'paste', isChrome);
    }, 1);
  }
})

function uploadImgFromPaste (file, type, isChrome) {
  var formData = new FormData();
  formData.append('image', file);
  formData.append('submission-type', type);

  var xhr = new XMLHttpRequest();
  xhr.open('POST', '/upload_image_by_paste');
  xhr.onload = function () {
    if ( xhr.readyState === 4 ) {
      if ( xhr.status === 200 ) {
        var data = JSON.parse( xhr.responseText ),
          tarBox = document.getElementById('tar_box');
        if ( isChrome ) {
          var img = document.createElement('img');
          img.className = 'my_img';
          img.src = data.store_path;
          tarBox.appendChild(img);
        } else {
          var imgList = document.querySelectorAll('#tar_box img'),
            len = imgList.length,
            i;
          for ( i = 0; i < len; i ++) {
            if ( imgList[i].className !== 'my_img' ) {
              imgList[i].className = 'my_img';
              imgList[i].src = data.store_path;
            }
          }
        }

      } else {
        console.log( xhr.statusText );
      }
    };
  };
  xhr.onerror = function (e) {
    console.log( xhr.statusText );
  }
  xhr.send(formData);
}
用express.js搭的简易后台的接收逻辑:
router.post('/', upload.array(), function (req, res, next) {
//1.获取客户端传来的src_str字符串=>判断是base64还是普通地址=>获取图片类型后缀(jpg/png etc)
//=>如果是base64替换掉"前缀"("data:image\/png;base64," etc)
//2.base64 转为 buffer对象 普通地址则先down下来
//3.写入硬盘(后续可以将地址存入数据库)
//4.返回picture地址
var src_str = req.body.image,
  timestamp = new Date().getTime();
if ( src_str.match(/^data:image\/png;base64,|^data:image\/jpg;base64,|^data:image\/jpg;base64,|^data:image\/bmp;base64,/) ) {
  //处理截图 src_str为base64字符串
  var pic_suffix = src_str.split(';',1)[0].split('/',2)[1],
    base64 = src_str.replace(/^data:image\/png;base64,|^data:image\/jpg;base64,|^data:image\/jpg;base64,|^data:image\/bmp;base64,/, ''),
    buf = new Buffer(base64, 'base64'),
    store_path = 'public/images/test_' + timestamp + '.' + pic_suffix;

  fs.writeFile(store_path, buf, function (err) {
    if (err) {
      throw err;
    } else {
      res.json({'store_path': store_path});
    }
  });
} else {// 处理非chrome的网页图片 src_str为图片地址
  var temp_array = src_str.split('.'),
    pic_suffix = temp_array[temp_array.length - 1],
    store_path = 'public/images/test_' + timestamp + '.' + pic_suffix,
    wstream = fs.createWriteStream(store_path);

  request(src_str).pipe(wstream);
  wstream.on('finish', function (err) {
    if( err ) {
      throw err;
    } else {
      res.json({"store_path": store_path});
    }
  });
}
});
需要node环境:安装node=>npm intall=>node app.js)
以上就是本文的全部内容,希望对大家的学习有所帮助。