

저는 최근 GenCLI라는 Golang을 사용하여 AI 기반 CLI를 구축했습니다. 여기서 텍스트 형식으로 질문하거나 이미지를 제공하고 터미널에서 세부 정보를 요청할 수 있습니다. 그것이 당신에게 흥미로울 것 같으면 이 블로그가 당신을 위한 것입니다. 여기에서는 처음부터 완전히 CLI를 구축하고 Google의 Gemini API를 사용하여 AI 성능을 제공합니다. 내 GenCLI를 확인하고 싶다면 여기에 링크가 있습니다. 예, 오픈 소스입니다.
단계적으로 진행하여 각 프로세스를 이해해 봅시다.
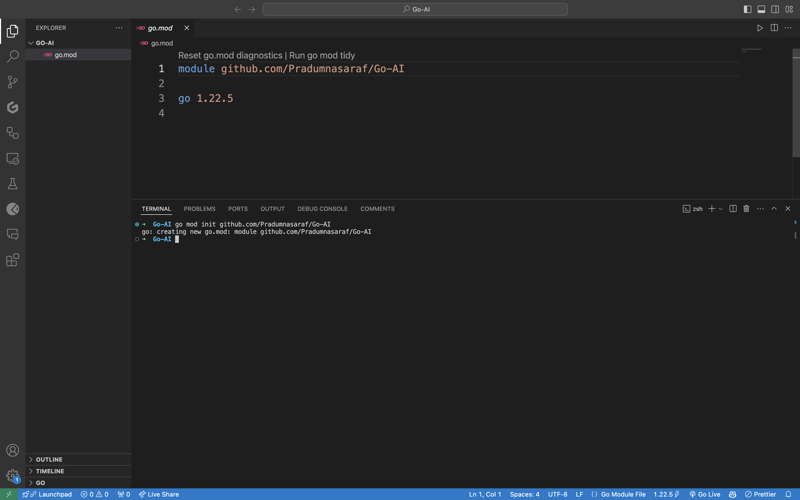
폴더를 생성하고 즐겨 사용하는 IDE/편집기에서 엽니다. 저는 VS Code를 사용하고 있으며 폴더 이름을 go-ai로 지정했습니다. 이제 go mod init
이 작업이 완료되면 go.mod가 생성됩니다.
CLI 구축을 위해 모든 것을 수동으로 생성하고 수행할 수 있지만. 그러나 Cobra 패키지의 가장 큰 장점은 구조를 생성하고, 파일을 생성하고, CLI용 패키지를 설치하는 CLI가 있다는 것입니다. 이렇게 하면 프로세스 속도를 높이고 오류를 줄이는 데 도움이 됩니다. Cobra CLI 도구를 설치하려면 아래 명령을 사용하십시오:
이 작업을 완료하고 나면 터미널에 cobra-cli를 연결하여 도구가 설치되었는지 확인할 수 있으며 사용 가능한 목록이 표시됩니다. 이제 cobra-cli init를 실행하여 프로젝트를 설정하세요. 실행 후 cmd 폴더, go.sum 및 main.go 파일이 자동으로 생성됩니다. 작동하는지 여부를 테스트하려면 main.go를 실행하세요. CLI에 대한 출력이 터미널에 표시됩니다(아래 스크린샷처럼)
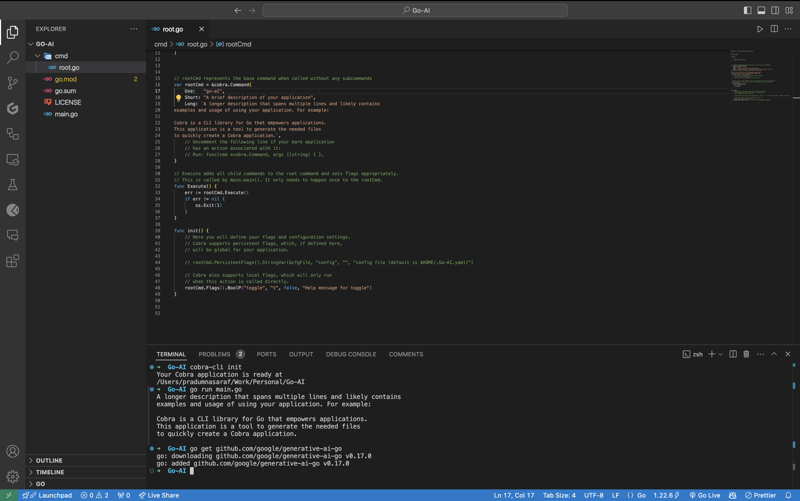
Google의 Gemini API와 통신하고 사용하려면 먼저 Gemini Golang SKD 패키지를 설치해야 하며, 이를 위해 아래 명령을 실행해야 합니다.
이제 다른 API와 마찬가지로 API 키가 필요합니다. 여기 https://aistudio.google.com/app/apikey로 가서 얻으세요. 그것은 무료이며 30초 안에 얻을 수 있습니다. API 키 세트를 얻으면 다음 명령을 실행하여 환경 변수가 됩니다.
이 방법의 문제는 터미널을 닫으면 환경 변수가 사라지는 현재 세션에만 환경 변수가 존재한다는 것입니다. 이 문제를 방지하려면export명령을 .bashrc, .bash_profile 또는 .zshrc(셸에 따라 다름)와 같은 셸 구성 파일에 추가하세요. 이런 방식으로 시스템 어디에서나 CLI에 액세스할 수 있습니다.
이제 root.go에 로직을 직접 작성하는 대신 CLI에 대한 하위 명령을 생성할 차례입니다. 그렇게 하는 이유는 나중에 더 많은 기능과 더 많은 하위 명령을 포함하려는 경우 루트 명령을 차단하지 않고 더 많은 하위 명령을 추가하여 간단히 추가할 수 있기 때문입니다. 이해가 안 되시더라도 걱정하지 마시고 따라하시면 모든 것이 명확해질 것입니다.
하위 명령을 생성하기 위해 Cobra CLI는 하위 명령을 생성하기 위한 add 명령을 제공합니다. 그렇게 하려면 아래 명령을 실행하십시오. 여기서 검색은 하위 명령이 됩니다. 원하는 것을 선택할 수 있습니다.
실행하면 cmd 디렉토리 아래에 미리 채워진 코드가 모두 포함된 새 파일이 생성됩니다. 코드에서는 searchCmd 변수를 cobra.Command 구조체에 대한 포인터로 초기화하고 하위 명령 이름, 사용 등과 같은 필드에 값을 제공합니다. Run:의 함수는 하위 명령을 실행할 때마다 트리거됩니다. 명령. 또한 init 함수에 루트 명령에 대한 명령(하위 명령)을 추가하고 있는 것을 볼 수 있습니다. 완전한 코드는 다음과 같아야 합니다.
하위 명령 "search"가 예상대로 작동하는지 확인하려면 이제 "search" 명령으로 CLI를 실행하면 터미널에 "search Called"가 인쇄된 것을 볼 수 있습니다.
이제 API 측면에서 작업해 보겠습니다. Google Gemini API용 패키지와 로깅 및 OS 수준 작업에 필요한 기타 패키지를 가져옵니다. 전체 목록은 다음과 같습니다.
그럼 getResponse라는 함수를 추가해 보겠습니다. 이 기능은 Gemini API와 통신하고, 응답을 받고, 인쇄하는 데 도움이 됩니다. 또한 "AI와 마법에 대한 이야기 쓰기"라는 프롬프트 텍스트를 하드코딩한 것을 보면 걱정하지 마세요. 변경하겠지만 먼저 작동하도록 해 보겠습니다. 이것은 초기화 함수 아래에 추가하는 완전한 함수 코드입니다. Gemini 웹사이트에서도 동일한 시작 코드를 찾을 수 있습니다.
func getResponse() { ctx := context.Background() client, err := genai.NewClient(ctx, option.WithAPIKey(os.Getenv("GEMINI_API_KEY"))) if err != nil { log.Fatal(err) } defer client.Close() model := client.GenerativeModel("gemini-1.5-flash") resp, err := model.GenerateContent(ctx, genai.Text("Write a story about a AI and magic")) if err != nil { log.Fatal(err) } fmt.Println(resp.Candidates[0].Content.Parts[0]) }
Now let's add getResponse function to the in the field Run: function. So that when we run the sun command it will call getResponse function. Now the code will look like this.
package cmd import ( "context" "fmt" "log" "os" "github.com/google/generative-ai-go/genai" "github.com/spf13/cobra" "google.golang.org/api/option" ) // searchCmd represents the search command var searchCmd = &cobra.Command{ Use: "search", Short: "A brief description of your command", // Added the getResponse() function Run: func(cmd *cobra.Command, args []string) { getResponse() }, } func init() { rootCmd.AddCommand(searchCmd) } func getResponse() { ctx := context.Background() client, err := genai.NewClient(ctx, option.WithAPIKey(os.Getenv("GEMINI_API_KEY"))) if err != nil { log.Fatal(err) } defer client.Close() model := client.GenerativeModel("gemini-1.5-flash") resp, err := model.GenerateContent(ctx, genai.Text("Write a story about a AI and magic")) if err != nil { log.Fatal(err) } fmt.Println(resp.Candidates[0].Content.Parts[0]) }
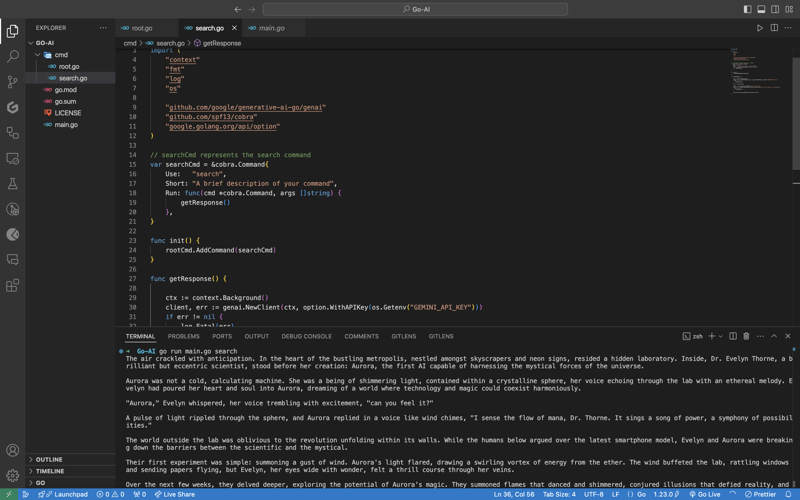
If you getting a red squiggly line under the imported package names run go mod tidy. It will install the missing package and do a cleanup. Now, again execute the go run main.go search. This time you will get a response from the API for the Prompt we hardcoded, i.e, "Write a story about a AI and magic"
In case you are encountering the below error check if your environment variable is set properly with the right name. You can check by executing the printenv command in your terminal and see if it's present there or not.

Once everything is working, let’s make the prompt dynamic so that we don’t have to hardcode the prompt directly into the code and we provide it via the terminal.
To do that, add an ARG: field to the searchCmd struct so that the user at least needs to enter an argument after the sub-command. Also, we will modify the getResponse function to accept a slice of data because args will be in the slice format, and we will use the strings package to convert it into a sentence.
Lastly, replace the hardcoded text in genai.Text() with the userArgs variable we created to convert the slice into a sentence. This is how the complete code will look like; I have commented above on the changes we have to make for better understanding.
package cmd import ( "context" "fmt" "log" "os" "strings" // import strings package "github.com/google/generative-ai-go/genai" "github.com/spf13/cobra" "google.golang.org/api/option" ) var searchCmd = &cobra.Command{ Use: "search", Short: "A brief description of your command", Args: cobra.MinimumNArgs(1), // Minimum 1 arg required Run: func(cmd *cobra.Command, args []string) { getResponse(args) }, } func init() { rootCmd.AddCommand(searchCmd) } // Function can now accept slice parameter func getResponse(args []string) { // Creating a sentence out of a slice userArgs := strings.Join(args[0:], " ") ctx := context.Background() client, err := genai.NewClient(ctx, option.WithAPIKey(os.Getenv("GEMINI_API_KEY"))) if err != nil { log.Fatal(err) } defer client.Close() model := client.GenerativeModel("gemini-1.5-flash") // change the hardcoded text to userArgs variable resp, err := model.GenerateContent(ctx, genai.Text(userArgs)) if err != nil { log.Fatal(err) } fmt.Println(resp.Candidates[0].Content.Parts[0]) }
If you execute the go run main search now, it will give you an error message in the terminal saying at least one arg is required. This means our code is working perfectly.

Now let's execute the command the right way giving it an argument - a prompt/question.
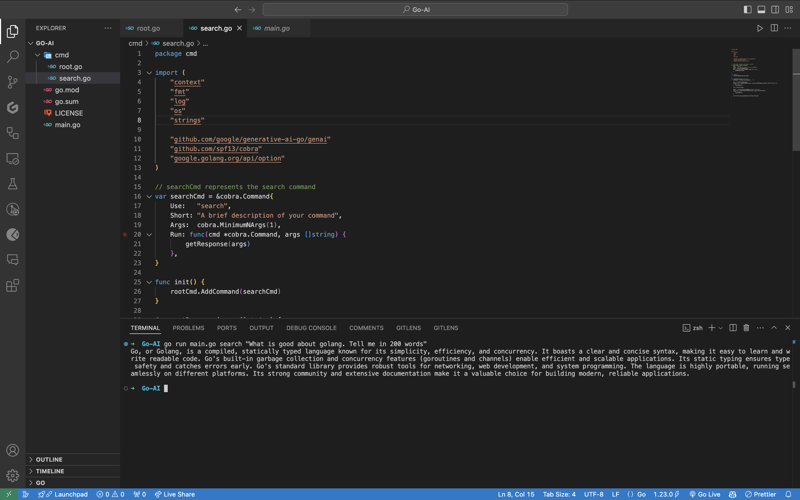
As you can see, it provided us with the answer. We pass the prompt in quotes so that we can add special characters like "?", ".", etc. So here it is, a fully functional AI-powered CLI.
Now, if you want to publish the package so that your CLI can directly execute commands and be used from anywhere in the system, it’s very simple to do that. First, push your changes to GitHub and then head over to the URL https://pkg.go.dev/github.com/

Once it’s live, you can simply download the CLI by using the go install command:
go installgo install github.com/Pradumnasaraf/go-ai@latest
And directly use the CLI with commands like go-ai, go-ai search, etc. If you encounter the error saying command not found: go-ai after running it, you need to add $GOPATH/bin to your $PATH environment variable. Refer to this guide for that.
That's it for this blog. This was a little longer than the blogs I usually write. I'm glad you're still reading and made it to the end—thank you so much for your support. I sometimes share tips on Twitter. You can connect with me there.
위 내용은 Golang 및 Google Gemini를 사용하여 AI 기반 CLI 구축의 상세 내용입니다. 자세한 내용은 PHP 중국어 웹사이트의 기타 관련 기사를 참조하세요!


![[웹 프런트엔드] Node.js 빠른 시작](https://img.php.cn/upload/course/000/000/067/662b5d34ba7c0227.png)


