This time I will bring you the use of the preload() function and image uploading. What are the precautions for using the preload() function and image uploading? The following is a practical case, let’s take a look.
The preload() function is a special function. It is similar to setup() and only runs once at the beginning of the program, but before setup().
Generally, we will put the statement for loading media files (pictures, sounds) in preload(), because preload() has a characteristic that the program will not start until it is loaded, ensuring that the program is running. Can't go wrong.
Before loading the image, we need to upload the image file first.
The method is:
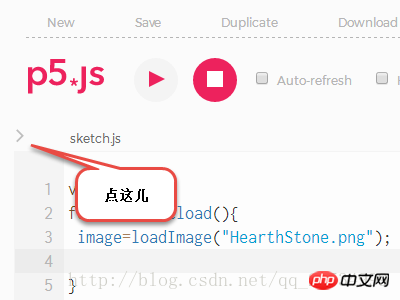
①Click the small triangle in the upper left corner of the editor to expand the file directory.

#② Click the small triangle in the upper right corner of the file directory, expand the menu and add File.

③ You can drag the image file directly into the box and it will be automatically uploaded. Just close it after uploading. Both jpg and png formats are supported.

2. Load the image
Next, add the following code:
var img; function preload(){ //加载图片文件 img=loadImage("HearthStone.png"); } function setup() { createCanvas(400, 400); } function draw() { background(220); //坐标原点设为图片中心 imageMode(CENTER); //绘制图片 image(img,200,200); }
There are two functions:
imageMode(): Set the center of the picture. Commonly used ones are CENTER and CORNER. CENTER is the center and CORNER is the upper left corner.
image(): Draw the picture. image( "Picture address",x,y)
Rendering:

##3. Picture dyeing and stretching
p5.js also provides some convenient functions, such as dyeing and stretching. The code is as follows:var img; function preload(){ //加载图片文件 img=loadImage("HearthStone.png"); } function setup() { createCanvas(400, 400); } function draw() { background(220); //坐标原点设为图片中心 imageMode(CENTER); //图片染色 tint(0,255,255); //绘制图片,后两个参数调整长宽 image(img,200,200,150,150); }

Comparison between JS dynamic addition method and PHP dynamic addition method
How to use Linux to repeatedly load .vimrc document
The above is the detailed content of Use of preload() function and image upload. For more information, please follow other related articles on the PHP Chinese website!


