

This time I will bring you a detailed explanation of the node server cross-domain steps. What are the precautions for node server cross-domain. The following is a practical case, let’s take a look.
Background
We all know that browsers have a core and most basic security feature, the same-origin policy. The same origins are: protocol, domain name, and port. If the browser accesses the server from a different source, it will not be able to access the data. If the servers frequently accessed during development are from different sources, you can use a server as an intermediary to access the server you need to access to obtain data. Because the same-origin policy is a browser security mechanism, servers are not subject to this restriction. Previously, there was a dev-serve.js file in the build folder of the vue-cli template. You can configure the local node server in this file to achieve cross-domain. However, there is no such file in the current template. So how should we use node cross-domain? Don't force it, just use the method.
Specific operations
1. Create a new dev-serve.js file under the build folder and add the following code:
'use strict'
const express = require('express')
const axios = require('axios')
module.exports = function () {
let app = express()
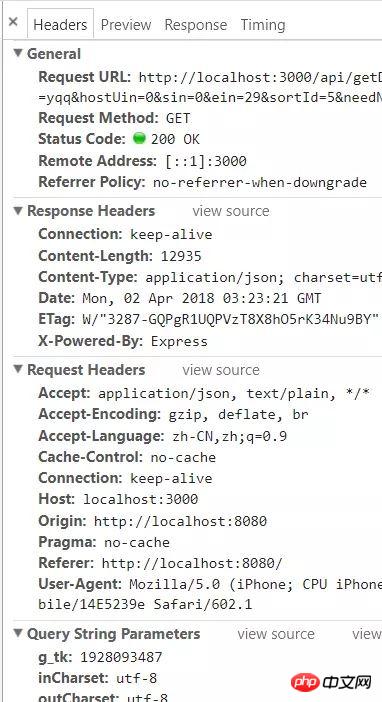
app.get('/api/getDiscList', (req, res) => {
let url = '请求地址'
axios.get(url, {
headers: {
//这里请求的是QQ音乐的接口,带上下面参数是为了骗服务器是自己人
referer: 'https://c.y.qq.com/',
host: 'c.y.qq.com'
},
params: req.query
}).then((response) => {
res.json(response.data)
}).catch((e) => {
console.log(e)
})
})
app.listen(3000)
}2. To introduce and run in build.js, you only need to add require('./dev-serve.js')() at the top
When we npm run dev runs the project, the node server will start automatically Listen to port 3000
3. Send an ajax request locally, and you can access the data through the node server. I use axios for the request. The request is as follows:
import axios from 'axios'
function getDiscList() {
  const data = {
    //...请求参数
  }
  return axios.get('/api/getDiscList', {
    params: data
  }).then(res => {
    return Promise.resolve(res.data)
  })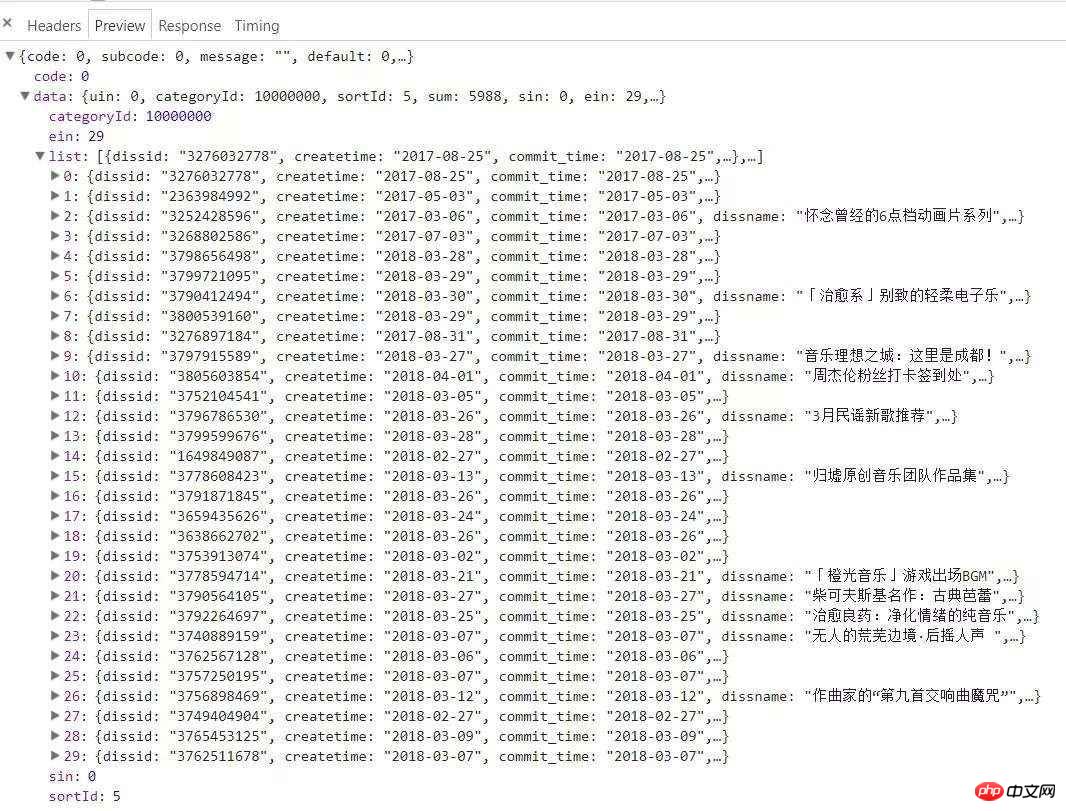
}The requested data is as follows:
How to upgrade vue cli to webapck4
vue-cli 3.0 Beginners must know
D3.js implements dynamic dial effect
The above is the detailed content of Detailed explanation of node server cross-domain steps. For more information, please follow other related articles on the PHP Chinese website!


![[Web front-end] Node.js quick start](https://img.php.cn/upload/course/000/000/067/662b5d34ba7c0227.png)


