


I recently had time to learn about the various APIs of html5, and found that the avatar setting of Sina Weibo uses canvas to achieve screenshots. In addition, I learned about the File API of html5 some time ago and used the File API's FileReader to implement file uploads《JavaScript File API File Upload Preview》, I think html5 is even more fun, and I want to try writing this function and learn canvas.
Below is a demo I wrote myself. The code is relatively small and I don’t know how to deal with many details. If there is anything inappropriate, please tell me, thank you ^_^ ^_^
Function implementation steps:
PS: Because I wrote the demo first before writing this article, the code posted in sections is copied directly from the code section by section. Please pay attention to this object
Step 1: Get the file, read the file and generate the url
Here I use the file api in HTML5 to handle local file upload, because this eliminates the need to upload the image to the server, and then the server returns the image address for preview. For details, please see: Using the File API's FileReader to implement file upload
document.getElementById('post_file').onchange = function() {
  var fileList = this.files[0];
  var oFReader = new FileReader();
  oFReader.readAsDataURL(fileList);
  oFReader.onload = function (oFREvent) { //当读取操作成功完成时调用.
    postFile.paintImage(oFREvent.target.result);//把预览图片url传给函数
  };
}
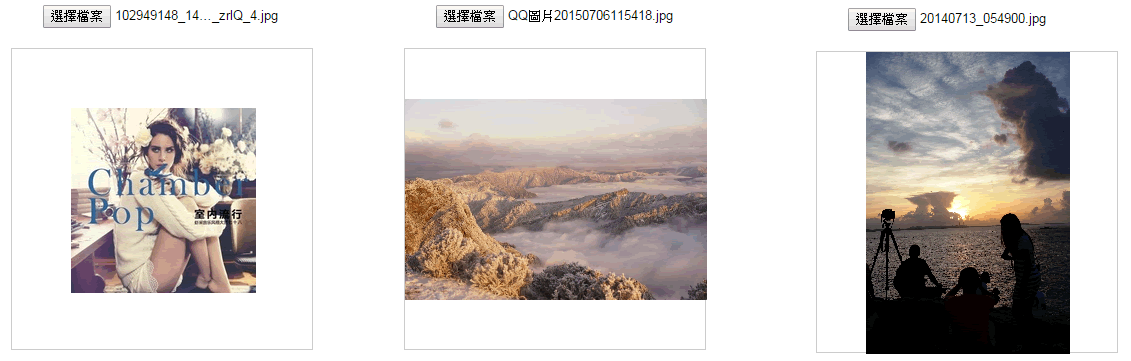
Step 2: Use canvas to draw pictures according to the size of the container
In the previous step, the FileReader using the File API has obtained the address of the image to be uploaded. Next, you need to use canvas to draw the image. Why not directly insert the img here and redraw it with canvas? Isn't this unnecessary? Not really. If you use img to directly insert into the page, it will not be adaptively centered. If you use canvas to draw the image, it will not only enable the image to be adaptively centered and scaled equally, but it will also make it easy to pass the coordinates and size of the image to the subsequent mask layer. This allows the mask layer to be drawn based on the coordinates of the image and the size of the image.
Here you need to pay a little attention to the drawImage method of canvas.
paintImage: function(url) {
var t = this;
var createCanvas = t.getImage.getContext("2d");
var img = new Image();
img.src = url;
img.onload = function(){
//等比例缩放图片(如果图片宽高都比容器小,则绘制的图片宽高 = 原图片的宽高。)
//如果图片的宽度或者高度比容器大,则宽度或者高度 = 容器的宽度或者高度,另一高度或者宽度则等比例缩放
//t.imgWidth:绘制后图片的宽度;t.imgHeight:绘制后图片的高度;t.px:绘制后图片的X轴;t.py:绘制后图片的Y轴
if ( img.width < t.regional.offsetWidth && img.height < t.regional.offsetHeight) {
t.imgWidth = img.width;
t.imgHeight = img.height;
} else {
var pWidth = img.width / (img.height / t.regional.offsetHeight);
var pHeight = img.height / (img.width / t.regional.offsetWidth);
t.imgWidth = img.width > img.height ? t.regional.offsetWidth : pWidth;
t.imgHeight = img.height > img.width ? t.regional.offsetHeight : pHeight;
}
//图片的坐标
t.px = (t.regional.offsetWidth - t.imgWidth) / 2 + 'px';
t.py = (t.regional.offsetHeight - t.imgHeight) / 2 + 'px';
t.getImage.height = t.imgHeight;
t.getImage.width = t.imgWidth;
t.getImage.style.left = t.px;
t.getImage.style.top = t.py;
createCanvas.drawImage(img,0,0,t.imgWidth,t.imgHeight);//没用直接插入背景图片而用canvas绘制图片,是为了调整所需框内图片的大小
t.imgUrl = t.getImage.toDataURL();//储存canvas绘制的图片地址
t.cutImage();
t.drag();
};
},
The result is as follows:
Step 3: Use canvas to draw the mask layer
In the previous step, you have drawn the background image that needs to be cropped. Now you need to draw a mask layer to cover the background according to the coordinates and size of the background image, and use the clearRect method of canvas to clear a cropping area so that Contrast it with the uncropped areas.
(The mask layer here is only used for display effects and does not do the work of cropping the image. I wonder if this step can be removed directly? If anyone knows, please tell me.)
//绘制遮罩层:
t.editBox.height = t.imgHeight;
t.editBox.width = t.imgWidth;
t.editBox.style.display = 'block';
t.editBox.style.left = t.px;
t.editBox.style.top = t.py;

var cover = t.editBox.getContext("2d");
cover.fillStyle = "rgba(0, 0, 0, 0.5)";
cover.fillRect (0,0, t.imgWidth, t.imgHeight);
cover.clearRect(t.sx, t.sy, t.sHeight, t.sWidth);
Step 4: Use canvas to draw the cropped picture
In the third step, the mask layer is drawn, but the mask layer does not have the ability to crop. It is only used to display the comparison between the cropped area and the non-cropped area, so the function of cropping the image begins here. Also use the drawImage method of canvas.
//绘制剪切图片:
t.editPic.height = t.sHeight;
t.editPic.width = t.sWidth;
var ctx = t.editPic.getContext('2d');
var images = new Image();
images.src = t.imgUrl;
images.onload = function(){
  ctx.drawImage(images,t.sx, t.sy, t.sHeight, t.sWidth, 0, 0, t.sHeight, t.sWidth); //裁剪图片
  document.getElementById('show_edit').getElementsByTagName('img')[0].src = t.editPic.toDataURL(); //把裁剪后的图片使用img标签显示出来
}
Step 5: Drag the cropping box and re-crop the image
When using the screenshot upload avatar function, we hope to be able to crop a satisfactory picture, so the cropping frame needs to be constantly changed to crop a perfect picture. The basic function of cropping pictures has been completed in the previous steps, so what needs to be done now is to follow the movement of the mouse to crop the picture in real time.
drag: function() {
  var t = this;
  var draging = false;
  var startX = 0;
  var startY = 0;

  document.getElementById('cover_box').onmousemove = function(e) {
    //获取鼠标到背景图片的距离
    var pageX = e.pageX - ( t.regional.offsetLeft + this.offsetLeft );
    var pageY = e.pageY - ( t.regional.offsetTop + this.offsetTop );
    //判断鼠标是否在裁剪区域里面:
    if ( pageX > t.sx && pageX < t.sx + t.sWidth && pageY > t.sy && pageY < t.sy + t.sHeight ) {
      this.style.cursor = 'move';

      this.onmousedown = function(){
        draging = true;
        //记录上一次截图的坐标
        t.ex = t.sx;
        t.ey = t.sy;
        //记录鼠标按下时候的坐标
        startX = e.pageX - ( t.regional.offsetLeft + this.offsetLeft );
        startY = e.pageY - ( t.regional.offsetTop + this.offsetTop );
      }
      window.onmouseup = function() {
        draging = false;
      }

      if (draging) {
        //移动时裁剪区域的坐标 = 上次记录的定位 + (当前鼠标的位置 - 按下鼠标的位置),裁剪区域不能超出遮罩层的区域;
        if ( t.ex + (pageX - startX) < 0 ) {
          t.sx = 0;
        } else if ( t.ex + (pageX - startX) + t.sWidth > t.imgWidth) {
          t.sx = t.imgWidth - t.sWidth;
        } else {
          t.sx = t.ex + (pageX - startX);
        };

        if (t.ey + (pageY - startY) < 0) {
          t.sy = 0;
        } else if ( t.ey + (pageY - startY) + t.sHeight > t.imgHeight ) {
          t.sy = t.imgHeight - t.sHeight;
        } else {
          t.sy = t.ey + (pageY - startY);
        }

        t.cutImage();
      }
    } else{
      this.style.cursor = 'auto';
    }
  };
}
大功告成,图片如下:

有童鞋指出,每移动一下鼠标就裁剪一张图片不是很耗性能吗,为什么不用background-position来做预览效果 保存的时候才用canvas裁出来?一听觉得这建议很有道理,所以就在第四步把代码稍微改动了一下。鼠标移动的时候的预览效果是改变图片的background-position,点击保存按钮的时候才裁剪图片,把裁剪下来的图片生成新的url就可以传给服务器啦~~
以下代码是改正过来的,大家有什么其它好的建议欢迎指出来喔 ^_^ ^_^
demo完整代码如下:
注意:因为用的是seajs写的,所以稍微留意下文件的加载情况啦
css:
body{text-align:center;}
#label{border:1px solid #ccc;background-color:#fff;text-align:center;height:300px; width:300px;margin:20px auto;position:relative;}
#get_image{position:absolute;}
#edit_pic{position:absolute;display:none;background:#000;}
#cover_box{position: absolute;z-index: 9999;display:none;top:0px;left:0px;}
#show_edit{margin: 0 auto;display:inline-block;}
#show_pic{height:100px;width:100px;border:2px solid #000;overflow:hidden;margin:0 auto;display:inline-block; }
html:
<input type="file" name="file" id="post_file">
<button id="save_button">保存</button>
<div id="label">
  <canvas id="get_image"></canvas>
  <p>
    <canvas id="cover_box"></canvas>
    <canvas id="edit_pic"></canvas>
  </p>
</div>
<p>
  <span id="show_edit"></span>
  <span id="show_pic"><img src=""></span>
</p>


<script type="text/javascript" src="../../lib/seajs/sea.js"></script>
<script type="text/javascript">
seajs.use(['_example/fileAPI/index_v2.js'], function(clipFile) {
  clipFile.init({
    clipPos: {    //裁剪框的默认尺寸与定位
      x: 15,
      y: 15,
      height: 100,
      width: 100,
    },
  });
});

</script>
js:
define(function(require, exports, module) {
'use strict';
var postFile = {
init: function(options) {
var t = this;
t.regional = document.getElementById('label');
t.getImage = document.getElementById('get_image');
t.clipPic = document.getElementById('edit_pic');
t.coverBox = document.getElementById('cover_box');
t.achieve = document.getElementById('show_edit');
t.clipPos = options.clipPos;
//初始化图片基本参数
t.bgPagePos = {
x: 0,
y: 0,
height: 0,
width: 0
};
//传进图片
document.getElementById('post_file').addEventListener("change", t.handleFiles, false);
//点击保存按钮后再裁剪图片
document.getElementById('save_button').onclick = function() {
//绘制剪切后的图片:
t.clipPic.height = t.clipPos.height;
t.clipPic.width = t.clipPos.width;
var ctx = t.clipPic.getContext('2d');
var images = new Image();
images.src = t.imgUrl;
images.onload = function(){
//drawImage(images,相对于裁剪图片的X, 相对于裁剪图片的Y, 裁剪的高度, 裁剪的宽度, 显示在画布的X, 显示在画布的Y, 显示在画布多高, 显示在画布多宽);
ctx.drawImage(images,t.clipPos.x, t.clipPos.y, t.clipPos.height, t.clipPos.width, 0, 0, t.clipPos.height, t.clipPos.width); //裁剪图片
document.getElementById('show_pic').getElementsByTagName('img')[0].src = t.clipPic.toDataURL();
}
};
t.drag();
},
handleFiles: function() {
var fileList = this.files[0];
var oFReader = new FileReader();
//读取文件内容
oFReader.readAsDataURL(fileList);
//当读取操作成功完成时调用.
oFReader.onload = function (oFREvent) {
//把预览图片URL传给函数
postFile.paintImage(oFREvent.target.result);
};
},
paintImage: function(url) {
var t = this;
var createCanvas = t.getImage.getContext("2d");
var img = new Image();
img.src = url;
//把传进来的图片进行等比例缩放
img.onload = function(){
//等比例缩放图片(如果图片宽高都比容器小,则绘制的图片宽高 = 原图片的宽高。)
//如果图片的宽度或者高度比容器大,则宽度或者高度 = 容器的宽度或者高度,另一高度或者宽度则等比例缩放
//t.bgPagePos.width:绘制后图片的宽度;
//t.bgPagePos.height:绘制后图片的高度;
//t.bgPagePos.x:绘制后图片的X轴;
//t.bgPagePos.y:绘制后图片的Y轴
if ( img.width < t.regional.offsetWidth && img.height < t.regional.offsetHeight) {
t.bgPagePos.width = img.width;
t.bgPagePos.height = img.height;
} else {
var pWidth = img.width / (img.height / t.regional.offsetHeight);
var pHeight = img.height / (img.width / t.regional.offsetWidth);
t.bgPagePos.width = img.width > img.height ? t.regional.offsetWidth : pWidth;
t.bgPagePos.height = img.height > img.width ? t.regional.offsetHeight : pHeight;
}
//图片的坐标
t.bgPagePos.x = (t.regional.offsetWidth - t.bgPagePos.width) / 2 + 'px';
t.bgPagePos.y = (t.regional.offsetHeight - t.bgPagePos.height) / 2 + 'px';
t.getImage.height = t.bgPagePos.height;
t.getImage.width = t.bgPagePos.width;
t.getImage.style.left = t.bgPagePos.x;
t.getImage.style.top = t.bgPagePos.y;
createCanvas.drawImage(img,0,0,t.bgPagePos.width,t.bgPagePos.height);//没用直接插入背景图片而用canvas绘制图片,是为了调整所需框内图片的大小
t.imgUrl = t.getImage.toDataURL();//储存canvas绘制的图片地址
t.clipImg();
};
},
clipImg: function() {
var t = this;
//绘制遮罩层:
t.coverBox.height = t.bgPagePos.height;
t.coverBox.width = t.bgPagePos.width;
t.coverBox.style.display = 'block';
t.coverBox.style.left = t.bgPagePos.x;
t.coverBox.style.top = t.bgPagePos.y;
var cover = t.coverBox.getContext("2d");
cover.fillStyle = "rgba(0, 0, 0, 0.5)";
cover.fillRect (0,0, t.bgPagePos.width, t.bgPagePos.height);
cover.clearRect(t.clipPos.x, t.clipPos.y, t.clipPos.height, t.clipPos.width);
t.achieve.style.background = 'url(' + t.imgUrl + ')' + -t.clipPos.x + 'px ' + -t.clipPos.y + 'px no-repeat';
t.achieve.style.height = t.clipPos.height + 'px';
t.achieve.style.width = t.clipPos.width + 'px';
},
drag: function() {
var t = this;
var draging = false;
var _startPos = null;
t.coverBox.onmousemove = function(e) {
e = e || window.event;
if ( e.pageX == null && e.clientX != null ) {
var doc = document.documentElement, body = document.body;
e.pageX = e.clientX + (doc && doc.scrollLeft || body && body.scrollLeft || 0) - (doc && doc.clientLeft || body && body.clientLeft || 0);
e.pageY = e.clientY + (doc && doc.scrollTop || body && body.scrollTop);
}
//获取鼠标到背景图片的距离
var _mousePos = {
left: e.pageX - ( t.regional.offsetLeft + this.offsetLeft ),
top: e.pageY - ( t.regional.offsetTop + this.offsetTop )
}
//判断鼠标是否在裁剪区域里面:
if ( _mousePos.left > t.clipPos.x && _mousePos.left < t.clipPos.x + t.clipPos.width && _mousePos.top > t.clipPos.y && _mousePos.top < t.clipPos.y + t.clipPos.height ) {
this.style.cursor = 'move';
this.onmousedown = function(){
draging = true;
//记录上一次截图的坐标
t.ex = t.clipPos.x;
t.ey = t.clipPos.y;
//记录鼠标按下时候的坐标
_startPos = {
left: e.pageX - ( t.regional.offsetLeft + this.offsetLeft ),
top: e.pageY - ( t.regional.offsetTop + this.offsetTop )
}
}
if (draging) {
//移动时裁剪区域的坐标 = 上次记录的定位 + (当前鼠标的位置 - 按下鼠标的位置),裁剪区域不能超出遮罩层的区域;
if ( t.ex + ( _mousePos.left - _startPos.left ) < 0 ) {
t.clipPos.x = 0;
} else if ( t.ex + ( _mousePos.left - _startPos.left ) + t.clipPos.width > t.bgPagePos.width ) {
t.clipPos.x = t.bgPagePos.width - t.clipPos.width;
} else {
t.clipPos.x = t.ex + ( _mousePos.left - _startPos.left );
};
if (t.ey + ( _mousePos.top - _startPos.top ) < 0) {
t.clipPos.y = 0;
} else if ( t.ey + ( _mousePos.top - _startPos.top ) + t.clipPos.height > t.bgPagePos.height ) {
t.clipPos.y = t.bgPagePos.height - t.clipPos.height;
} else {
t.clipPos.y = t.ey + ( _mousePos.top - _startPos.top );
}
t.clipImg();
}
document.body.onmouseup = function() {
draging = false;
document.onmousemove = null;
document.onmouseup = null;
}
} else{
this.style.cursor = 'auto';
}
};
}
}
return postFile;
});
以上就是本文的全部内容,希望对大家的学习有所帮助。
 What are the IP reverse domain name checking tools?
 MySQL changes root password
 How to prevent the computer from automatically installing software
 How to operate json with jquery
 Session failure solution
 array_push
 Virtual number receives verification code
 The Metaverse recognizes the top ten potential coins


![[Web front-end] Node.js quick start](https://img.php.cn/upload/course/000/000/067/662b5d34ba7c0227.png)


