

#SMS サービスを開く
まずはこの Web サイトにアクセスしてくださいAlibaba Cloud の SMS テキスト メッセージ サービス: https://www.aliyun.com/product/sms?spm=5176.8142029.388261.295.vU5T5g関連学習の推奨事項:php プログラミング(ビデオ)
署名とテンプレートの作成
SMS サーバーを使用するには、署名を作成する必要がありますAlibaba Cloud のレビューに合格した場合にのみ、SMS サービスを通常に使用できるようになります。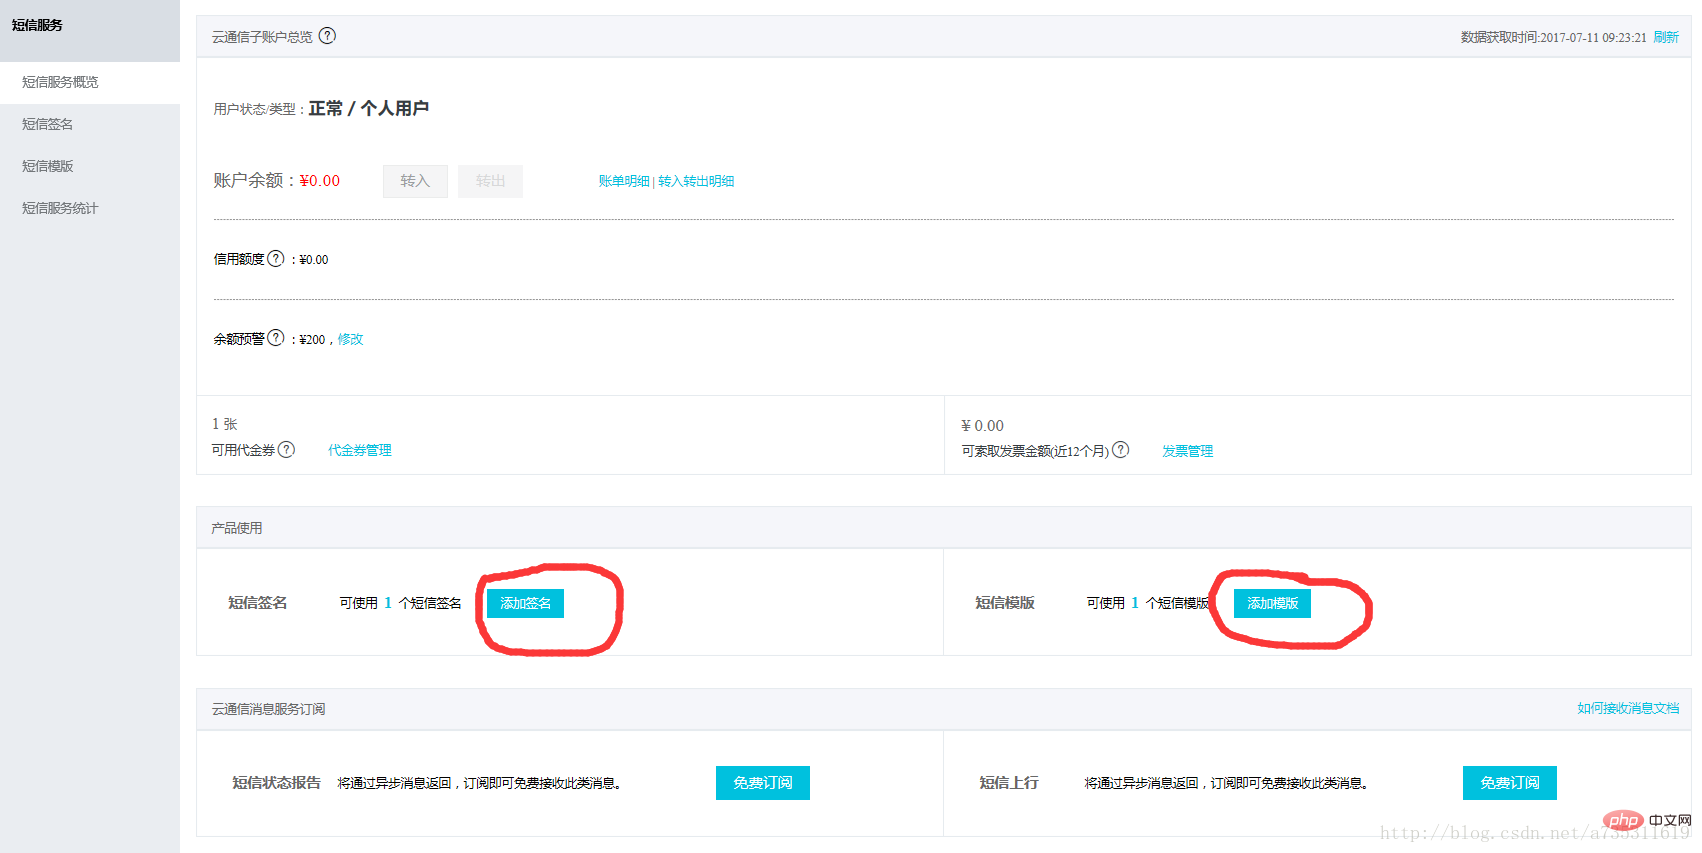
#署名の作成署名を作成するときは、署名名と署名に注意してください。休むのは面倒ではありません。
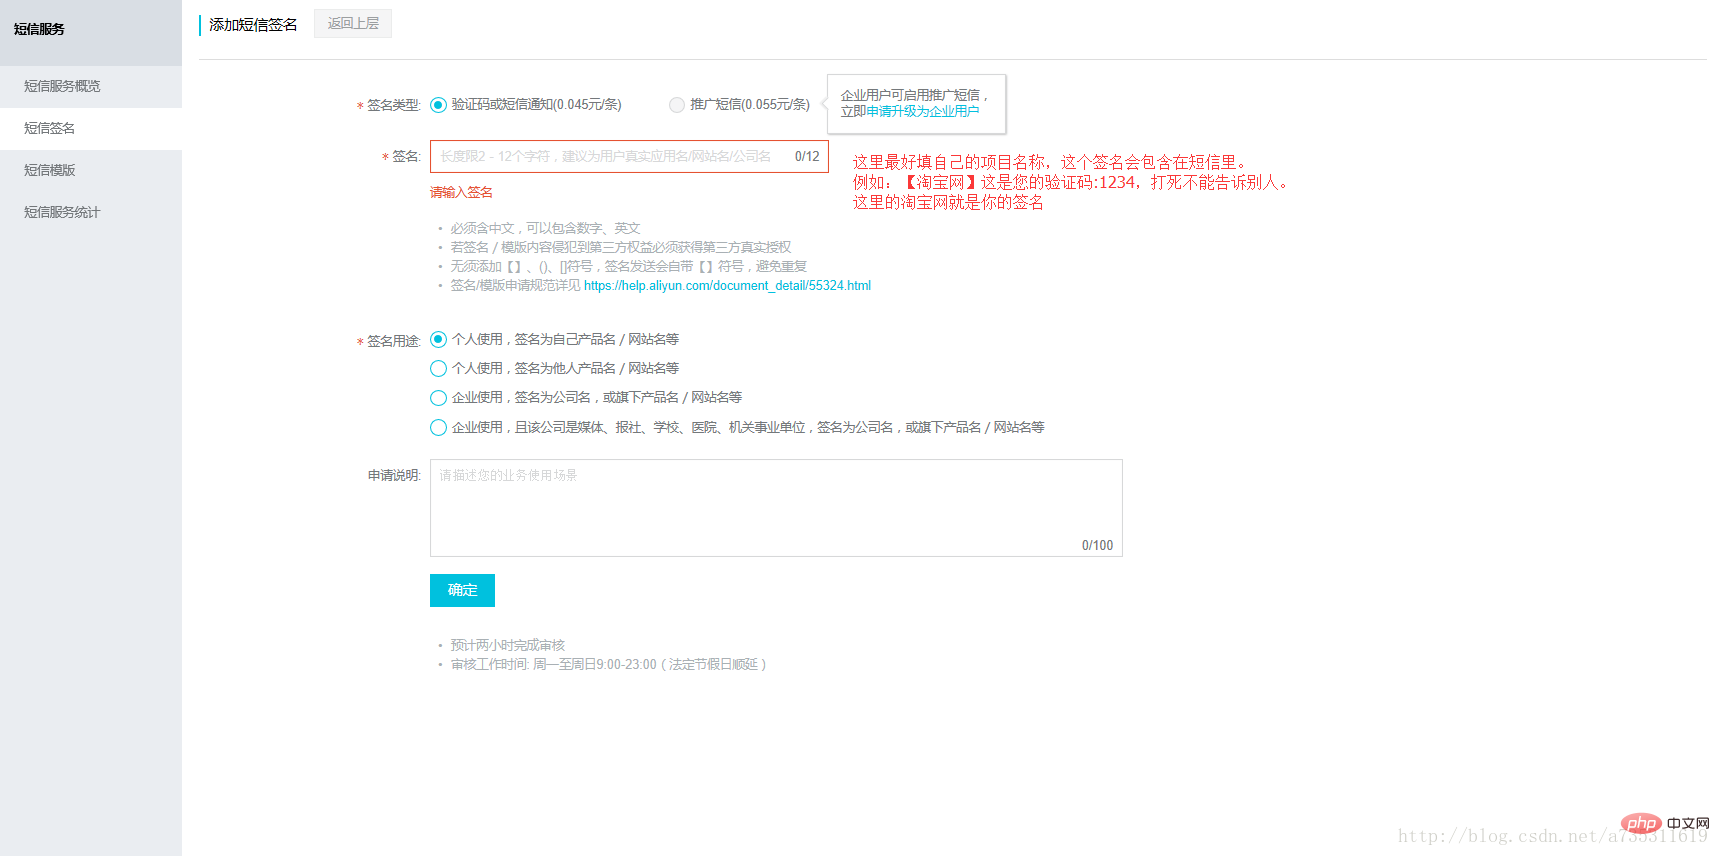
作成した署名名を覚えてください。表示されます。後でコード内で使用する必要があります。
テンプレートの作成テンプレートの作成も非常に簡単で、Alibaba Cloud にはその記入方法が明確に記載されています。
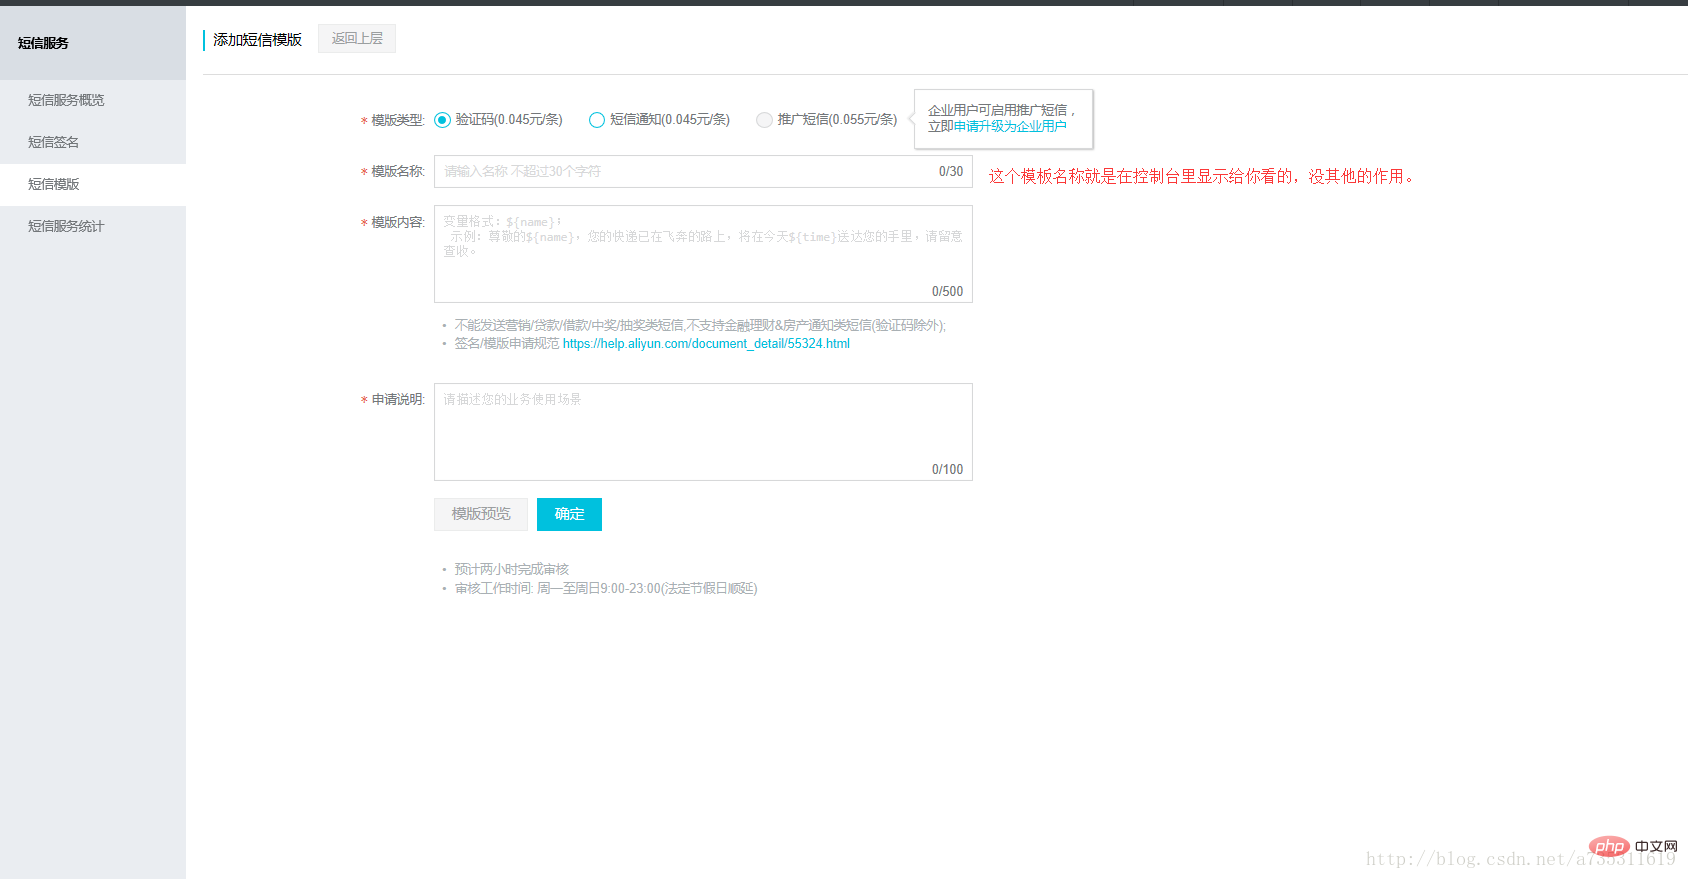 #テンプレート コードを表示して覚えてください
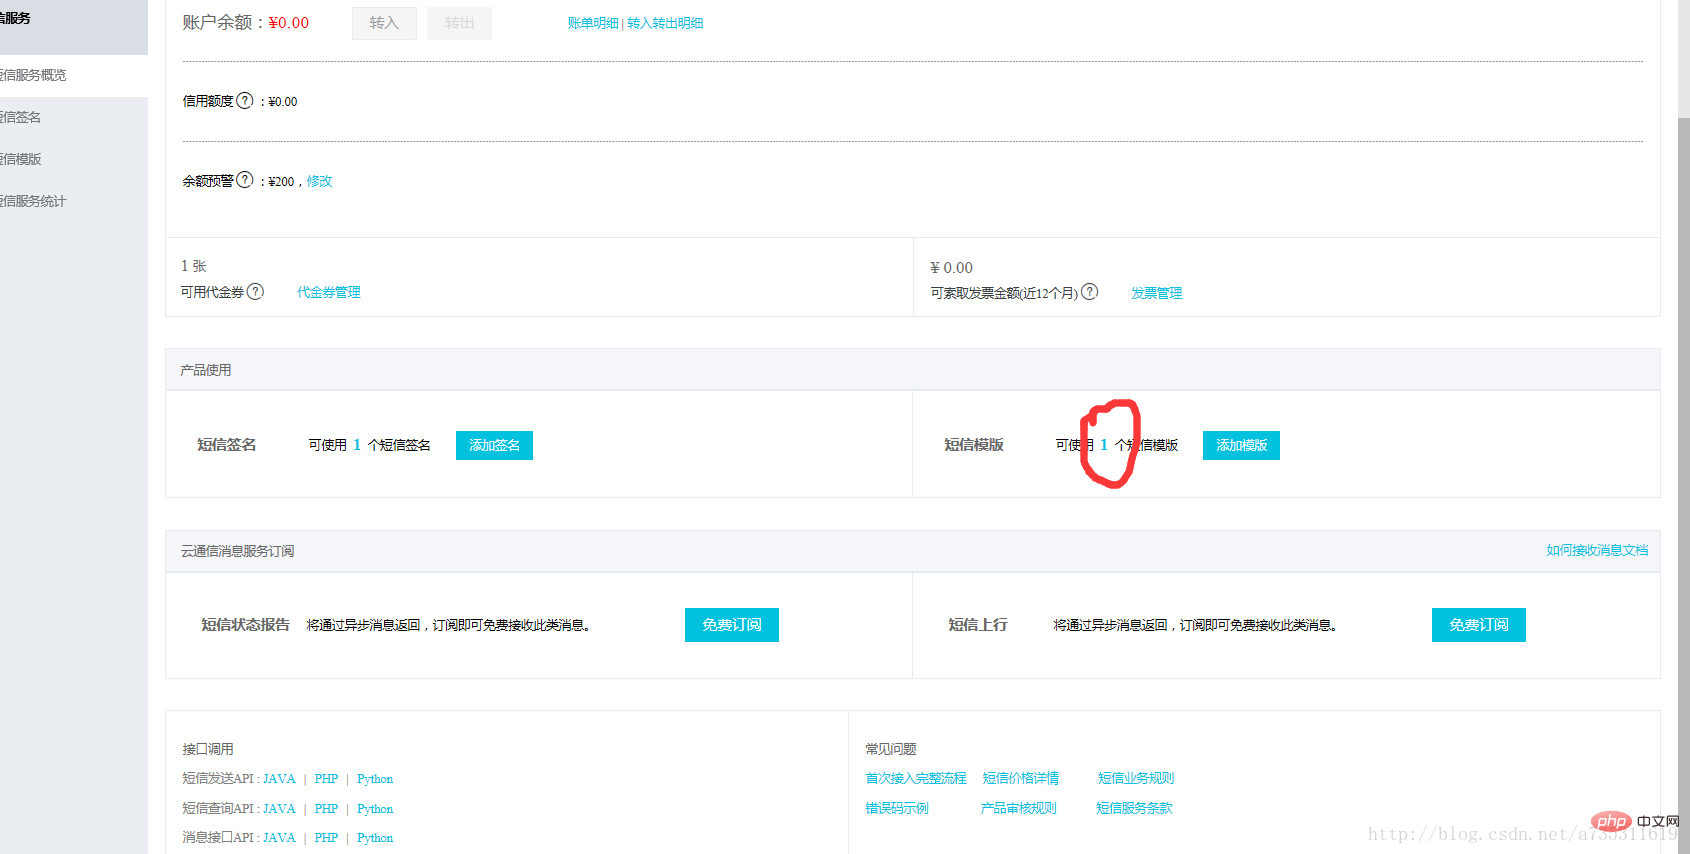
テンプレートが確認されたらコンソールに戻ります。合格したら、0より大きい数値が表示されます。 この番号をクリックすると、テンプレート管理パネルに入り、テンプレートのコードが表示されます。覚えておいてください。
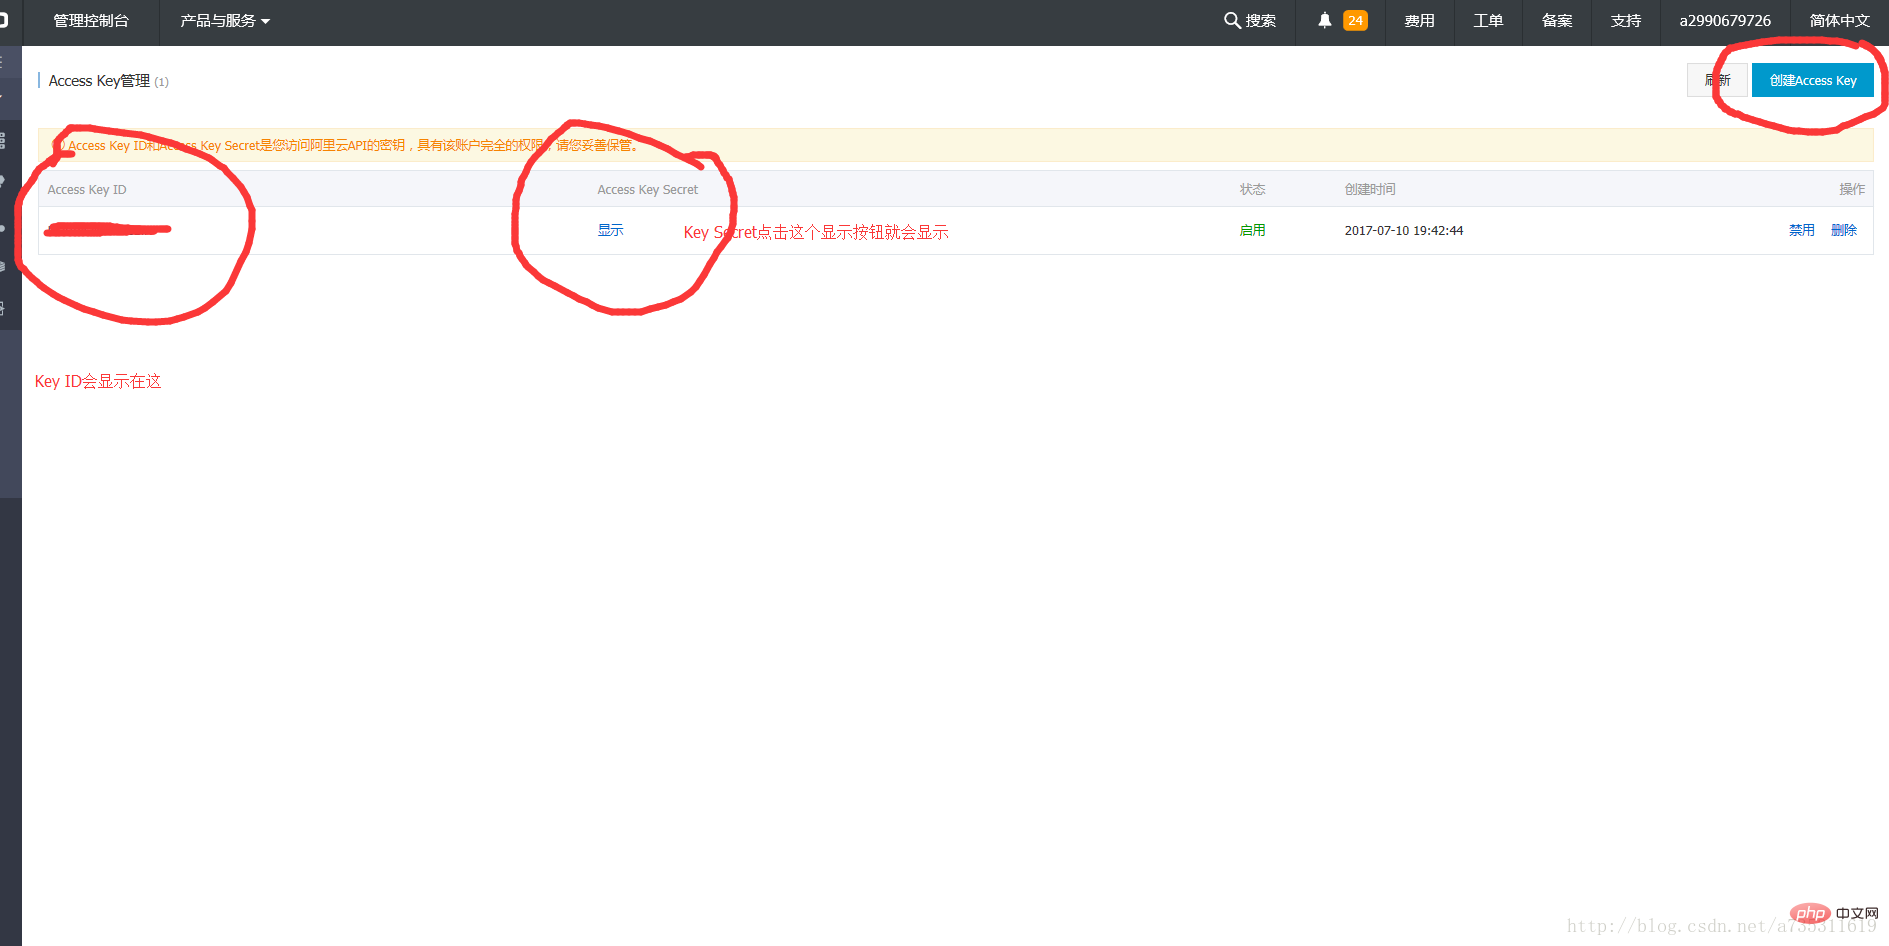
KeyId と KeySecret を作成して記憶する 
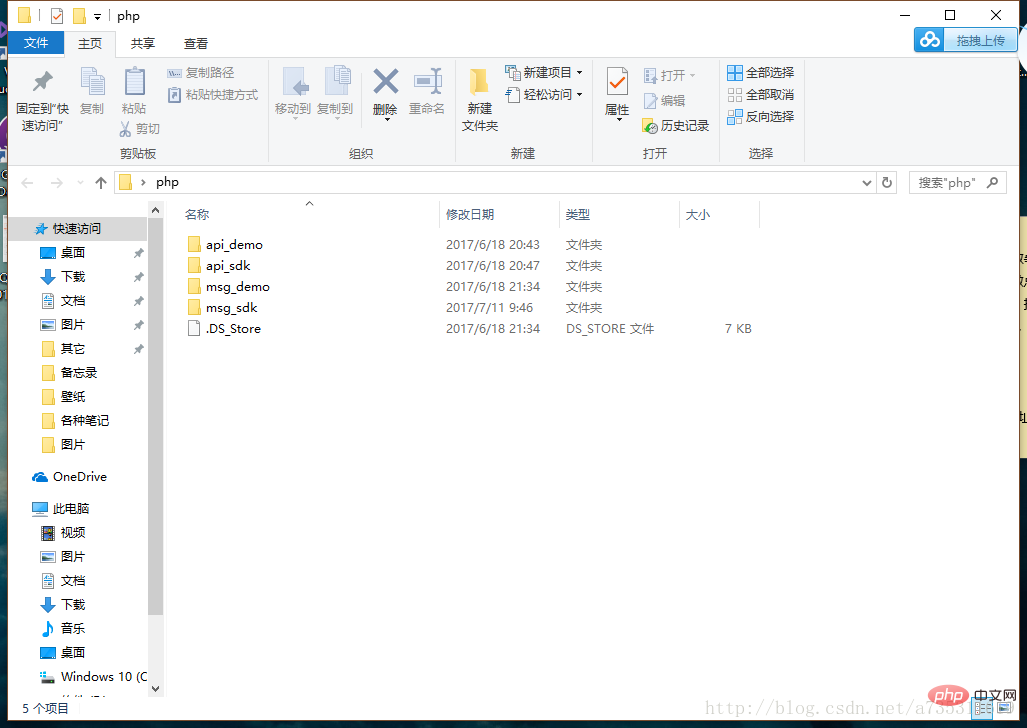
Alibaba Cloud SMS サーバー PHP-SDK をダウンロード
公式ダウンロード アドレス: https://help.aliyun. com/document_detail/55359.html?spm=5176.8195934.507901.12.b1ngGK
このチュートリアルでは、SDK のダウンロード アドレスを使用します: http://pan.baidu.com/s/1bpF5B8z
キー: pult
PHP-SMS プロジェクトの作成
コード ファイルの作成
コード ファイルを作成します。このファイルをダウンロードした SDK フォルダーの api_sdk aliyun-php-sdk-core ディレクトリに置き、コード ファイルに次のコードを書き込みます。
aliyun-php-sdk-core ディレクトリには SMS テキスト メッセージ サービスのさまざまなモジュールが含まれているため、サービスを使用するにはここに配置する必要があります
<?php
include 'Config.php';
include_once 'Request/V20170525/SendSmsRequest.php';
include_once 'Request/V20170525/QuerySendDetailsRequest.php';
$accessKeyId = "LTAIvAaNs61JeBiN";
//阿里云KeyId
$accessKeySecret = "Y3H7durYJ6GIqmJJrsdbJwPi6E8O8M";
//阿里云KeySecret
//短信API产品名
$product = "Dysmsapi";
//照写就行了
//短信API产品域名
$domain = "dysmsapi.aliyuncs.com";
//照着写就行了
//暂时不支持多Region
$region = "cn-hangzhou";
//照着写就行了
//初始化访问的acsCleint
$profile = DefaultProfile::getProfile($region, $accessKeyId, $accessKeySecret);
DefaultProfile::addEndpoint("cn-hangzhou", "cn-hangzhou", $product, $domain);
$acsClient= new DefaultAcsClient($profile);
$request = new SendSmsRequest;
//必填-短信接收号码。支持以逗号分隔的形式进行批量调用,批量上限为20个手机号码,批量调用相对于单条调用及时性稍有延迟,验证码类型的短信推荐使用单条调用的方式
$request->setPhoneNumbers("123456789");
//这里填你要发送的电话号码
//必填-短信签名
$request->setSignName("xx项目");
//这里就是刚才让你记住的项目签名
//必填-短信模板Code
$request->setTemplateCode("SMS_123456");
//这里就是模板CODE
//选填-假如模板中存在变量需要替换则为必填(JSON格式)
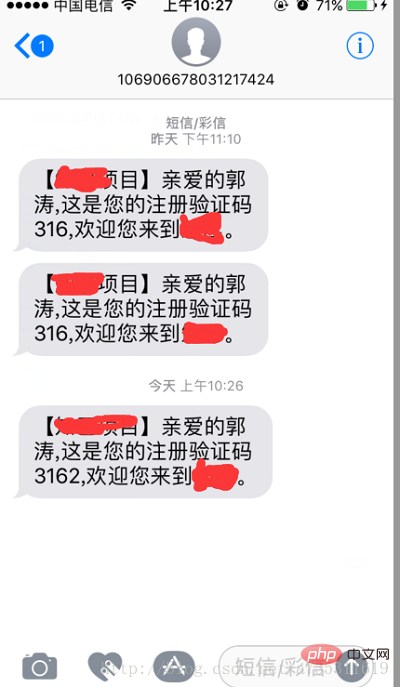
$request->setTemplateParam("{\"name\":\"郭涛\",\"number\":\"316\"}");
//选填-发送短信流水号
$request->setOutId("1234");//照填就行了
//发起访问请求
$acsResponse = $acsClient->getAcsResponse($request);
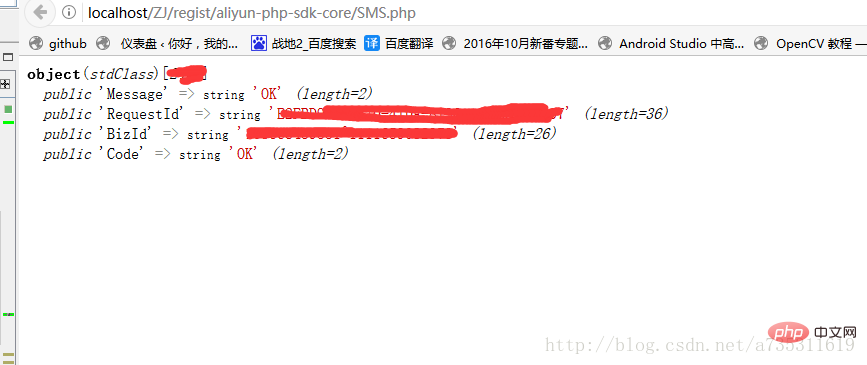
var_dump($acsResponse);//返回结果# #Move Requset
ダウンロードした SDK フォルダーの api_sdk ディレクトリに、Dysmsapi のフォルダーがあります。このフォルダーを開くと、Request というフォルダーが表示されます。 。フォルダーをコピーして aliyun-php-sdk-core に貼り付けます。正直に言うと、Alibaba Cloud が SDK を個別にインストールする理由がわかりません。もしかしたら私の使い方が間違っているからかもしれません。もしわかるマスターがいたらアドバイスをお願いします。安全な生活。引っ越し後、Request\V20170525 ディレクトリにあるソース ファイル SendSmsRequest.php を開きます。最初の行のスペース名を無効にしてください。つまり、この行の名前空間 Dysmsapi\Reqest\V20170525;最終的な効果は次のとおりです
<?php
/*
 * Licensed to the Apache Software Foundation (ASF) under one
 * or more contributor license agreements. See the NOTICE file
 * distributed with this work for additional information
 * regarding copyright ownership. The ASF licenses this file
 * to you under the Apache License, Version 2.0 (the
 * "License"); you may not use this file except in compliance
 * with the License. You may obtain a copy of the License at
 *
 *   http://www.apache.org/licenses/LICENSE-2.0
 *
 * Unless required by applicable law or agreed to in writing,
 * software distributed under the License is distributed on an
 * "AS IS" BASIS, WITHOUT WARRANTIES OR CONDITIONS OF ANY
 * KIND, either express or implied. See the License for the
 * specific language governing permissions and limitations
 * under the License.
 */
//namespace Dysmsapi\Request\V20170525;//就是屏蔽这一行代码!!!!
class SendSmsRequest extends \RpcAcsRequest
{
  function __construct()
  {
    parent::__construct("Dysmsapi", "2017-05-25", "SendSms");
  }
  private $outId;
  private $signName;
  private $ownerId;
  private $resourceOwnerId;
  private $templateCode;
  private $phoneNumbers;
  private $resourceOwnerAccount;
  private $templateParam;
  public function getOutId() {
    return $this->outId;
  }
  public function setOutId($outId) {
    $this->outId = $outId;
    $this->queryParameters["OutId"]=$outId;
  }
  public function getSignName() {
    return $this->signName;
  }
  public function setSignName($signName) {
    $this->signName = $signName;
    $this->queryParameters["SignName"]=$signName;
  }
  public function getOwnerId() {
    return $this->ownerId;
  }
  public function setOwnerId($ownerId) {
    $this->ownerId = $ownerId;
    $this->queryParameters["OwnerId"]=$ownerId;
  }
  public function getResourceOwnerId() {
    return $this->resourceOwnerId;
  }
  public function setResourceOwnerId($resourceOwnerId) {
    $this->resourceOwnerId = $resourceOwnerId;
    $this->queryParameters["ResourceOwnerId"]=$resourceOwnerId;
  }
  public function getTemplateCode() {
    return $this->templateCode;
  }
  public function setTemplateCode($templateCode) {
    $this->templateCode = $templateCode;
    $this->queryParameters["TemplateCode"]=$templateCode;
  }
  public function getPhoneNumbers() {
    return $this->phoneNumbers;
  }
  public function setPhoneNumbers($phoneNumbers) {
    $this->phoneNumbers = $phoneNumbers;
    $this->queryParameters["PhoneNumbers"]=$phoneNumbers;
  }
  public function getResourceOwnerAccount() {
    return $this->resourceOwnerAccount;
  }
  public function setResourceOwnerAccount($resourceOwnerAccount) {
    $this->resourceOwnerAccount = $resourceOwnerAccount;
    $this->queryParameters["ResourceOwnerAccount"]=$resourceOwnerAccount;
  }
  public function getTemplateParam() {
    return $this->templateParam;
  }
  public function setTemplateParam($templateParam) {
    $this->templateParam = $templateParam;
    $this->queryParameters["TemplateParam"]=$templateParam;
  }
}
プログラミング ビデオ
以上がAlibaba Cloud PHP SMS SMS サービスの認証コードの送信方法の詳細な説明の詳細内容です。詳細については、PHP 中国語 Web サイトの他の関連記事を参照してください。