


Vue で作成されたプロジェクトはローカルでビルドできますが、サーバーにデプロイすると多くの問題が発生します: リソースが見つかりません、index.html ページへの直接アクセスが空白です >, 現在のルート 404 を更新します。この記事ではvueやreactなどのシングルページプロジェクトをサーバーにデプロイする方法を中心に紹介しますので、お役に立てれば幸いです。 资源找不到,直接访问index.html页面空白,刷新当前路由404。本文我们主要和大家分享vue、react等单页面项目部署到服务器方法,希望能帮助到大家。
由于前端路由缘故,单页面应用应该放到nginx或者apache、tomcat等web代理服务器中,千万不要直接访问index.html,同时要根据自己服务器的项目路径更改react或vue的路由地址。
如果说项目是直接跟在域名后面的,比如:http://www.sosout.com ,根路由就是 '/'。
如果说项目是直接跟在域名后面的一个子目录中的,比如:http://www.sosout.com/children ,根路由就是 '/children ',不能直接访问index.html。
以配置Nginx为例,配置过程大致如下:(假设:
1、项目文件目录: /mnt/html/spa(spa目录下的文件就是执行了npm run dist 后生成的dist目录下的文件)
2、访问域名:spa.sosout.com)
进入nginx.conf新增如下配置:
server {
    listen 80;
    server_name  spa.sosout.com;
    root /mnt/html/spa;
    index index.html;
    location ~ ^/favicon\.ico$ {
        root /mnt/html/spa;
    }

    location / {
        try_files $uri $uri/ /index.html;
        proxy_set_header   Host             $host;
        proxy_set_header   X-Real-IP        $remote_addr;
        proxy_set_header   X-Forwarded-For  $proxy_add_x_forwarded_for;
        proxy_set_header   X-Forwarded-Proto  $scheme;
    }
    access_log  /mnt/logs/nginx/access.log  main;
}注意事项:1、配置域名的话,需要80端口,成功后,只要访问域名即可访问的项目2、如果你使用了react-router的 browserHistory 模式或 vue-router的 history 模式,在nginx配置还需要重写路由:
server {
    listen 80;
    server_name  spa.sosout.com;
    root /mnt/html/spa;
    index index.html;
    location ~ ^/favicon\.ico$ {
        root /mnt/html/spa;
    }

    location / {
        try_files $uri $uri/ @fallback;
        index index.html;
        proxy_set_header   Host             $host;
        proxy_set_header   X-Real-IP        $remote_addr;
        proxy_set_header   X-Forwarded-For  $proxy_add_x_forwarded_for;
        proxy_set_header   X-Forwarded-Proto  $scheme;
    }
    location @fallback {
        rewrite ^.*$ /index.html break;
    }
    access_log  /mnt/logs/nginx/access.log  main;
}为什么要重写路由?因为我们的项目只有一个根入口,当输入类似/home的url时,如果找不到对应的页面,nginx会尝试加载index.html,这是通过react-router就能正确的匹配我们输入的/home路由,从而显示正确的home页面,如果browserHistory模式或history模式的项目没有配置上述内容,会出现404的情况。
フロントエンドルーティングのため、シングルページアプリケーションはnginxやapache、tomcatなどのWebプロキシサーバーに配置する必要があります。index.htmlに直接アクセスせず、に従ってreactまたはvueのルーティングアドレスを変更してください。自分のサーバーのプロジェクト パス。
http://www.sosout.com のように、プロジェクトがドメイン名に直接従う場合、ルート ルートは「/」です。 プロジェクトが http://www.sosout.com/children など、ドメイン名の直後のサブディレクトリにある場合、ルート ルートは「/children」であり、index.html に直接アクセスすることはできません。
Nginx の設定を例に挙げます。設定プロセスは大まかに次のとおりです: (前提:
1. プロジェクト ファイル ディレクトリ:/mnt/html/spa (spa ディレクトリ内のファイルは、後で生成された dist ディレクトリ内のファイルです) npm run dist が実行されます) )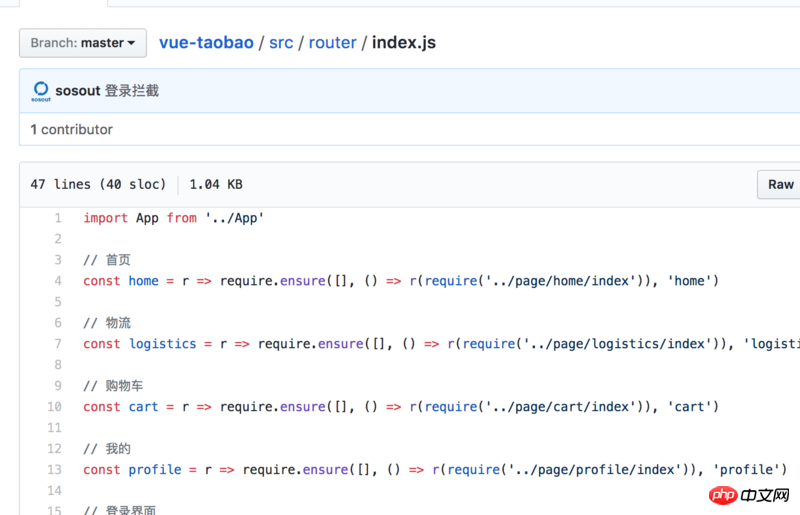 2. ドメイン名にアクセスします: spa.sosout.com
nginx.conf に入り、次の設定を追加します: import App from '../App'
// 首页
const home = r => require.ensure([], () => r(require('../page/home/index')), 'home')
// 物流
const logistics = r => require.ensure([], () => r(require('../page/logistics/index')), 'logistics')
// 购物车
const cart = r => require.ensure([], () => r(require('../page/cart/index')), 'cart')
// 我的
const profile = r => require.ensure([], () => r(require('../page/profile/index')), 'profile')
// 登录界面
const login = r => require.ensure([], () => r(require('../page/user/login')), 'login')
export default [{
path: '/',
component: App, // 顶层路由,对应index.html
children: [{
path: '/home', // 首页
component: home
}, {
path: '/logistics', // 物流
component: logistics,
meta: {
login: true
}
}, {
path: '/cart', // 购物车
component: cart,
meta: {
login: true
}
}, {
path: '/profile', // 我的
component: profile
}, {
path: '/login', // 登录界面
component: login
}, {
path: '*',
redirect: '/home'
}]
}]ログイン後にコピー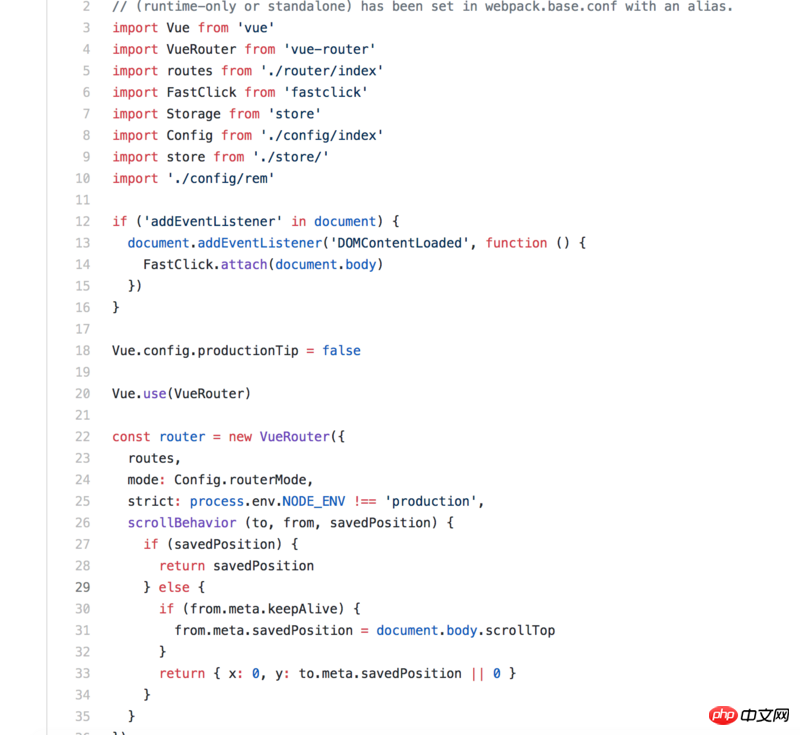 注:
注: 1.ドメイン名、ポート 80 が必要です。成功後は、ドメイン名にアクセスすることでアクセスできるプロジェクトのみです。
2. 反応ルーターのブラウザー履歴モードまたは vue-router の履歴モードを使用する場合。 、nginx 設定のルートを書き換える必要があります:
############
# 其他配置
############

http {
    ############
    # 其他配置
    ############
    server {
        listen 80;
        server_name  tb.sosout.com;
        root /mnt/html/tb;
        index index.html;
        location ~ ^/favicon\.ico$ {
            root /mnt/html/tb;
        }

        location / {
            try_files $uri $uri/ @fallback;
            index index.html;
            proxy_set_header   Host             $host;
            proxy_set_header   X-Real-IP        $remote_addr;
            proxy_set_header   X-Forwarded-For  $proxy_add_x_forwarded_for;
            proxy_set_header   X-Forwarded-Proto  $scheme;
        }
        location @fallback {
            rewrite ^.*$ /index.html break;
        }
        access_log  /mnt/logs/nginx/access.log  main;
    }
    ############
    # 其他配置
    ############
}プロジェクトにはルート エントリが 1 つしかないため、/home のような URL を入力すると、対応するページが見つからない場合、nginx は、react-router / を介して入力と正しく一致する Index.html をロードしようとします。 home ルートを設定し、正しいホームページを表示します。ブラウザ履歴モードまたは履歴モード プロジェクトが上記のコンテンツを構成していない場合、404 が発生します。 vue プロジェクトと React プロジェクトの 2 つの例を挙げます:
vue プロジェクト: 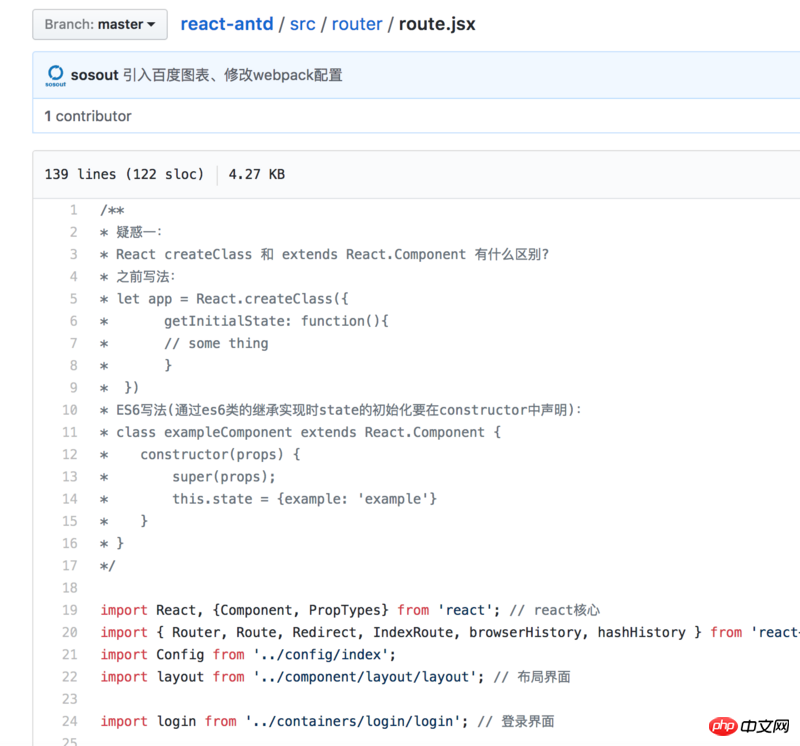 ドメイン名: http://tb.sosout.com
/**
* 疑惑一:
* React createClass 和 extends React.Component 有什么区别?
* 之前写法:
* let app = React.createClass({
*      getInitialState: function(){
*        // some thing
*      }
*  })
* ES6写法(通过es6类的继承实现时state的初始化要在constructor中声明):
* class exampleComponent extends React.Component {
*    constructor(props) {
*        super(props);
*        this.state = {example: 'example'}
*    }
* }
*/

import React, {Component, PropTypes} from 'react'; // react核心
import { Router, Route, Redirect, IndexRoute, browserHistory, hashHistory } from 'react-router'; // 创建route所需
import Config from '../config/index';
import layout from '../component/layout/layout'; // 布局界面

import login from '../containers/login/login'; // 登录界面

/**
 * (路由根目录组件,显示当前符合条件的组件)
 *
 * @class Roots
 * @extends {Component}
 */
class Roots extends Component {
    render() {
        // 这个组件是一个包裹组件,所有的路由跳转的页面都会以this.props.children的形式加载到本组件下
        return (
            <p>{this.props.children}</p>
        );
    }
}

// const history = process.env.NODE_ENV !== 'production' ? browserHistory : hashHistory;

// 快速入门
const home = (location, cb) => {
    require.ensure([], require => {
        cb(null, require('../containers/home/homeIndex').default)
    }, 'home');
}

// 百度图表-折线图
const chartLine = (location, cb) => {
    require.ensure([], require => {
        cb(null, require('../containers/charts/lines').default)
    }, 'chartLine');
}

// 基础组件-按钮
const button = (location, cb) => {
    require.ensure([], require => {
        cb(null, require('../containers/general/buttonIndex').default)
    }, 'button');
}

// 基础组件-图标
const icon = (location, cb) => {
    require.ensure([], require => {
        cb(null, require('../containers/general/iconIndex').default)
    }, 'icon');
}

// 用户管理
const user = (location, cb) => {
    require.ensure([], require => {
        cb(null, require('../containers/user/userIndex').default)
    }, 'user');
}

// 系统设置
const setting = (location, cb) => {
    require.ensure([], require => {
        cb(null, require('../containers/setting/settingIndex').default)
    }, 'setting');
}

// 广告管理
const adver = (location, cb) => {
    require.ensure([], require => {
        cb(null, require('../containers/adver/adverIndex').default)
    }, 'adver');
}

// 组件一
const oneui = (location, cb) => {
    require.ensure([], require => {
        cb(null, require('../containers/ui/oneIndex').default)
    }, 'oneui');
}

// 组件二
const twoui = (location, cb) => {
    require.ensure([], require => {
        cb(null, require('../containers/ui/twoIndex').default)
    }, 'twoui');
}

// 登录验证
const requireAuth = (nextState, replace) => {
    let token = (new Date()).getTime() - Config.localItem('USER_AUTHORIZATION');
    if(token > 7200000) { // 模拟Token保存2个小时
        replace({
            pathname: '/login',
            state: { nextPathname: nextState.location.pathname }
        });
    }
}

const RouteConfig = (
    <Router history={browserHistory}>
        <Route path="/home" component={layout} onEnter={requireAuth}>
            <IndexRoute getComponent={home} onEnter={requireAuth} /> // 默认加载的组件,比如访问www.test.com,会自动跳转到www.test.com/home
            <Route path="/home" getComponent={home} onEnter={requireAuth} />
            <Route path="/chart/line" getComponent={chartLine} onEnter={requireAuth} />
            <Route path="/general/button" getComponent={button} onEnter={requireAuth} />
            <Route path="/general/icon" getComponent={icon} onEnter={requireAuth} />
            <Route path="/user" getComponent={user} onEnter={requireAuth} />
            <Route path="/setting" getComponent={setting} onEnter={requireAuth} />
            <Route path="/adver" getComponent={adver} onEnter={requireAuth} />
            <Route path="/ui/oneui" getComponent={oneui} onEnter={requireAuth} />
            <Route path="/ui/twoui" getComponent={twoui} onEnter={requireAuth} />
        </Route>
        <Route path="/login" component={Roots}> // 所有的访问,都跳转到Roots
            <IndexRoute component={login} /> // 默认加载的组件,比如访问www.test.com,会自动跳转到www.test.com/home
        </Route>
        <Redirect from="*" to="/home" />
    </Router>
);

export default RouteConfig;rrreee
以上がvue などの単一ページ プロジェクトをデプロイし、サーバーに反応する方法の詳細内容です。詳細については、PHP 中国語 Web サイトの他の関連記事を参照してください。


![[Web フロントエンド] Node.js クイック スタート](https://img.php.cn/upload/course/000/000/067/662b5d34ba7c0227.png)


