movable-area は WeChat アプレットの新しいコンポーネントであり、ビューエリアを移動するために使用できます。この記事では主に、WeChat アプレットの可動ビューの動画と 2 本指ズームのサンプル コードを紹介します。必要な友人は参考にしてください。
movable-area は、WeChat アプレットの新しいコンポーネントであり、ビュー エリアを可動に移動するために使用できます。 -ビュー。移動方向は垂直、平行のいずれかを選択できます。可動領域には、他のテキスト、画像、ボタン、その他のコンポーネントが含まれます。可動領域はタッチエンドやその他のイベントにバインドできます。可動ビューのパラメータでアニメーション効果を調整できます。
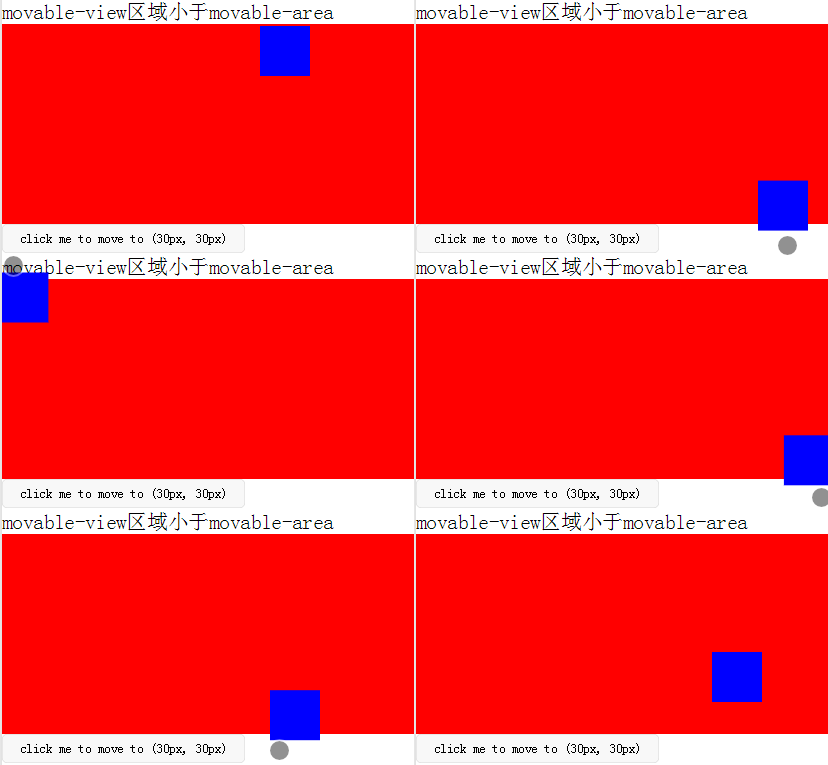
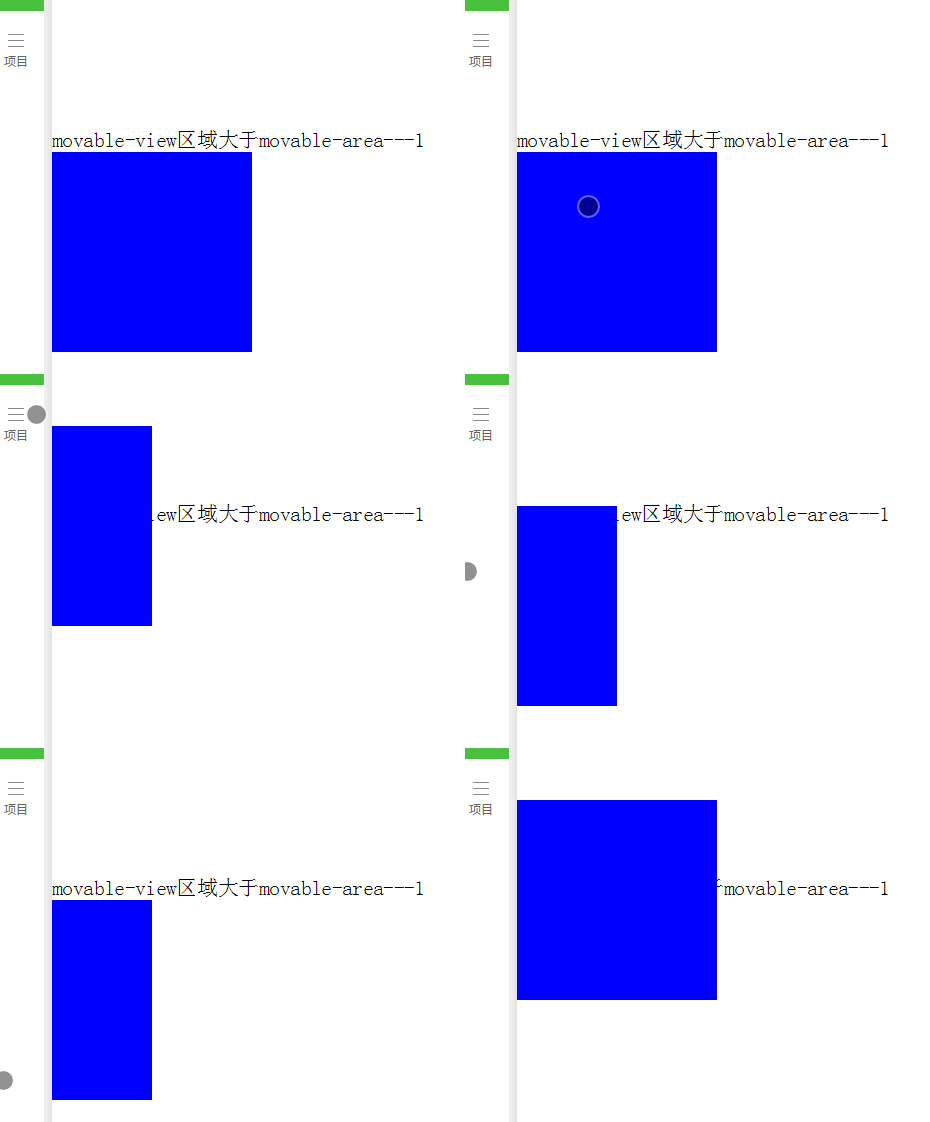
可動ビューから始めましょう。可動ビューはミニプログラムのカスタムコンポーネントです:「ページ上でドラッグしてスライドできる可動ビューコンテナー」です。 「可動ビューが可動領域より小さい場合、可動ビューの移動範囲は可動領域内にありますが、可動ビューが可動領域より大きい場合、可動ビューの移動範囲は可動領域内でなければなりません」と注意書きがあります。 「可動範囲を含む(x軸方向とy軸方向を別々に考える)」。つまり、親コンテナの可動範囲は子コンテナの可動範囲より小さくても構いませんが、子コンテナの移動範囲には親コンテナが含まれている必要があります
まず公式の例を見てください。 コード:
<view class="section">
 <view class="section__title">movable-view区域小于movable-area</view>
 <movable-area style="height: 200px;width: 200px;background: red;">
 <movable-view style="height: 50px; width: 50px; background: blue;" x="{{x}}" y="{{y}}" direction="all">
 </movable-view>
 </movable-area>
 <view class="btn-area">
 <button size="mini" bindtap="tap">click me to move to (30px, 30px)</button>
 </view>
 <view class="section__title">movable-view区域大于movable-area</view>
 <movable-area style="height: 100px;width: 100px;background: red;" direction="all">
 <movable-view style="height: 200px; width: 200px; background: blue;">
 </movable-view>
 </movable-area>
</view><movable-area style="height: 100px;width: 100px;background: red;" > <movable-view style="height: 200px; width: 200px; background: blue;" direction="all"> </movable-view> </movable-area>
1) 可動ビュー領域が可動領域より小さい場合、サブコンテナの可動ビュー下の図の効果は、属性 out-of-bounds="true" を設定すると、子コンテナに境界を超えるアニメーションが発生する可能性があります。親コンテナの境界に達するとリバウンドします。実際には、子コンテナが親コンテナの外に移動することはできません。
2) 可動ビュー領域が可動領域よりも大きい場合、移動範囲は子コンテナには親コンテナが含まれている必要があります。
 画像が動的に読み込まれ、固定画像の場合、画像の幅と高さが画面の表示幅と高さより小さい可能性と、画像の幅と高さが表示画面の幅と高さより大きい可能性を考慮する必要があります。上記 2 つの状況では、可動コンポーネントの読み込み中に可動ビューの幅と高さを設定する必要があります。これは、可動コンポーネントが正常に読み込まれた後、可動ビューのサイズが変更されるためです。ページ上で表示される画像の onload イベントを通じて画像の幅と高さを取得できます (現時点では、画像の幅と高さを取得できるのは bindingload イベントのみであることがわかりました)。その後、imgWidth と imgHeight を保存します。ユーザーが画像をクリックすると、bindtap イベントで可動ビューの幅と高さを設定し、可動領域のポップアップ wx;if を true に設定します。
<!-- 要查看的图片列表 -->
<view class="flex-wrap flex-pic">
<view class="picList">
<image wx:for="{{item.imglist}}" wx:for-item="itemImg" wx:key="*this" id="{{'rfnd_'+index}}" bindload="imageOnload" src="{{ itemImg}}" bindtap="showResizeModal" src="{{itemImg}}"></image>
</view>
</view>/**
* 加载图片
*/
imageOnload:function(e){
var id = e.currentTarget.id
this.data.imgIdList[id] = {
width:e.detail.width,
height:e.detail.height
}
},
模板页面
<!--components/resizePicModal/resizePicModal.wxml-->
<template name="resizePic">
<scroll-view class="backdrop">
<view class="close-icon" bindtap="closeResizeModal">
取消预览
</view>
<movable-area style="width:100%;height:100%;" >
<movable-view direction="all"
out-of-bounds="true" x="{{img.x}}" y="{{img.y}}" >
<image mode="widthFix" class="dtl-img" src="{{img.currentSrc}}"></image>
</movable-view>
</movable-area>
</scroll-view>
</template>
/**
* 打开弹窗
*/
showResizeModal: function (e) {
var src = e.currentTarget.dataset.src;
var x = 0
var y =0
try {
var width = this.imgIdList[e.currentTarget.id].width; //图片原宽
var height = this.imgIdList[e.currentTarget.id].height; //图片原高
//小程序默认固定宽320px,获取top和left值,使图片居中显示
height = height * (320 / width);
width = 320;
x = (app.windowWidth - width) / 2
y = (app.windowHeight - height) / 2
} catch (e) { }
var img = {
x: x,
y: y,26 currentSrc: src,
};
this.setData({ img: img, isCheckDtl: true });
}, CSS コードの一部
.backdrop{
 background: rgba(0, 0, 0, 1);
 width:100%;
 height: 100%;
 position: fixed;
 top:0;
 left:0;
} 上記は基本的に画像を表示するにはクリックする必要があります。
。カスタムコントロールのresizePicModal .wxml:
<!-- 缩放 -->
<template name="resizePic">
 <scroll-view class="backdrop" catchtouchmove="bindTouchMove" catchtouchend="bindTouchEnd" bindtouchstart="bindTouchStart" >
 <view class="close-icon" bindtap="closeResizeModal">
  取消预览
 </view>
  <image catchtouchmove="bindTouchMove" bindtouchend="bindTouchEnd" bindtouchstart="bindTouchStart"
  style=" transform: scale({{img.baseScale}}); position:absolute; top:{{img.top}}px; left:{{img.left}}px; "
  mode="widthFix" class="dtl-img" src="{{img.currentSrc}}"></image>
 </scroll-view>
</template> /**
* 使用方法:
* 1) WXHTML要缩放的图片 必须 传入 src 以及绑定 bindtap事件,
* e.g:
* <image bindtap="toggleDtl" src="{{item}}" wx:for="{{productCard.arrImg}}" wx:key="*this" src="{{item}}" style="width:100%" mode="widthFix"></image>
* 2) WXHTML 要引入Modal模板(isCheckDtl无需再定义):
* <view wx:if="{{isCheckDtl}}">
* <import src="/components/resizePicModal/resizePicModal.wxml"/>
* <template is="resizePic" data="{{img}}"></template>
* </view>
* 3) JS页面要引入JS文件,覆盖当前页面的事件:
* var resizePicModalService = require ('../../components/resizePicModal/resizePicModal.js')
* var resizePicModal = {}
* 4) 在onLoad事件中,实例化ResizePicModal
* resizePicModal = new resizePicModalService.ResizePicModal()
*/
var app = getApp()
let modalEvent = {
distanceList: [0, 0],//存储缩放时,双指距离.只有两个数据.第一项为old distance.最后一项为new distance
disPoint: { x: 0, y: 0 },//手指touch图片时,在图片上的位置
imgIdList:{},
/**
* 打开弹窗
*/
showResizeModal: function (e) {
var src = e.currentTarget.dataset.src;
var x = 0
var y =0
try {
var width = this.imgIdList[e.currentTarget.id].width; //图片原宽
var height = this.imgIdList[e.currentTarget.id].height; //图片原高
//小程序固定宽320px
height = height * (320 / width);
width = 320;
x = (app.windowWidth - width) / 2 //> 0 ? (app.windowWidth - width) / 2 : 0;
y = (app.windowHeight - height) / 2// > 0 ? (app.windowHeight - height) / 2 : 0;
} catch (e) { }
var img = {
top: y,
left: x,
x: x, y: y,
width: '100%',
baseScale: 1,
currentSrc: src,
};
this.setData({ img: img, isCheckDtl: true });
},
/**
* 关闭弹窗
*/
closeResizeModal:function(){
this.setData({ isCheckDtl: false })
},
/**
* 加载图片
*/
imageOnload:function(e){
var id = e.currentTarget.id
this.imgIdList[id] = {
width:e.detail.width,
height:e.detail.height
}
},
/**
* bindtouchmove
*/
bindTouchMove: function (e) {
if (e.touches.length == 1) {//一指移动当前图片
this.data.img.left = e.touches[0].clientX - this.disPoint.x
this.data.img.top = e.touches[0].clientY - this.disPoint.y
this.setData({ img: this.data.img })
}
if (e.touches.length == 2) {//二指缩放
var xMove = e.touches[1].clientX - e.touches[0].clientX
var yMove = e.touches[1].clientY - e.touches[0].clientY
var distance = Math.sqrt(xMove * xMove + yMove * yMove);//开根号
this.distanceList.shift()
this.distanceList.push(distance)
if (this.distanceList[0] == 0) { return }
var distanceDiff = this.distanceList[1] - this.distanceList[0]//两次touch之间, distance的变化. >0,放大图片.<0 缩小图片
// 假设缩放scale基数为1: newScale = oldScale + 0.005 * distanceDiff
var baseScale = this.data.img.baseScale + 0.005 * distanceDiff
if(baseScale>0){
this.data.img.baseScale = baseScale
var imgWidth = baseScale * parseInt(this.data.img.imgWidth)
var imgHeight = baseScale * parseInt(this.data.img.imgHeight)
this.setData({ img: this.data.img })
}else{
this.data.img.baseScale = 0
this.setData({ img: this.data.img })
}
}
},
/**
* bindtouchend
*/
bindTouchEnd: function (e) {
if (e.touches.length == 2) {//二指缩放
this.setData({ isCheckDtl: true })
}
},
/**
* bindtouchstart
*/
bindTouchStart: function (e) {
this.distanceList = [0, 0]//回复初始值
this.disPoint = { x: 0, y: 0 }
if (e.touches.length == 1) {
this.disPoint.x = e.touches[0].clientX - this.data.img.left
this.disPoint.y = e.touches[0].clientY - this.data.img.top
}
}
}
function ResizePicModal(){
let pages = getCurrentPages()
let curPage = pages[pages.length - 1]
Object.assign(curPage, modalEvent)//覆盖原生页面事件
this.page = curPage
curPage.resizePicModal = this
return this
}
module.exports = {
ResizePicModal
}ビジネスページwxml:カスタムコントロールテンプレートの紹介
<view class="flex-wrap flex-pic">
<view class="picList">
<image wx:for="{{item.imglist}}" wx:for-item="itemImg" wx:key="*this" id="{{'rfnd_'+index}}" bindload="imageOnload" src="{{ itemImg}}" bindtap="showResizeModal" src="{{itemImg}}"></image>
</view>
</view>
<!-- 缩放 -->
<view wx:if="{{isCheckDtl}}">
<import src="/components/resizePicModal/resizePicModal.wxml"/>
<template is="resizePic" data="{{img}}"></template>
</view>业务页面js,引用js文件,实例化resizePicModal
var that
 var resizePicModal = {}
 var app = getApp()
 var resizePicModalService = require('../../components/resizePicModal/resizePicModal.js')
 /**
  * 生命周期函数--监听页面加载
  */
 onLoad: function (options) {
  that = this 8  resizePicModal = new resizePicModalService.ResizePicModal()
}总结
以上がWeChatミニプログラムにおけるムーバブルビュー動画と2本指ズームの例を詳しく解説の詳細内容です。詳細については、PHP 中国語 Web サイトの他の関連記事を参照してください。