


現在の dev.to フロントエンド チャレンジを、3D 視覚化用の基本的な静的ファイル Web アプリをすばやくまとめる方法を検討する手段として使用します。 THREE.js (私のお気に入りライブラリの 1 つ) を使用して、チャレンジから入力されたマークアップを表示するために使用できる基本的な太陽系ツールをまとめます。
このプロジェクトのきっかけとなった現在の dev.to チャレンジは次のとおりです:
https://dev.to/challenges/frontend-2024-09-04
それでは、これらの方針に沿ってどれだけ早く何かをまとめることができるかを見てみましょう!
まったく新しい Github プロジェクトから、Vite を使用してプロジェクトを起動し、ホット モジュール交換 (または HMR) をすぐに実行できるようにして、非常に迅速な反復を実現します。
git clone [url]
cd [folder]
yarn create vite --template vanilla .
これにより、すぐに機能するフレームワークのない Vite プロジェクトが作成されます。依存関係をインストールし、3 つ追加して、「ライブ」開発プロジェクトを実行するだけです:
yarn install
yarn add three
yarn run dev
これにより、ほぼリアルタイムで開発およびデバッグできる「ライブ」バージョンが得られます。これで、実際に作業を開始して、中身を取り出す準備が整いました!
THREE を使用したことがない場合は、知っておく価値のあることがいくつかあります。
エンジン設計では、通常、常に 3 つのアクティビティまたはループが実行されます。 3 つすべてがシリアルで実行される場合、コアの「ゲーム ループ」には 3 種類のアクティビティのシーケンスがあることを意味します。
処理する必要がある何らかのユーザー入力ポーリングまたはイベントがあります
レンダリング呼び出し自体があります
何らかの内部ロジック/更新動作があります
ネットワークのようなもの (更新パケットの受信など) は、(ユーザー アクションと同様に) アプリケーションの状態の更新に伝播する必要があるイベントをトリガーするため、ここでは入力として扱うことができます。

そしてもちろん、そのすべての根底には国家そのものの表現があります。 ECS を使用している場合、これはコンポーネント テーブルのセットである可能性があります。私たちの場合、これは主に 3 つのオブジェクト (Scene インスタンスなど) のインスタンス化として始まります。
これを念頭に置いて、アプリの基本的なプレースホルダーを書き始めましょう。
トップレベルのindex.htmlをリファクタリングすることから始めます:
静的ファイル参照は必要ありません
JavaScript フックは必要ありません
グローバルスコープのスタイルシートが必要になります
HTML からのトップレベルのエントリ ポイントとして ES6 モジュールをフックしたいと思います
これにより、トップレベルのindex.html ファイルは次のようになります。
<!doctype html>
<html lang="en">

<head>
  <meta charset="UTF-8" />
  <meta name="viewport" content="width=device-width, initial-scale=1.0" />
  <title>Vite App</title>
  <link rel="stylesheet" href="index.css" type="text/css" />
  <script type="module" src="index.mjs"></script>
</head>

<body>
</body>

</html>
グローバル スコープのスタイルシートでは、本文が画面全体を占めるように指定するだけです (パディング、マージン、オーバーフローはありません)。
body {
    width: 100vw;
    height: 100vh;
    overflow: hidden;
    margin: 0;
    padding: 0;
}
これで、残りをクリーンアップしている間にアプリが動作していることを確認するための基本的なプレースホルダー コンテンツを含む ES6 モジュールを追加する準備が整いました。
/**
 * index.mjs
 */

function onWindowLoad(event) {
    console.log("Window loaded", event);
}

window.addEventListener("load", onWindowLoad);
これで、物を取り出し始めることができます!以下を削除します:
main.js
javascript.svg
counter.js
パブリック/
style.css
もちろん、ブラウザで「ライブ」ビューを見ると、空白になります。でも大丈夫!これで 3D を使用する準備が整いました。
まず、古典的な 3 つの「hello world」回転キューブを説明します。残りのロジックは、前の段階で作成した ES6 モジュール内にあります。まず、次の 3 つをインポートする必要があります:
import * as THREE from "three";
しかし、今はどうでしょうか?
THREE には、シンプルかつ強力な特定のグラフィックス パイプラインがあります。考慮すべき要素がいくつかあります:
シーン
カメラ
レンダラ。(指定されていない場合) 独自のレンダリング ターゲットと、シーンとカメラをパラメータとして受け取る render() メソッドを持ちます
シーンは単なるトップレベルのシーン グラフ ノードです。これらのノードは、次の 3 つの興味深いプロパティの組み合わせです:
(親ノードからの) 変換と子の配列
頂点バッファーの内容と構造を定義するジオメトリ (およびインデックス バッファー - 基本的にメッシュを定義する数値データ)
GPU がジオメトリ データを処理およびレンダリングする方法を定義するマテリアル
それでは、始める前にこれらのことをそれぞれ定義する必要があります。カメラから始めます。これには、ウィンドウの寸法を知ることが役立ちます。
const width = window.innerWidth;
const height = window.innerHeight;
const camera = new THREE.PerspectiveCamera(70, width/height, 0.01, 10);
camera.position.z = 1;
これでシーンを定義できます。このシーンに、「ボックス」ジオメトリと「メッシュ法線」マテリアルを持つ基本的な立方体を追加します。
const scene = new THREE.Scene();
const geometry = new THREE.BoxGeometry(0.2, 0.2, 0.2);
const material = new THREE.MeshNormalMaterial();
const mesh = new THREE.Mesh(geometry, material);
scene.add(mesh);
Lastly, we'll instantiate the renderer. (Note that, since we don't provide a rendering target, it will create its own canvas, which we will then need to attach to our document body.) We're using a WebGL renderer here; there are some interesting developments in the THREE world towards supporting a WebGPU renderer, too, which are worth checking out.
const renderer = new THREE.WebGLRenderer({
    "antialias": true
});
renderer.setSize(width, height);
renderer.setAnimationLoop(animate);
document.body.appendChild(renderer.domElement);
We have one more step to add. We pointed the renderer to an animation loop function, which will be responsible for invoking the render function. We'll also use this opportunity to update the state of our scene.
function animate(time) {
    mesh.rotation.x = time / 2000;
    mesh.rotation.y = time / 1000;
    renderer.render(scene, camera);
}
But this won't quite work yet. The singleton context for a web application is the window; we need to define and attach our application state to this context so various methods (like our animate() function) can access the relevant references. (You could embed the functions in our onWindowLoad(), but this doesn't scale very well when you need to start organizing complex logic across multiple modules and other scopes!)
So, we'll add a window-scoped app object that combines the state of our application into a specific object.
window.app = {
    "renderer": null,
    "scene": null,
    "camera": null
};
Now we can update the animate() and onWindowLoad() functions to reference these properties instead. And once you've done that you will see a Vite-driven spinning cube!

Lastly, let's add some camera controls now. There is an "orbit controls" tool built into the THREE release (but not the default export). This is instantiated with the camera and DOM element, and updated each loop. This will give us some basic pan/rotate/zoom ability in our app; we'll add this to our global context (window.app).
import { OrbitControls } from "three/addons/controls/OrbitControls.js";
// ...in animate():
window.app.controls.update();
// ...in onWindowLoad():
window.app.controls = new OrbitControls(window.app.camera, window.app.renderer.domElement);
We'll also add an "axes helper" to visualize coordinate frame verification and debugging inspections.
// ...in onWindowLoad():
app.scene.add(new THREE.AxesHelper(3));
Not bad. We're ready to move on.
Let's pull up what the solar system should look like. In particular, we need to worry about things like coordinates. The farthest object out will be Pluto (or the Kuiper Belt--but we'll use Pluto as a reference). This is 7.3 BILLION kilometers out--which brings up an interesting problem. Surely we can't use near/far coordinates that big in our camera properties!
These are just floating point values, though. The GPU doesn't care if the exponent is 1 or 100. What matters is, that there is sufficient precision between the near and far values to represent and deconflict pixels in the depth buffer when multiple objects overlap. So, we can move the "far" value out to 8e9 (we'll use kilometers for units here) so long as we also bump up the "near" value, which we'll increase to 8e3. This will give our depth buffer plenty of precision to deconflict large-scale objects like planets and moons.
Next we're going to replace our box geometry and mesh normal material with a sphere geometry and a mesh basic material. We'll use a radius of 7e5 (or 700,000 kilometers) for this sphere. We'll also back out our initial camera position to keep up with the new scale of our scene.
// in onWindowLoad():
app.camera.position.x = 1e7;
// ...
const geometry = new THREE.SPhereGEometry(7e5, 32, 32);
const material = new THERE.MeshBasicMaterial({"color": 0xff7700});
You should now see something that looks like the sun floating in the middle of our solar system!

Let's add another sphere to represent our first planet, Mercury. We'll do it by hand for now, but it will become quickly obvious how we want to reusably-implement some sort of shared planet model once we've done it once or twice.
We'll start by doing something similar as we did with the sun--defining a spherical geometry and a single-color material. Then, we'll set some position (based on the orbital radius, or semi-major axis, of Mercury's orbit). Finally, we'll add the planet to the scene. We'll also want (though we don't use it yet) to consider what the angular velocity of that planet's orbit is, once we start animating it. We'll consolidate these behaviors, given this interface, within a factory function that returns a new THREE.Mesh instance.
function buildPlanet(radius, initialPosition, angularVelocity, color) {
    const geometry = new THREE.SphereGeometry(radius, 32, 32);
    const material = new THREE.MeshBasicMaterial({"color": color});
    const mesh = new THREE.Mesh(geometry, material);
    mesh.position.set(initialPosition.x, initialPosition.y, initialPosition.z);
    return mesh;
}
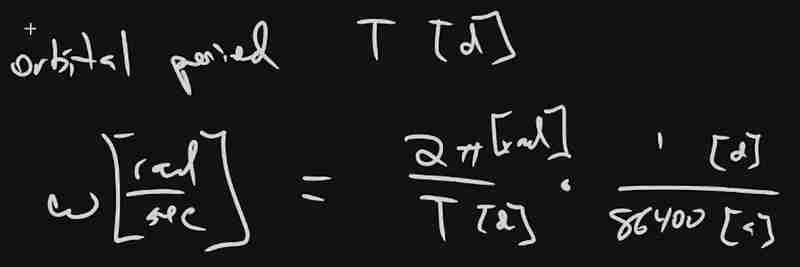
Back in onWindowLoad(), we'll add the planet by calling this function and adding the result to our scene. We'll pass the parameters for Mercury, using a dullish grey for the color. To resolve the angular velocity, which will need to be in radius per second, we'll pass the orbital period (which Wikipedia provides in planet data cards) through a unit conversion:
The resulting call looks something like this:
// ...in onWindowLoad():
window.app.scene.add(buildPlanet(2.4e3, new THREE.Vector3(57.91e6, 0, 0), 2 * Math.PI / 86400 / 87.9691, 0x333333));
(We can also remove the sun rotation calls from the update function at this point.)
If you look at the scene at this point, the sun will look pretty lonely! This is where the realistic scale of the solar system starts becoming an issue. Mercury is small, and compared to the radius of the sun it's still a long way away. So, we'll add a global scaling factor to the radius (to increase it) and the position (to decrease it). This scaling factor will be constant so the relative position of the planets will still be realistic. We'll tweak this value until we are comfortable with how visible our objects are within the scene.
const planetRadiusScale = 1e2;
const planetOrbitScale = 1e-1;
// ...in buildPlanet():
const geometry = new THREE.SphereGeometry(planetRadiusScale * radius, 32, 32);
// ...
mesh.position.set(
    planetOrbitScale * initialPosition.x,
    planetOrbitScale * initialPosition.y,
    planetOrbitScale * initialPosition.z
);
You should now be able to appreciate our Mercury much better!

We now have a reasonably-reusable planetary factory. Let's copy and paste spam a few times to finish fleshing out the "inner" solar system. We'll pull our key values from a combination of Wikipedia and our eyeballs' best guess of some approximate color.
// ...in onWindowLoad():
window.app.scene.add(buildPlanet(2.4e3, new THREE.Vector3(57.91e6, 0, 0), 2 * Math.PI / 86400 / 87.9691, 0x666666));
window.app.scene.add(buildPlanet(6.051e3, new THREE.Vector3(108.21e6, 0, 0), 2 * Math.PI / 86400 / 224.701, 0xaaaa77));
window.app.scene.add(buildPlanet(6.3781e3, new THREE.Vector3(1.49898023e8, 0, 0), 2 * Math.PI / 86400 / 365.256, 0x33bb33));
window.app.scene.add(buildPlanet(3.389e3, new THREE.Vector3(2.27939366e8, 0, 0), 2 * Math.PI / 86400 / 686.980, 0xbb3333));
Hey! Not bad. It's worth putting a little effort into reusable code, isn't it?

But this is still something of a mess. We will have a need to reuse this data, so we shouldn't copy-paste "magic values" like these. Let's pretend the planet data is instead coming from a database somewhere. We'll mock this up by creating a global array of objects that are procedurally parsed to extract our planet models. We'll add some annotations for units while we're at it, as well as a "name" field that we can use later to correlate planets, objects, data, and markup entries.
At the top of the module, then, we'll place the following:
const planets = [
    {
        "name": "Mercury",
        "radius_km": 2.4e3,
        "semiMajorAxis_km": 57.91e6,
        "orbitalPeriod_days": 87.9691,
        "approximateColor_hex": 0x666666
    }, {
        "name": "Venus",
        "radius_km": 6.051e3,
        "semiMajorAxis_km": 108.21e6,
        "orbitalPeriod_days": 224.701,
        "approximateColor_hex": 0xaaaa77
    }, {
        "name": "Earth",
        "radius_km": 6.3781e3,
        "semiMajorAxis_km": 1.49898023e8,
        "orbitalPeriod_days": 365.256,
        "approximateColor_hex":  0x33bb33
    }, {
        "name": "Mars",
        "radius_km": 3.389e3,
        "semiMajorAxis_km": 2.27939366e8,
        "orbitalPeriod_days": 686.980,
        "approximateColor_hex":  0xbb3333
    }
];
Now we're ready to iterate through these data items when populating our scene:
// ...in onWindowLoad():
planets.forEach(p => {
    window.app.scene.add(buildPlanet(p.radius_km, new THREE.Vector3(p.semiMajorAxis_km, 0, 0), 2 * Math.PI / 86400 / p.orbitalPeriod_days, p.approximateColor_hex));
});
Next we'll add some "orbit traces" that illustrate the path each planet will take during one revolution about the sun. Since (for the time being, until we take into account the specific elliptical orbits of each planet) this is just a circle with a known radius. We'll sample that orbit about one revolution in order to construct a series of points, which we'll use to instantiate a line that is then added to the scene.
This involves the creation of a new factory function, but it can reuse the same iteration and planet models as our planet factory. First, let's define the factory function, which only has one parameter for now:
function buildOrbitTrace(radius) {
    const points = [];
    const n = 1e2;
    for (var i = 0; i < (n = 1); i += 1) {
        const ang_rad = 2 * Math.PI * i / n;
        points.push(new THREE.Vector3(
            planetOrbitScale * radius * Math.cos(ang_rad),
            planetOrbitScale * radius * Math.sin(ang_rad),
            planetOrbitScale * 0.0
        ));
    }
    const geometry = new THREE.BufferGeometry().setFromPoints(points);
    const material = new THREE.LineBasicMaterial({
        // line shaders are surprisingly tricky, thank goodness for THREE!
        "color": 0x555555
    });
    return new THREE.Line(geometry, material);
}
Now we'll modify the iteration in our onWindowLoad() function to instantiate orbit traces for each planet:
// ...in onWindowLoad():
planets.forEach(p => {
    window.app.scene.add(buildPlanet(p.radius_km, new THREE.Vector3(p.semiMajorAxis_km, 0, 0), 2 * Math.PI / 86400 / p.orbitalPeriod_days, p.approximateColor_hex));
    window.app.scene.add(buildOrbitTrace(p.semiMajoxAxis_km));
});
Now that we have a more three-dimensional scene, we'll also notice that our axis references are inconsistent. The OrbitControls model assumes y is up, because it looks this up from the default camera frame (LUR, or "look-up-right"). We'll want to adjust this after we initially instantiate the original camera:
// ...in onWindowLoad():
app.camera.position.z = 1e7;
app.camera.up.set(0, 0, 1);
Now if you rotate about the center of our solar system with your mouse, you will notice a much more natural motion that stays fixed relative to the orbital plane. And of course you'll see our orbit traces!

Now it's time to think about how we want to fold in the markup for the challenge. Let's take a step back and consider the design for a moment. Let's say there will be a dialog that comes up when you click on a planet. That dialog will present the relevant section of markup, associated via the name attribute of the object that has been clicked.

But that means we need to detect and compute clicks. This will be done with a technique known as "raycasting". Imagine a "ray" that is cast out of your eyeball, into the direction of the mouse cursor. This isn't a natural part of the graphics pipeline, where the transforms are largely coded into the GPU and result exclusively in colored pixels.
In order to back out those positions relative to mouse coordinates, we'll need some tools that handle those transforms for us within the application layer, on the CPU. This "raycaster" will take the current camera state (position, orientation, and frustrum properties) and the current mouse position. It will look through the scene graph and compare (sometimes against a specific collision distance) the distance of those node positions from the mathematical ray that this represents.
Within THREE, fortunately, there are some great built-in tools for doing this. We'll need to add two things to our state: the raycaster itself, and some representation (a 2d vector) of the mouse state.
window.app = {
    // ... previous content
    "raycaster": null,
    "mouse_pos": new THREE.Vector2(0, 0)
};
We'll need to subscribe to movement events within the window to update this mouse position. We'll create a new function, onMouseMove(), and use it to add an event listener in our onWindowLoad() initialization after we create the raycaster:
// ...in onWindowLoad():
window.app.raycaster = new THREE.Raycaster();
window.addEventListener("pointermove", onPointerMove);
Now let's create the listener itself. This simply transforms the [0,1] window coordinates into [-1,1] coordinates used by the camera frame. This is a fairly straightforward pair of equations:
function onPointerMove(event) {
    window.app.mouse_pos.x = (event.clientX / window.innerWidth) * 2 - 1;
    window.app.mouse_pos.y = (event.clientY / window.innerHeight) * 2 - 1;
}
Finally, we'll add the raycasting calculation to our rendering pass. Technically (if you recall our "three parts of the game loop" model) this is an internal update that is purely a function of game state. But we'll combine the rendering pass and the update calculation for the time being.
// ...in animate():
window.app.raycaster.setFromCamera(window.app.mouse_pos, window.app.camera):
const intersections = window.app.raycaster.intersectObjects(window.app.scene.children);
if (intersections.length > 0) { console.log(intersections); }
Give it a quick try! That's a pretty neat point to take a break.
What have we accomplished here:
We have a representation of the sun and inner solar system
We have reusable factories for both planets and orbit traces
We have basic raycasting for detecting mouse collisions in real time
We have realistic dimensions (with some scaling) in our solar system frame
But we're not done yet! We still need to present the markup in response to those events, and there's a lot more we can add! So, don't be surprised if there's a Part Two that shows up at some point.
以上が[ ランダム ソフトウェア プロジェクト: dev.to フロントエンド チャレンジの詳細内容です。詳細については、PHP 中国語 Web サイトの他の関連記事を参照してください。


![[Web フロントエンド] Node.js クイック スタート](https://img.php.cn/upload/course/000/000/067/662b5d34ba7c0227.png)


