
Investing in top-tier hardware for your Windows gaming rig is a great start, but it's not the whole story. Even the most powerful components can underperform if not optimized correctly. Here are the key Windows 11 settings I adjusted to maximize gaming performance.
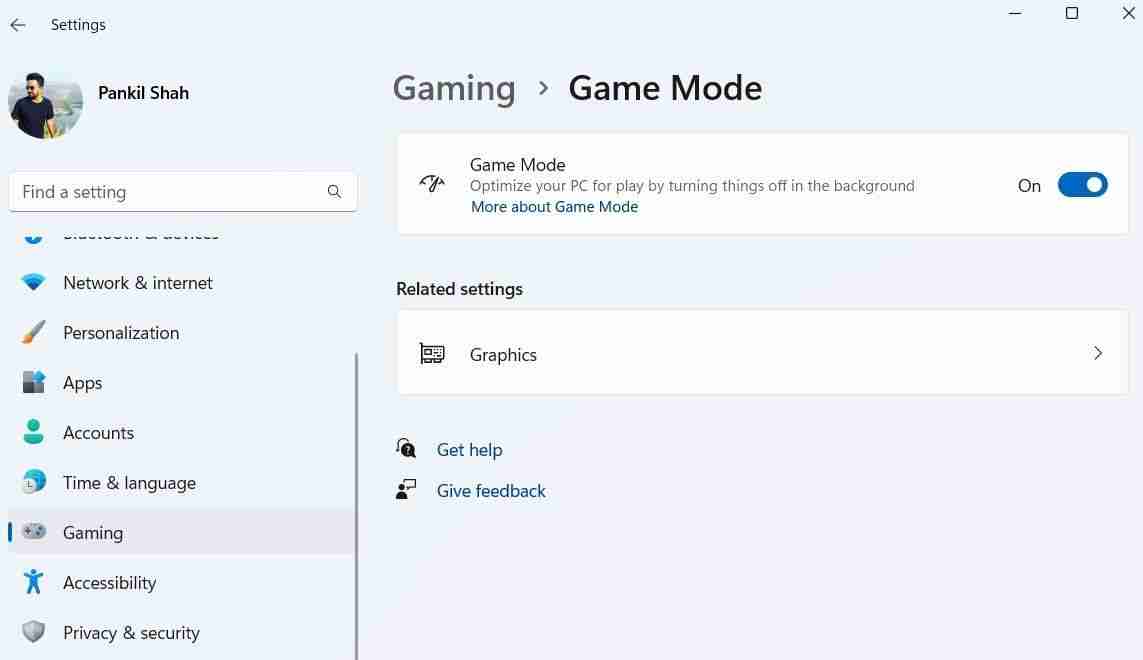
Enabling Game Mode in Windows 11 is a must for anyone looking to maximize their hardware's performance. Game Mode prioritizes system resources for the game by reducing unnecessary background processes, including automatic Windows updates, which helps maintain stable gaming performance.
This feature ensures that my gaming experience remains the top priority, preventing potential slowdowns or frame drops caused by background processes. You can enable Game Mode in Windows 11 by heading to Settings > Gaming > Game Mode.
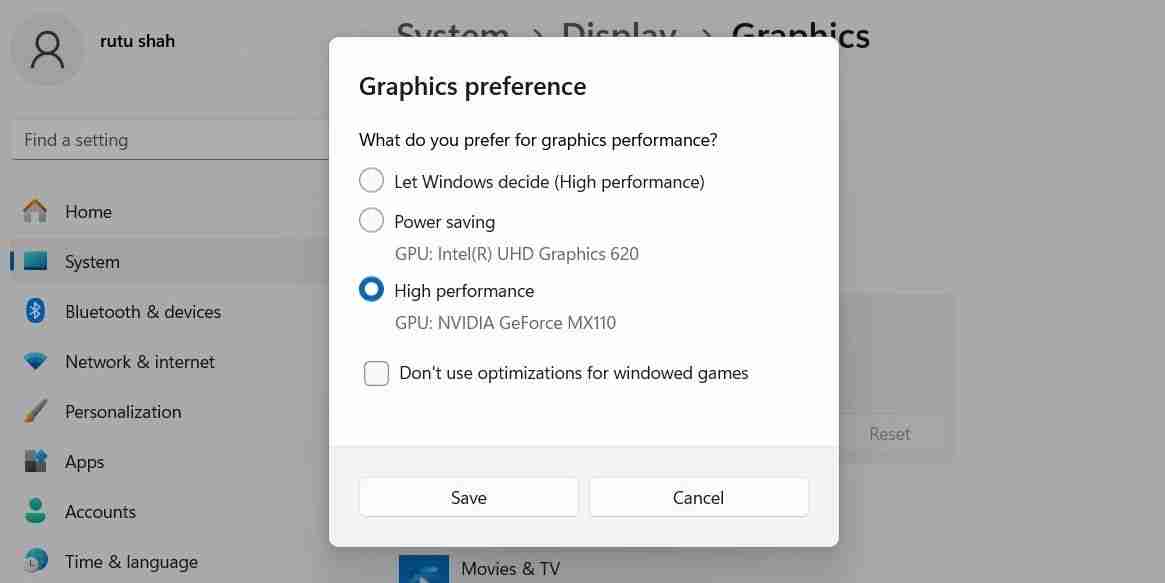
Another step I take to boost gaming performance on Windows 11 is enabling the high-performance graphics setting for my visually demanding games. This is especially important on PCs with both integrated and dedicated graphics cards, as games might otherwise default to the power-saving option. Here's how to do it:
Game overlays are excellent for monitoring system performance, chatting with friends, and accessing specific game features quickly. However, they come at a cost. Since these overlays run additional processes in the background, it can affect overall performance, leading to lower frame rates, increased latency, or stuttering in games.
Overlays can also be distracting in specific titles or sometimes conflict with the game itself. Hence, I avoid using them whenever possible.
To get rid of the default Xbox Game Bar overlay in Windows 11, follow these steps:
<code class="hljs ">Ge-AppxPackage Microsoft.XboxGamingOverlay | Remove-AppxPackage</code>
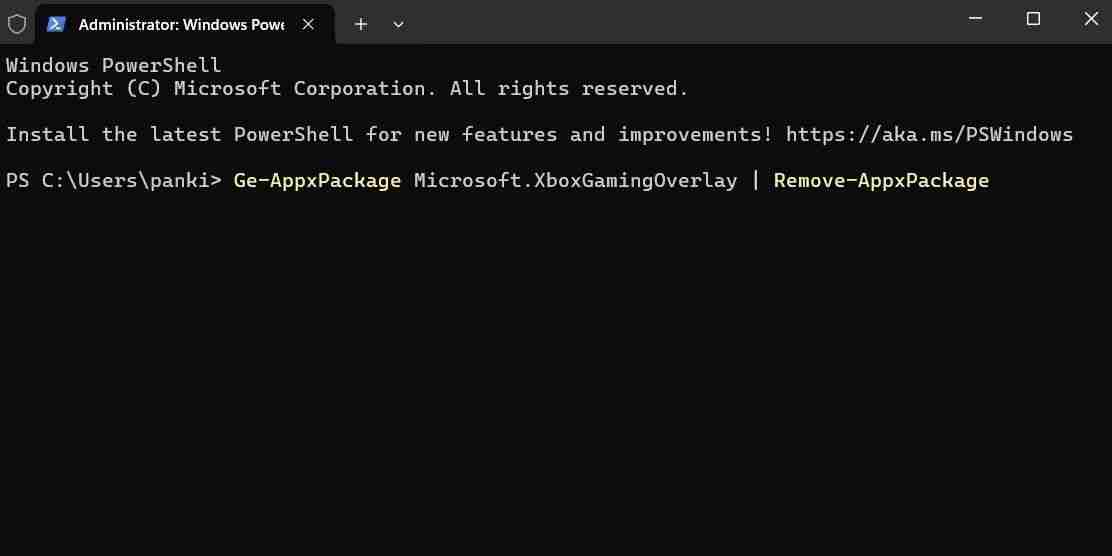
Similarly, you can disable overlays in NVIDIA GeForce Experience, Discord, and other apps.
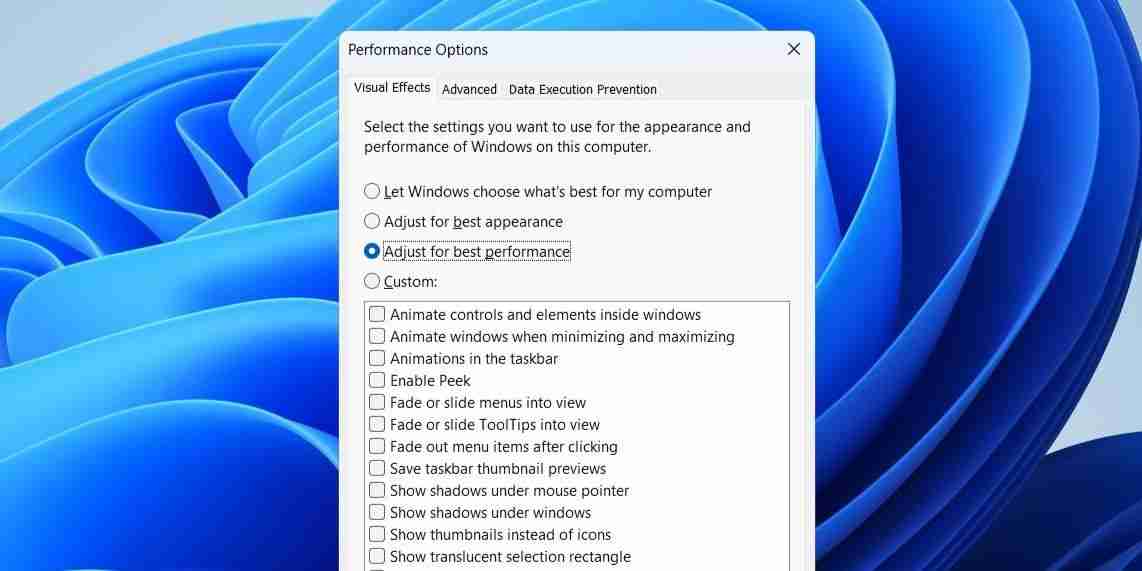
Windows 11 includes various visual effects to enhance its aesthetic appeal. However, these effects can consume valuable system resources that could otherwise be allocated to improving gaming performance.
To optimize the gaming experience, I have configured my Windows 11 PC to prioritize performance over appearance. Here's how to do it:
Windows 11's default "Balanced" power plan is ideal for everyday computing tasks. However, before starting a gaming session, I always switch to the "High performance" power plan. This maximizes hardware performance by allowing Windows to run at higher power levels, ensuring that all components operate at their full potential.
To enable this power plan on Windows, open the Control Panel via the Windows Search menu. Then, go to Power Options and select the High performance option
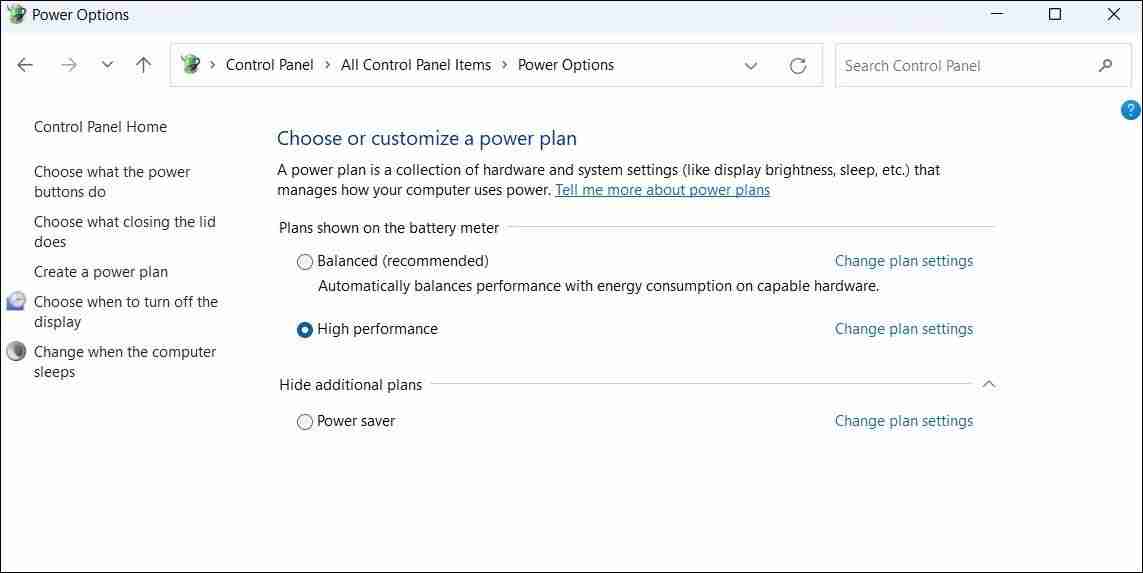
Windows PC にハイパフォーマンス プランがない場合は、手動で作成できます。

Wi-Fi は速度と信頼性の点で大きな進歩を遂げていますが、有線のパフォーマンスと安定性に勝るものはありません。ゲーム用のLAN接続。ネットワークの混雑や物理的な障害物によって変動する可能性がある Wi-Fi とは異なり、有線 LAN 接続は安定した高速なインターネット速度を提供します。
この安定性により、パケット損失が最小限に抑えられ、切断が防止され、よりスムーズなゲーム体験が保証されます。また、ゲーム中はアプリのバックグラウンドダウンロードと自動更新を必ず無効にするようにしています。これは、特に Call of Duty、Fortnite、Apex Legends など、ミリ秒単位が重要なオンライン ゲームをプレイする場合に大きな違いをもたらします。
また、グラフィック ドライバーを常に最新の状態に保つようにしています。更新により、新しいゲームのパフォーマンスが最適化され、バグが修正されます。 PC に搭載されているグラフィックス カード (NVIDIA、AMD、または Intel) に応じて、Windows でグラフィックス ドライバーを更新するプロセスが異なる場合があります。
ゲーム自体もバグの修正、パフォーマンスの向上、新機能の追加などのアップデートを受け取るため、これらの改善の恩恵を受けるために常に最新の状態に保っています。
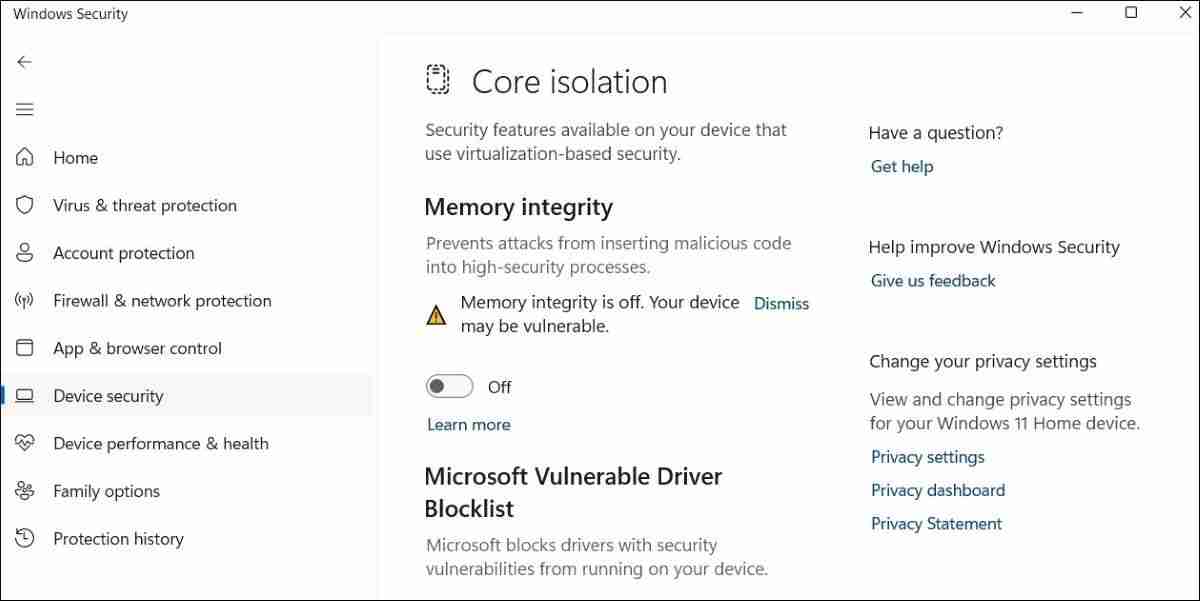
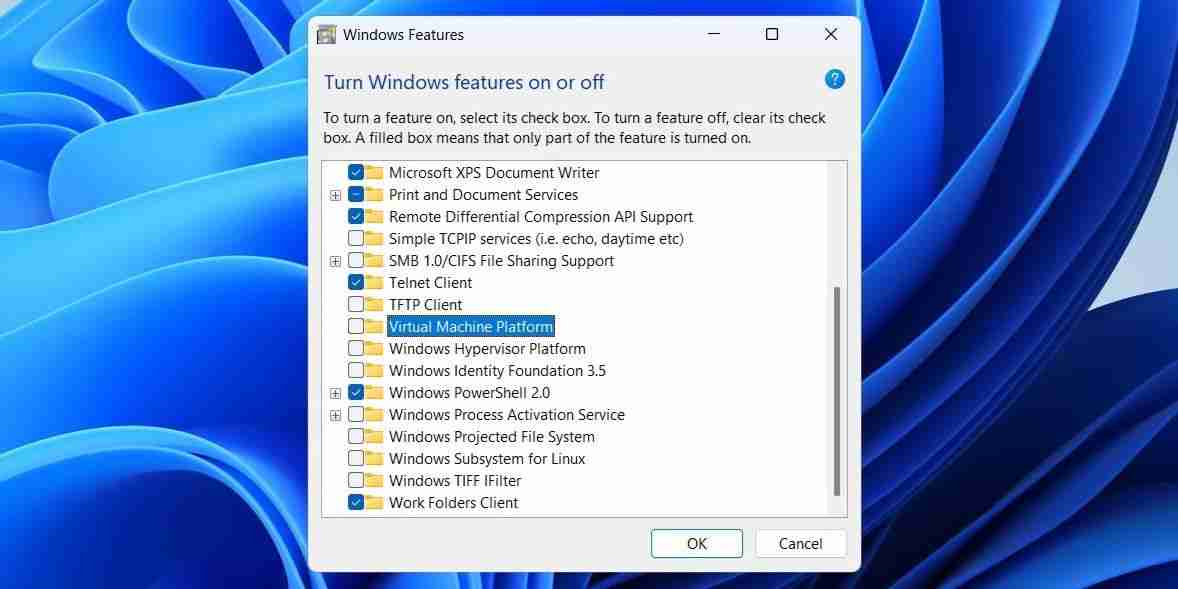
最後に、ゲーム セッション中はメモリの整合性や仮想マシン プラットフォーム (VMP) などのセキュリティ機能をオフにしておきます。これら 2 つの機能は、システム セキュリティを強化し、潜在的な脅威に対してより堅牢な環境を提供するために、Windows 11 ではデフォルトで有効になっています。ただし、ゲーム体験に影響を与える可能性のあるパフォーマンスのオーバーヘッドも発生する可能性があります。
Windows 11 でメモリの整合性を無効にするには、次の手順に従います。
Windows で仮想マシン プラットフォームを無効にするには、検索メニューを再度開きます。 「Windows 機能」と入力し、表示される最初の結果を選択します。 [Windows の機能] ウィンドウで、[仮想マシン プラットフォーム] を見つけて選択を解除します。次に、「OK」を選択します。
これら 2 つのオプションを無効にすると、Windows のゲーム エクスペリエンスに大きな違いが生じます。ただし、PC の安全性を確保するために、ゲーム終了後は常にこれらの機能を再度有効にしています。
これらの主要な設定を調整することで、Windows 11 PC で可能な限り最高のゲーム体験を得ることができ、ラグや途切れなどの迷惑な問題を避けることができました。それぞれの調整はそれ自体ではわずかな改善にしかならないかもしれませんが、組み合わせると PC のゲーム パフォーマンスに大きな違いをもたらす可能性があります。
以上がゲームのパフォーマンスを最大化するためにこれらの 7 つの Windows 11 設定を微調整しましたの詳細内容です。詳細については、PHP 中国語 Web サイトの他の関連記事を参照してください。