

スバ・チャンダ作✏️
Go は、Golang としても知られ、Google によって設計された静的に型付けされ、コンパイルされたプログラミング言語です。これは、静的型付け言語のパフォーマンスとセキュリティの利点と、動的型付け言語に通常伴う使いやすさを組み合わせたものです。
Go は、同時実行性とマルチスレッド メカニズム、および優れた標準ライブラリにより、Web 開発、ネットワーク プログラミング、システム プログラミングなどの幅広いアプリケーションで人気があります。
PDF の生成は、さまざまな種類のアプリケーションに必要な重要なタスクです。大規模な PDF を効率的に生成することは、複雑な作業となる場合があります。ただし、パフォーマンスと効率性で知られる Go は、大量のシナリオで PDF を生成する場合に適しています。
しかし、独自の PDF ジェネレーターを作成するのは複雑な作業になる可能性があります。ここでマロトが活躍します。 Bootstrap のレイアウト システムからインスピレーションを得た PDF 生成ライブラリです。
行と列を備えたグリッド システムにより、レイアウト管理が容易になります。また、コンテンツのオーバーフローを処理するための自動改ページもサポートしています。また、テキスト、画像、バーコード、QR コード、署名などのサポートも組み込まれています。
Maroto を使用して Golang で動的 PDF を作成する方法について書きます。
PDF 生成機能は、さまざまな種類のプロジェクトやアプリケーションにとって非常に価値があります。
他の使用例を想像して、PDF を自動化することで一貫性が確保され、プロフェッショナルな外観のフォーマットが提供される理由を理解できます。
次に進む前に、以下の内容を理解していることを確認してください:
Go に慣れる必要がある場合は、このガイドに従って言語の基本的な理解を得ることができます。すべての設定が完了したら、準備完了です。?
まず、Maroto で PDF を生成する際に重要な役割を果たすいくつかの中心的な概念について説明します。
高さによって定義される行は、ドキュメントの水平セクションを表します。複数の列 (Col) を含めることができます。 New 関数は、指定された高さで Row を初期化します。
Col は Row 内の垂直セクションを表し、テキスト、画像、QR コード、バーコードなどのさまざまなコンポーネントを含めることができます。列の内容とサイズは柔軟です。 Col の New 関数は、特定のサイズ、またはサイズが指定されていない場合は最大サイズの列を作成できます。 Add メソッドを使用すると、コンポーネントを列に追加できます。
これは、さまざまなドキュメント要素が実装するインターフェイスです。テキスト、画像、QR コード、バーコードなどの要素はコンポーネントとみなされます。これらを列に追加して、ドキュメントのコンテンツを構築できます。それでは、Go プロジェクトを開始しましょう。
まず、お気に入りのコード エディターを開き、プロジェクトに関連するすべてのコードを保存するフォルダーをエディターで開きます。
次に、ターミナル ウィンドウを開いてプロジェクトの場所を見つけ、次のコマンドを実行します。
上記のコマンドで、github.com をファイルを保存するドメイン (Bitbucket や Gitlab など) に置き換えます。さらに、USERNAME を自分のユーザー名に置き換え、PROJECT_NAME を目的のプロジェクト名に置き換えます。
Running this command will initialize a Go project and will create a go.mod file in the folder. This file is used to manage the dependencies of a Go project.
After the command creates a go.mod file successfully, you are ready to install the necessary packages. The only package required to follow along with this article is Maroto.
To install Maroto as a dependency, run the following command:
go get github.com/johnfercher/maroto/v2@v2
At the time of writing this article, Maroto is in its v2 stage. And, the v2 provides significant performance improvements compared to v1.
All of the logic for this code will reside in the main package. To keep the article simple, everything will be in a single file. For writing code, create a new file called main.go to the root of your project folder, and paste the following code into it:
package main import "fmt" func main() { fmt.Println("Hello, World!") }
Now, run the command go run main.go from the terminal, and check if it prints Hello, World! in the terminal. If it does, it means you are ready to get started.
In this article, we’ll be building a sample PDF that replicates a ticket copy. The PDF will contain a dynamic QR code, as well as a barcode, image, and other relevant details.
The core layout of Maroto is based on the 12-unit grid system. Meaning that, the width of each page is divided into an equal amount of 12 units. Based on this, you can add a structure to your PDF.
The image shown below replicates a basic ticket of a movie show, and you’ll be creating this PDF programmatically using Go: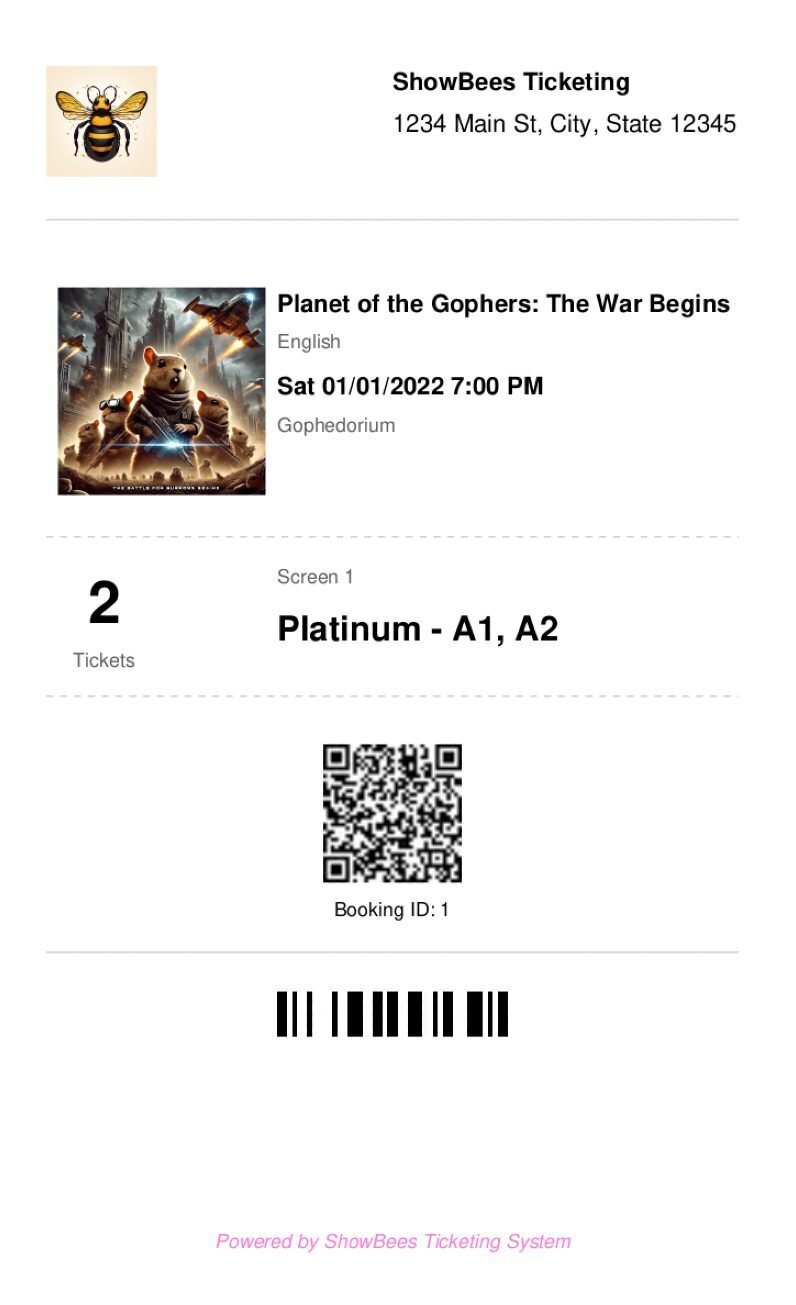
The ticket contains three basic sections: header, body, and footer.
The header contains a logo, name and address of an imaginary company called Showbees Ticketing.
The body contains all the necessary tickets like the name of the show, language, date, venue, number of tickets, etc.. The body also contains a QR code and a barcode just to demonstrate how these can be implemented in your PDF.
The footer is very basic and contains a single text.
Let’s start by creating a struct that defines the structure of the PDF. Copy and paste the code in your main.go file:
package main type Company struct { Name string Address string LogoLocation string } type Ticket struct { ID int ShowName string ShowTime string Language string ShowVenue string SeatNumber string Cost float64 Screen string TicketCount int ShowPosterLocation string } func main() { c := Company{ Name: "ShowBees Ticketing", Address: "1234 Main St, City, State 12345", LogoLocation: "./logo.png", } t := Ticket{ ID: 1, ShowName: "Planet of the Gophers: The War Begins", ShowTime: "Sat 01/01/2022 7:00 PM", Language: "English", ShowVenue: "Gophedorium", SeatNumber: "Platinum - A1, A2", Cost: 620.00, Screen: "Screen 1", TicketCount: 2, ShowPosterLocation: "./poster.png", } }
Here, we are creating a Company struct first. This represents the details of the company. The Ticket struct defines the structure for the ticket.
In the main function, we are creating a variable called c which holds the company details and another variable called t which holds the ticket details. The field name, and the variable are pretty self-explanatory.
One thing to mention here is that the logo and the poster are stored in the root of the folder. If you are following along, you can either add any two images in this place, or you can download the images of the article from this repo.
Now, let’s create the header.
To create a header, we’ll be creating a new function. The function will take a parameter of type Company and will return a core.Row. The header is pretty simple. Let’s check out the code first:
func getPageHeader(c Company) core.Row { return row.New(16).Add( image.NewFromFileCol(4, c.LogoLocation, props.Rect{ Center: false, Percent: 100, }), col.New(2), col.New(6).Add( text.New(c.Name, props.Text{ Style: fontstyle.Bold, Size: 10, }), text.New(c.Address, props.Text{ Top: 6, Size: 10, }), ), ) }
The header consists of three columns: an image column, an empty column, and a column containing text components. Let’s look at the code step-by-step.
The first line row.New(16) creates a new row component with a height of 16. This row will serve as the container for the header columns.
To render the image, you’ll need to use the image.NewFromFileCol method. This function is available in the image component.
This line image.NewFromFileCol(4, c.LogoLocation, props.Rect{...}) creates an image column with a size of 4. It loads an image from the file specified by c.LogoLocation and sets some properties for the image, such as its alignment and size.
The next line col.New(2) creates an empty column with a size of 2. This column is used to create space between the image column and the text column.
The following line col.New(6).Add(...) creates a column with a size of 6.
Inside this column, there are two text components created using the text.New function. The first text component displays the company name (c.Name) with some text properties like bold style, left alignment, and font size of 10.
The second text component displays the company address (c.Address) with different text properties, including a top margin of 6 pixels, left alignment, and font size of 10.
Finally, the image column and the text column are then added to the row using the Add method. So, a row contains all the columns, and columns can be added in a row.
Let’s now create a function called getMaroto which will be responsible for registering necessary components and returning a core.Maroto interface which wraps the basic methods of Maroto.
Using the methods from these interfaces, we’ll be generating the PDF from the main function. Let’s take a look at the function first:
func getMaroto(c Company, t Ticket) core.Maroto { cfg := config.NewBuilder().WithDimensions(120, 200).Build() mrt := maroto.New(cfg) err := mrt.RegisterHeader(getPageHeader(c)) if err != nil { log.Println("Error registering header") } return mrt }
At this point, we only have a header component. As we add more components to the PDF, this function will grow larger. The function takes two parameters: a company object and a ticket object.
The function begins by creating a new PDF configuration using config.NewBuilder(), which is customized with width and height for the PDF document through the WithDimensions method. This configuration is then used to instantiate a new Maroto PDF document (mrt) with the specified dimensions.
After setting the desired configuration options, Build() is called to finalize and return the configuration object.
If you do not prefer to set up dimensions like we have done in this article and want to use a standard paper size, Maroto provides a WithPageSize function as well where you can add a standard page size like A4, Letter, etc..
Here’s a sample:
cfg := config.NewBuilder().WithPageSize(pagesize.Letter).Build()
After the cfg variable is initialized, it’s time to register the header for the PDF document. This is done by calling mrt.RegisterHeader(getPageHeader(c)), where getPageHeader(c) generates a header row based on the provided Company object.
The RegisterHeader method adds the header row to the PDF and calculates its height to ensure it fits within the page's useful area. If the header's height exceeds the available space, an error is logged, and the mrt variable is returned from the function.
Update the main function as shown below:
func main() { // ... // ... m := getMaroto(c, t) document, err := m.Generate() filename := fmt.Sprintf("ticket-%d.pdf", t.ID) if err != nil { log.Println("Error generating PDF") } // Check if temp folder exists, if not create it if _, err := os.Stat("temp"); os.IsNotExist(err) { err = os.Mkdir("temp", 0755) if err != nil { log.Println("Error creating directory:", err) } } err = document.Save("temp/" + filename) if err != nil { log.Println("Unable to save file:", err) } }
The code here is pretty straightforward. The company and ticket details are passed into the getMaroto function. The Generate method of the Maroto type is then called to actually generate the PDF document.
After generating the PDF, a filename for the PDF is created using the fmt.Sprintf function, incorporating the ticket's ID into the filename. It then checks if a "temp" directory exists using os.Stat, and if it doesn't, the directory is created with os.Mkdir with appropriate permissions. If any error occurs in this stage, the error is logged in.
Finally, the generated PDF document is saved to the temp directory using the Save method, which internally uses os.WriteFile to write the PDF bytes to a file. The permissions for the file are set to allow any operation by the user.
If you run the code using go run main.go, you’ll be able to see that a new folder called temp is created, and the folder contains a file called ticket-1.pdf. Your PDF should look like this image now: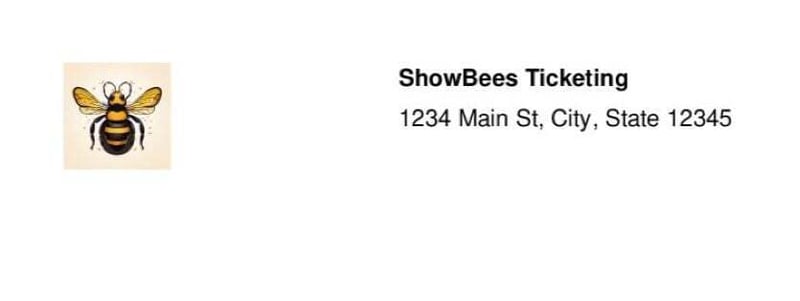
Let’s move on and create the body of the PDF. This is the longest of the functions, but now that you understand the basics of how Maroto works, it should be a breeze.
Create a new function called getShowDetails which accepts a ticket struct and returns an array of core.Row interface. First, copy and paste the below code into your main.go function:
func getShowDetails(t Ticket) []core.Row { rows := []core.Row{ row.New(30).Add( image.NewFromFileCol(4, t.ShowPosterLocation, props.Rect{ Center: true, Percent: 100, }), col.New(8).Add( text.New(t.ShowName, props.Text{ Style: fontstyle.Bold, Size: 10, }), text.New(t.Language, props.Text{ Top: 6, Style: fontstyle.Normal, Size: 8, Color: &props.Color{Red: 95, Green: 95, Blue: 95}, }), text.New(t.ShowTime, props.Text{ Top: 12, Style: fontstyle.Bold, Size: 10, }), text.New(t.ShowVenue, props.Text{ Top: 18, Style: fontstyle.Normal, Size: 8, Color: &props.Color{Red: 95, Green: 95, Blue: 95}, }), ), ), row.New(6), row.New(1).Add( line.NewCol(12, props.Line{ Thickness: 0.2, Color: &props.Color{Red: 200, Green: 200, Blue: 200}, SizePercent: 100, Style: linestyle.Dashed, }), ), row.New(3), row.New(16).Add( col.New(2).Add( text.New(strconv.Itoa(t.TicketCount), props.Text{ Style: fontstyle.Bold, Size: 24, Align: align.Center, }), text.New("Tickets", props.Text{ Top: 12, Style: fontstyle.Normal, Size: 8, Color: &props.Color{Red: 95, Green: 95, Blue: 95}, Align: align.Center, }), ), col.New(2), col.New(8).Add( text.New(t.Screen, props.Text{ Size: 8, Color: &props.Color{Red: 95, Green: 95, Blue: 95}, }), text.New(t.SeatNumber, props.Text{ Top: 6, Style: fontstyle.Bold, Size: 14, }), ), ), row.New(3), row.New(1).Add( line.NewCol(12, props.Line{ Thickness: 0.2, Color: &props.Color{Red: 200, Green: 200, Blue: 200}, SizePercent: 100, Style: linestyle.Dashed, }), ), row.New(6), row.New(20).Add( code.NewQrCol(12, fmt.Sprintf("%v\n%v\n%v\n%v", t.ID, t.ShowName, t.ShowTime, t.ShowVenue), props.Rect{ Center: true, Percent: 100, }, ), ), row.New(10).Add( col.New(12).Add(text.New(fmt.Sprintf("Booking ID: %v", t.ID), props.Text{ Style: fontstyle.Normal, Size: 8, Align: align.Center, Top: 2, })), ), row.New(1).Add( line.NewCol(12, props.Line{ Thickness: 0.2, Color: &props.Color{Red: 200, Green: 200, Blue: 200}, SizePercent: 100, Style: linestyle.Solid, }), ), row.New(3), row.New(10).Add( code.NewBarCol(12, strconv.Itoa(t.ID), props.Barcode{ Center: true, Percent: 100, }, ), ), } return rows }
The code starts by initializing a new variable called rows, which consists of all the rows that will be returned from the function.
The rows slice starts by initializing a first row of height 30. In this row, an image is first added to the column which takes a third of the available area. The t.ShowPosterLocation is rendered here, with a few properties like centre alignment and size in percentage.
In the remaining 2/3rd space, a new column is added, which renders the show name, show language and the show time. Each of the text has a different size, top position, and color. For defining the colors, the props.Color struct is used, where the value of red, green, and blue is defined.
The next row is added to add a blank space in the PDF. After the blank space, a new line is added to the rows slice. A new line can be added using the line module available in the Maroto package.
The line.NewCol function takes two arguments, one being the area to be taken, and another one for defining the properties of the line. In this case, the line takes the complete width, and different properties like the thickness, color, and size are defined. For the style, a dashed line is added.
After adding the line, another empty row is added, and after the empty row, the ticket count, screen name, and seat number are added.
Similar to the other columns, different props for the text are added for enhancing the look of the document. To display the ticket count, you must have noticed that we are using the strconv package to convert the integer type to string because the text.New function takes the value as a string.
A blank space area and a line is added to the document after the details.
In the next step, a new row of size 20 is created. Inside this row, a column is added. This column contains a QR code generated from a formatted string that includes the ticket ID, show name, show time, and show venue.
The QR code is centered and occupies 100 percent of the column's width. The NewQrCol function is used to create this column by generating a QR code with the specified properties and adding it to a new column of a specified size.
Next, a new row with a height of 10 units is created, and a column is added to it. This column contains a text component displaying the booking ID with centered positioning. Following that, a row with a height of 1 unit is added, containing a single column with a line.
The line's color, thickness, and style are specified, and it spans 100 percent of the column's width. This is used as a separator between sections of the document. An empty row with a height of 3 units is then added to create some vertical spacing in the document.
Finally, a row with a height of 10 units is created, containing a column. The column contains a barcode generated from the ticket ID. The barcode is generated using the code.NewBarCol function. It is centered and occupies 100 percent of the column's width.
With the above complete, let’s move on to the footer.
The footer contains just a single text. The aim is to demonstrate how a footer can be registered in your PDF:
func getPageFooter() core.Row { return row.New(2).Add( col.New(12).Add( text.New("Powered by ShowBees Ticketing System", props.Text{ Style: fontstyle.Italic, Size: 8, Align: align.Center, Color: &props.Color{Red: 255, Green: 120, Blue: 218}, }), ), ) }
The footer displays a single text in a column. The text has a size of 8 pixels, center aligned with an RGB color value.
Now, to register this footer and the getShowDetails function into the getMaroto function, update this accordingly:
func getMaroto(c Company, t Ticket) core.Maroto { cfg := config.NewBuilder().WithDimensions(120, 200).Build() // ... // ... mrt.AddRow(6) mrt.AddRow(4, line.NewCol(12, props.Line{ Thickness: 0.2, Color: &props.Color{Red: 200, Green: 200, Blue: 200}, SizePercent: 100, })) mrt.AddRow(6) mrt.AddRows(getShowDetails(t)...) mrt.AddRow(8) err = mrt.RegisterFooter(getPageFooter()) if err != nil { log.Println("Error registering footer") } return mrt }
If you generate the PDF by running go run main.go, you should get a PDF that resembles the image shown earlier in the article. Here is a video demonstration of the PDF generation.
The complete code for the article is available in this GitHub repo.
Maroto uses a grid system similar to Bootstrap, making it intuitive for developers familiar with web development. This system allows for easy layout management using rows and columns, which can contain various components like text, images, QR codes, and barcodes.
Maroto makes it easy for developers to create complex PDF layouts without extensive boilerplate code, a significant advantage over more complex libraries like UniDoc and pdfcpu.
Maroto is built on top of gofpdf but offers significant performance improvements, especially in v2. This makes it suitable for high-volume PDF generation tasks.
Maroto also handles content overflow by automatically adding page breaks without manual intervention.
Finally, Maroto has a growing community and comprehensive documentation. The library is open-source and actively maintained, which ensures that it stays up-to-date with the latest features and improvements.
Generating PDF documents using the Maroto library in Go is a straightforward and efficient process. This powerful library provides an intuitive API that allows developers to create complex layout structures with ease.
The use of rows and columns to manage content positioning, alongside the built-in support for various elements such as text, images, QR codes, and barcodes, makes Maroto a highly versatile tool.
To explore more about the package, you can check out their documentation.
NPM:
$ npm i --save logrocket // Code: import LogRocket from 'logrocket'; LogRocket.init('app/id');
Script Tag:
Add to your HTML:
3.(Optional) Install plugins for deeper integrations with your stack:
Get started now
以上がMaroto を使用して Golang で PDF を生成して長く使いましょうの詳細内容です。詳細については、PHP 中国語 Web サイトの他の関連記事を参照してください。


![[Web フロントエンド] Node.js クイック スタート](https://img.php.cn/upload/course/000/000/067/662b5d34ba7c0227.png)


