$(document).click(function (e) {
if (!$(e.target).is (".dummy") && !$(e.target).is(" #dummydata")) {
$("#dummydata").hide();
}
});
}
});
上記のコードでは、locateBeside とlocateBelow という 2 つのメソッドが使用されていることがわかります。これらは、私の js ライブラリの jQuery の拡張機能です。ちなみに、さらに 2 つのメソッド、locate とlocateCenter
を紹介します。
$.fn.extend ({
locate: function (x, y ) {
if (this.css("position") == "fixed") {
y -= $(document).scrollTop();
}
return this.css({ left: x, top: y });
},
locateBeside: function (el,AdjustX) {
var p = $(el). offset()、
w1 = $(el ).outerWidth()、
w2 = this.outerWidth()、
h2 = this.outerHeight()、
x = p.left w1 5 (adjustX || 0),
y = p.top;
if ($(document).width() x = p.left - w2 - 5 - (adjustX || 0);
}
if ($(document).height() < y h2) {
y = p.top - (y h2 15 - $(document).height() );
}
これを返します。locate(x, y);
},
locateBelow: function (el,AdjustY) {
var p = $(el).offset() ;
return this.locate(p.left , p.top $(el).outerHeight() 3 (adjustY || 0));
locateCenter: function () {
return this.locate(
($(window ).width() - this.width()) / 2,
($(window).height() - this.height()) / 2 $( document).scrollTop()
);
}
});
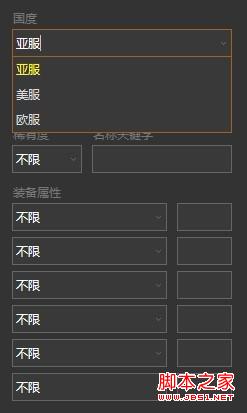
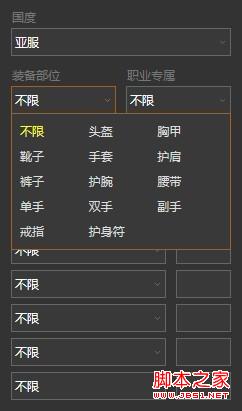
最後に、スタイル シートの定義とデモンストレーション効果の例をいくつか示します。
コードをコピーします
コードは次のとおりです: input.dummy {background-image: url(/static/images/ combo.gif); 背景の位置: 右 12 ピクセル; 背景の繰り返し: カーソル: ポインター !重要; }
input.dummy:hover, input.dummy:focus { 背景画像: url(/static) /images/combo_hover.gif); }
#dummydata { 位置: 絶対値; 境界線: 1px 背景色: #393939; }
#dummydata { 表示: ブロック; カラー: #ddd; テキスト-インデント: 3px; テキスト-オーバーフロー: 省略記号; } -装飾: なし; }
#dummydata.matrix { width : 208px; } /* マトリックス効果 */
#dummydata.matrix a { float: left; } >#dummydata.matrix-large { width: 640px; パディング: 5px ; } /* 行列-large 効果 */
#dummydata.matrix-large a { float: left; }
# dummydata a.fullwidth { float: none; }
#dummydata a.delimiter { float: なし; 高さ: 10px; 可視性: hidden;
上記のスタイル定義の効果 Picture
HTML で行う必要があるのは、クラスの変更をいくつか追加することだけです


