
首先我们启动系统自带的Apache服务。
打开Terminal,输入如下指令:
// 开启Apache服务 sudo apachectl start // 查看Apache版本号 sudo apachectl -v

然后我们验证一下我们开启的apache服务是否可以使用,打开浏览器,输入:
http://localhost
相关学习推荐:PHP 编程从入门到精通
运行我们的php之前,我们需要更改我们的php配置文件,打开Finder,“前往->前往文件夹…”,输入:
/etc/apache2/
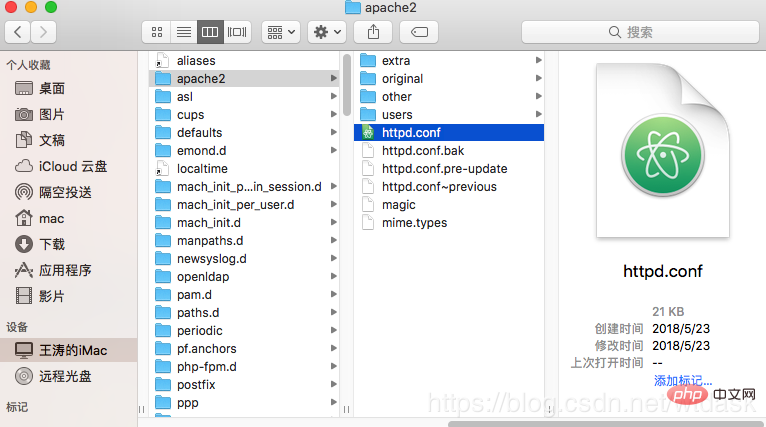
找到我们的httpd.conf配置文件:
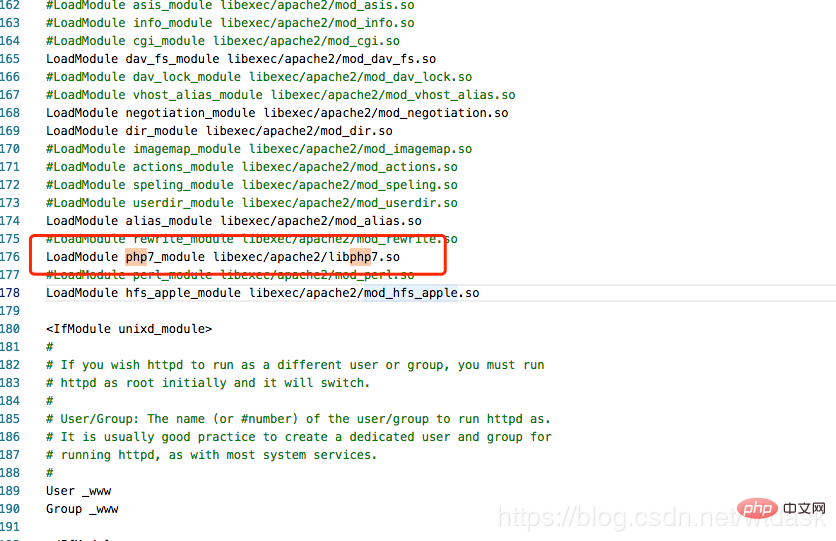
使用文本编辑器,将我们下面一行注释给取消掉:
LoadModule php7_module libexec/apache2/libphp7.so

配置文件修改后,我们只要重启我们的Apache服务就可以让修改生效了,在Terminal输入:
sudo apachectl restart
接下来我们想知道我们Mac上的php的版本。
我们在Terminal输入:
// 在Apache的根目录下复制index.html.en文件并重命名为info.php。 sudo cp /Library/WebServer/Documents/index.html.en /Library/WebServer/Documents/info.php
打开我们的info.php文件,用文本编辑器在“It works”后面添加:
然后再次重启我们的Apache。
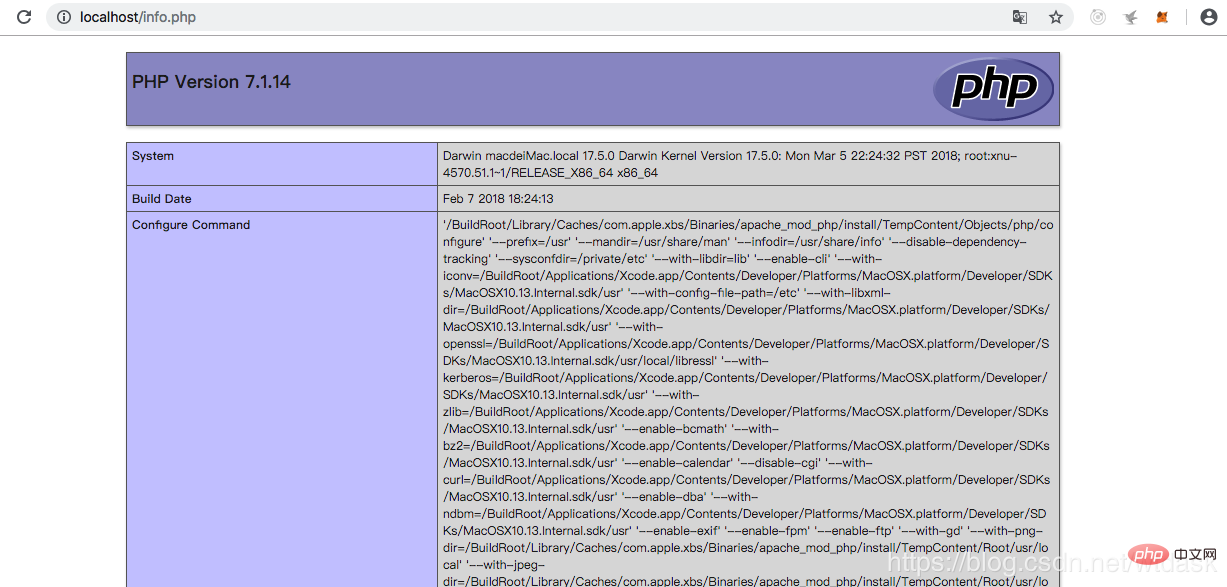
重启后,我们在浏览器URL栏输入:
http://localhost/info.php

使用第三方包homebrew来安装,非常迅速有效!
首先我们启动系统自带的Apache服务。
打开Terminal,输入如下指令:
// 开启Apache服务 sudo apachectl start // 查看Apache版本号 sudo apachectl -v

然后我们验证一下我们开启的apache服务是否可以使用,打开浏览器,输入:
http://localhost
运行我们的php之前,我们需要更改我们的php配置文件,打开Finder,“前往->前往文件夹…”,输入:
/etc/apache2/
找到我们的httpd.conf配置文件:
使用文本编辑器,将我们下面一行注释给取消掉:
LoadModule php7_module libexec/apache2/libphp7.so

配置文件修改后,我们只要重启我们的Apache服务就可以让修改生效了,在Terminal输入:
sudo apachectl restart
接下来我们想知道我们Mac上的php的版本。
我们在Terminal输入:
// 在Apache的根目录下复制index.html.en文件并重命名为info.php。 sudo cp /Library/WebServer/Documents/index.html.en /Library/WebServer/Documents/info.php
打开我们的info.php文件,用文本编辑器在“It works”后面添加:
然后再次重启我们的Apache。
重启后,我们在浏览器URL栏输入:
http://localhost/info.php

Ce qui précède est le contenu détaillé de. pour plus d'informations, suivez d'autres articles connexes sur le site Web de PHP en chinois!
 Ouvrir le dossier personnel sur Mac
 prix du fil coin aujourd'hui
 Raisons pour lesquelles le chargement du CSS a échoué
 Comment rendre l'arrière-plan transparent dans PS
 Prix du marché d'Ethereum aujourd'hui
 Comment résoudre le code d'erreur 8024401C
 utilisation de la fonction Excel vlookup
 Comment annuler le compte Douyin sur Douyin