
1. What is a cross-domain request:
A page on server A needs to request a handler on server B. This is called a cross-domain request
The test page this time is:
The handler kimhandler.ashx is as follows:
%@ WebHandler Language="C#" Class="KimHandler" %>

using System;
using System.Web;

public class KimHandler : IHttpHandler {

  public void ProcessRequest (HttpContext context)
  {
    string msg = "{\"name\":\"kim\",\"gender\":\"男\",\"age\":24}";
    context.Response.Write(msg);
  }

  public bool IsReusable {
    get {
      return false;
    }
  }
}
Another handler.ashx is as follows:
<%@ WebHandler Language="C#" Class="Handler" %>

using System;
using System.Web;

public class Handler : IHttpHandler {

  public void ProcessRequest (HttpContext context)
  {
    string callbackName = context.Request.Params["callbackFun"];
    string msg = callbackName+ "({\"name\":\"kim\",\"age\":\"18\"});";
    context.Response.Write(msg);
  }

  public bool IsReusable {
    get {
      return false;
    }
  }

}
2.Ajax cannot implement cross-domain requests
<meta http-equiv="Content-Type" content="text/html; charset=utf-8"/>
  <title></title>
  <script>
    var requestUrl = "http://qxw1192430265.my3w.com/kimhandler.ashx";
    window.onload = function () {
      document.getElementById("btnAjax").onclick = function() {
        var xhr = new XMLHttpRequest();
        xhr.open("get", requestUrl, true);
        xhr.setRequestHeader("If-Modified-Since", 0);
        xhr.onreadystatechange = function () {
          if (xhr.readyState == 4 && xhr.status == 200) {
            var res = xhr.responseText;
            alert(res);
          }
        }
        xhr.send(null);
      }
    }
  </script>
</head>
<body>
  <input type="button" id="btnAjax" value="点击" />
</body>
</html>
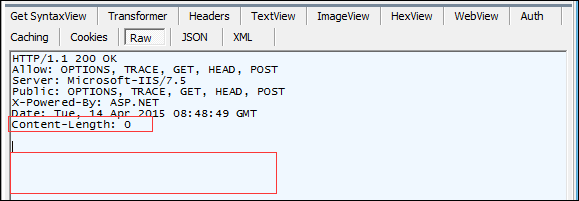
Check the monitor and find that no request message body was returned
3. Use script tags to implement cross-domain requests
The test code is as follows:
<!DOCTYPE html>
<html xmlns="http://www.w3.org/1999/xhtml">
<head>
<meta http-equiv="Content-Type" content="text/html; charset=utf-8"/>
  <title></title>
  <script src="http://qxw1192430265.my3w.com/kimhandler.ashx"></script>
</head>
<body>

</body>
</html>
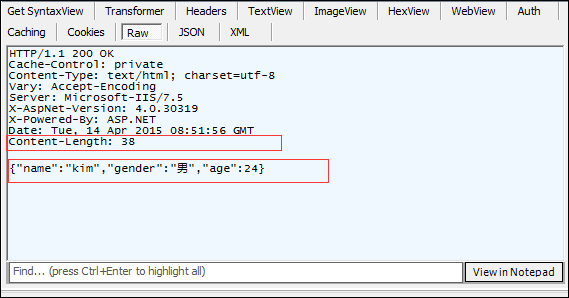
Looking at the monitor, you can see that there is a request message body returned
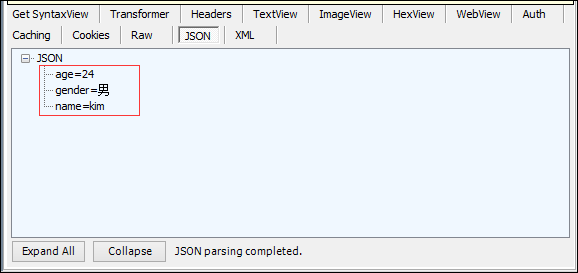
Look at it in json format
4. Use js method , and on the browser side, read the response as data
The test code is as follows, please note that a handler has been changed
<!DOCTYPE html>
<html xmlns="http://www.w3.org/1999/xhtml">
<head>
<meta http-equiv="Content-Type" content="text/html; charset=utf-8"/>
<title></title>
<script>
function getData(data) {
for (var key in data) {
alert(data[key]);
}
}
</script>
<script src="http://qxw1192430265.my3w.com/handler.ashx?callbackFun=getData"></script>
</head>
<body>
</body>
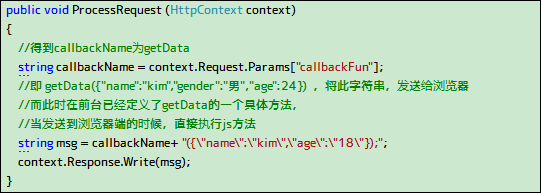
</html>Through the background code, you can know
Then look at it on the monitor
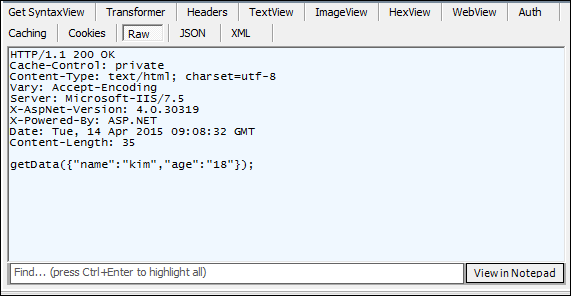
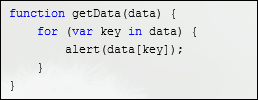
I found that on the browser side, kim and 18 popped up
5. Use Jq to implement cross-domain requests (the internal principle is to create a script tag for us)
The code is as follows
<!DOCTYPE html>
<html xmlns="http://www.w3.org/1999/xhtml">
<head>
<meta http-equiv="Content-Type" content="text/html; charset=utf-8"/>
  <title></title>
  <script src="jquery-1.9.0.js"></script>
  <script>
    var requestUrl = "http://qxw1192430265.my3w.com/handler.ashx";
    window.onload = function () {
      document.getElementById("btnJq").onclick = function() {
        $.ajax(requestUrl, {
          type: "get", //请求方式
          dataType: "jsonp", //数据发送类型
          jsonp: "callbackFun", //服务器端接收的参数
          jsonpCallback: "fun", //js处理方法
          success: function () {
            alert("成功");
          }
        });
      }
    }

    function fun(data) {
      for (var key in data) {
        alert(data[key]);
      }
    }
  </script>
</head>
<body>
  <input type="button" id="btnJq" value="Jq按钮" />
</body>
</html>
After clicking the button, you can see the effect, and then look at the monitor
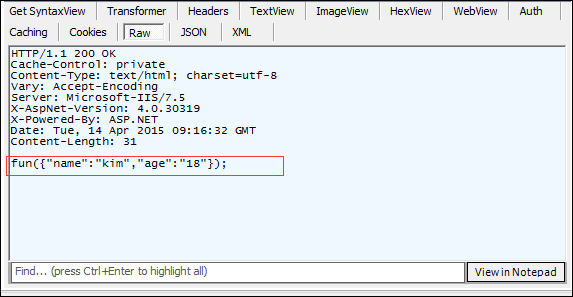
The above is the entire content of this article, I hope you all like it.


