AutoCAD_2009 Drawing three views may be difficult for beginners. This article will detail the steps for drawing three views in AutoCAD_2009, including: Creating a new drawing: Learn how to set up a new drawing to comply with engineering drafting standards. Defining Views: Learn how to define front, top, and side views using the Orthographic View command. Draw datum geometry: Learn how to draw the datum geometry required for three views using lines, circles, and arcs. Add details: Learn how to improve your 3D views using tools like dimensions, annotations, and section lines.
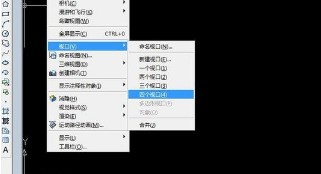
1. Open AutoCAD 2009, click [View] in the menu bar, select [Viewport] from the pop-up options, and then select [Four Viewports].

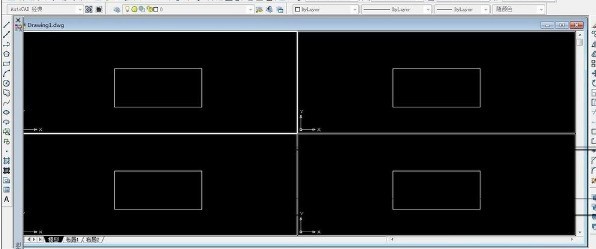
2. Then generate four viewports.

3. Draw a rectangle in the first viewport. You can see that the rectangle appears in the four viewports at the same time. This means that the four viewports are synchronized, and the same shape means The four viewports have the same view direction.

4. Select the first viewport, execute [View]-[3D View]-[Main View], and then set the other three viewports in this way, top view , left view, and other measurements.

5. Draw a rectangle in the main viewport, draw a triangle connection in the isometric viewport, and draw a circle in the top viewport. Each time you draw a step, you can see four viewports. It changes synchronously.

The above is the detailed content of Introduction to the method of drawing three views in AutoCAD_2009. For more information, please follow other related articles on the PHP Chinese website!


