php editor Baicao introduces the scheduled shutdown operation method of win7 computer, which is a very practical function. In the process of daily use of computers, we often encounter situations where we need to shut down the computer regularly, such as downloading large files, backing up data, etc. By setting the scheduled shutdown function, it can help us manage computer usage time more conveniently and improve work efficiency. Let’s learn more about how to set a scheduled shutdown on a Windows 7 computer.
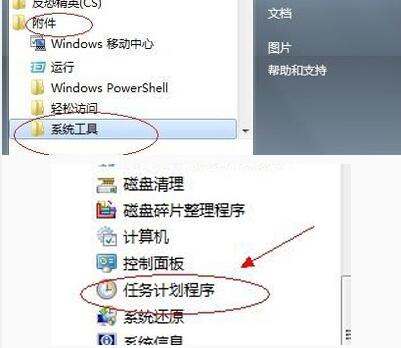
1. [All Programs]--[Accessories], find [Task Scheduler] in [System Tools] in the attachment and open it; as shown in the picture:

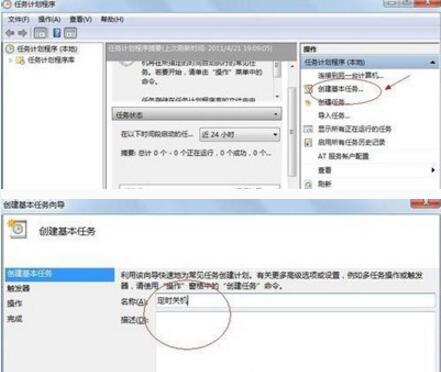
2. Select [Create Basic Task] in the operation on the right. You can fill in the name you want in [Task Name]. What I filled in here is [Schedule Shutdown]; as shown in the picture:

3. Select the task execution time. For those who need to shut down the computer regularly every day, you can select [Everyday]; for those who do not need to shut down the computer for a few days each week, you can select [Weekly]; as for [Everyday] Month] is not recommended because the time span is too large and most people cannot use this function. What I chose is [Every day]; as shown in the picture:

4. Fill in the time for scheduled shutdown in the time box; as shown in the picture:

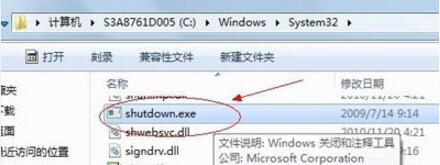
5. Select [Startup Program] and enter: C:WindowsSystem32shutdown.exe. The key is to find shutdown.exe. This depends on the location of the personal installation system and can be found from browsing; as shown in the figure Display:

6. Enter [-s] or [-f -s] in the added parameters. -s: shutdown command, -f: force shutdown running s application. Idea: Do not enter double quotes; as shown in the figure:

7. Click Finish and the main interface appears.
8. You can view the tasks you added in the scheduled task library, and you can also change or delete the selected tasks. Just select the properties when changing.
The above is the detailed content of How to set up scheduled shutdown on Windows 7 computer. For more information, please follow other related articles on the PHP Chinese website!
 How to create virtual wifi in win7
 How to change file type in win7
 How to set up hibernation in Win7 system
 How to open Windows 7 Explorer
 How to solve the problem of not being able to create a new folder in Win7
 Solution to Win7 folder properties not sharing tab page
 Win7 prompts that application data cannot be accessed. Solution
 The difference between win7 32-bit and 64-bit


