
php Xiaobian Banana In the Excel table, limiting the input content of cells can help ensure the accuracy and consistency of data. By setting up data validation rules, you can prevent incorrect data from being entered by specifying numerical ranges, text lengths, or specific content that is allowed to be entered. In addition, you can use conditional formatting to automatically format or tag based on input content, improving data readability and analysis efficiency. With these simple settings, you can effectively manage data input in Excel tables and improve work efficiency.
Using "data verification" allows Excel users to fill in content only according to the set rules. If the rules are not met, the content cannot be entered.
The editor below will give an example of the specific operation method:
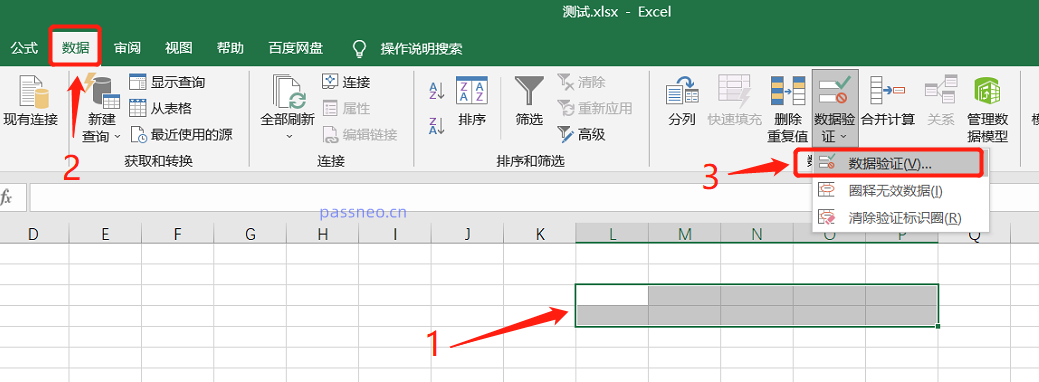
First select the range that needs to be restricted in the Excel table, and click [Data Validation] under the [Data] option on the upper toolbar.
 .
.
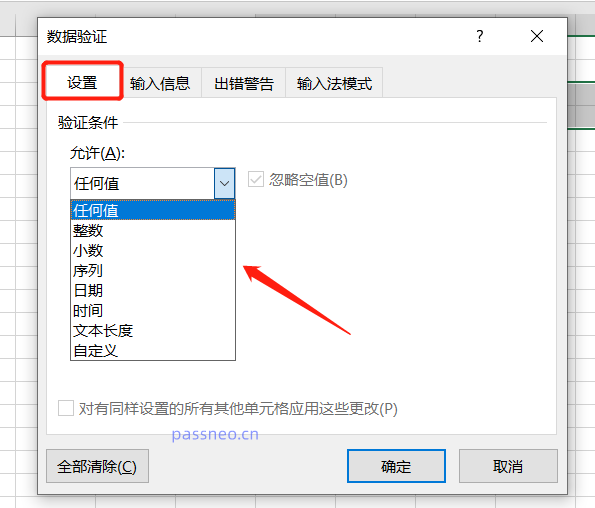
After the new page pops up, you can see the first option [Settings], click [Allow] in the lower list, and you can select the content type that is allowed to be entered. For example, selecting "Integer" means that the originally selected cell only Integers can be entered.
 .
.
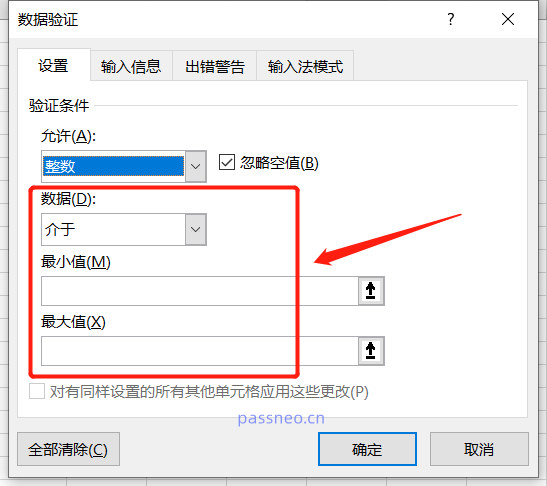
After selection, the range of "integer" can be further restricted.
 .
.
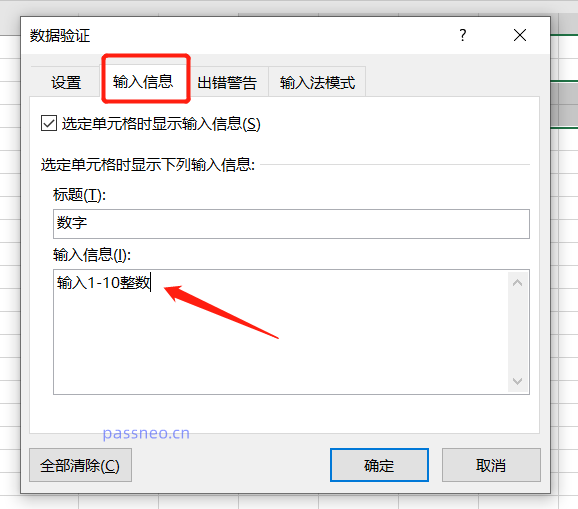
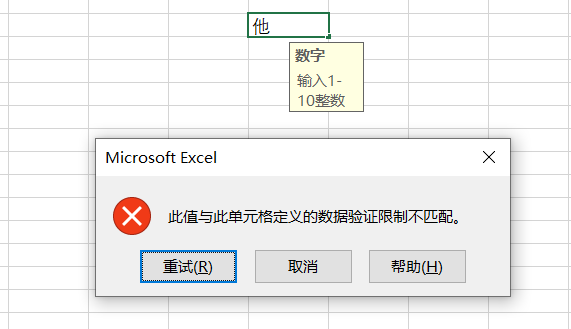
The second option [Enter Information], this item means that when filling in the cell, a prompt will appear wherever the mouse slides to explain the restricted content to be filled in. For example, it prompts "Enter an integer from 1 to 10."
 .
.
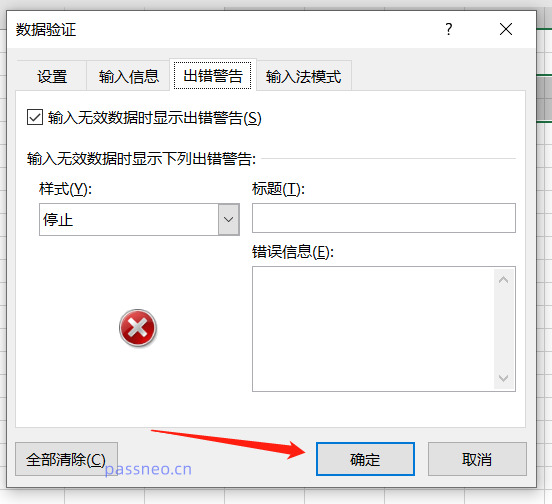
The third option [Error Warning] means that if the restricted range content is not filled in, a warning dialog box will pop up. The "error message" can remind you of the content range that needs to be filled in, or you can not fill it in. Finally click [OK].
 .
.
After completing the above operations, the restricted input content of the Excel table will be set. You can see that when the mouse clicks on the set cell, a prompt for input content will appear; if the input is incorrect, an error prompt box will pop up.
 .
.
In addition to restricting the input of content, Excel can also lock some cells through passwords so that content cannot be input.
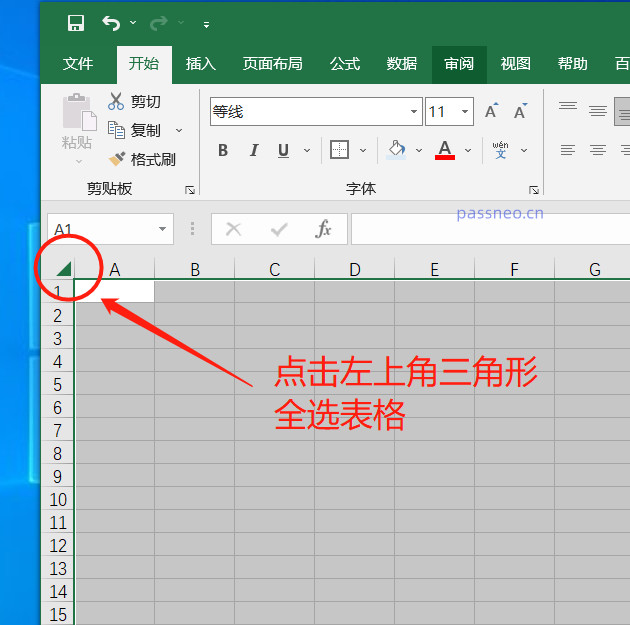
The operation is also very simple. First, click the "triangle" in the upper left corner of Excel to select the entire table.
 .
.
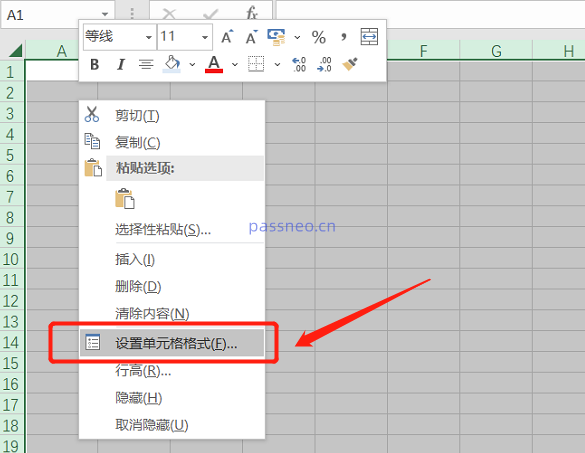
Right-click on the table interface and select [Format Cells].
 .
.
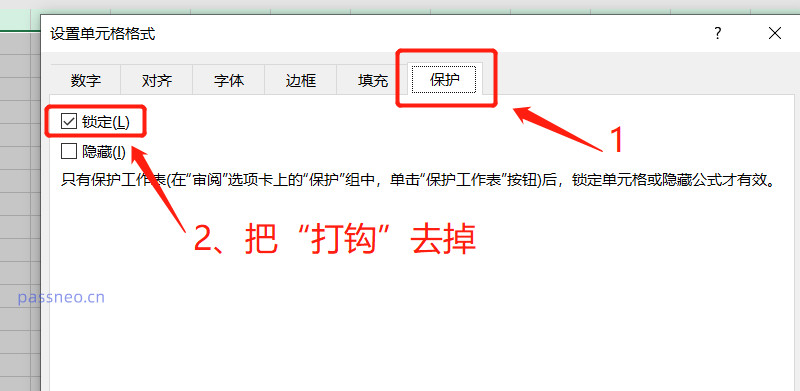
Click the [Protect] option on the new page, then remove the "check" in front of the [Lock] option, and click [OK].
 .
.
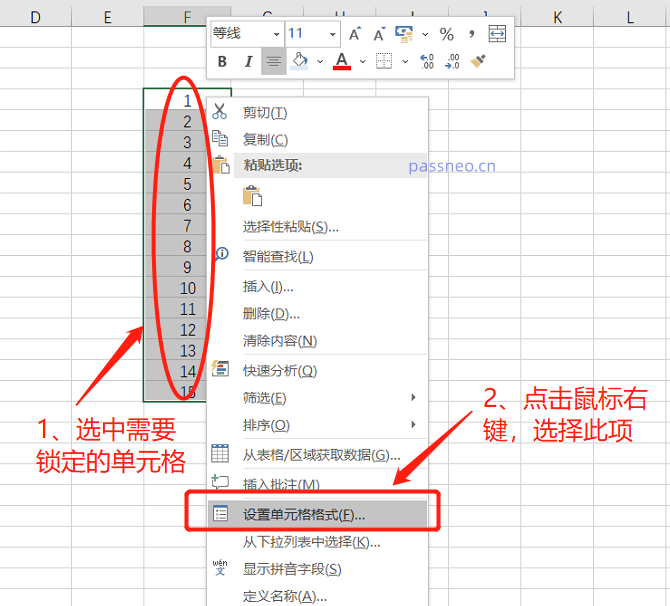
Use the mouse to select the area to be locked on the cell page. Press and hold the "Ctrl" key to select multiple areas at the same time. Then right-click again and select [Format Cells].
 .
.
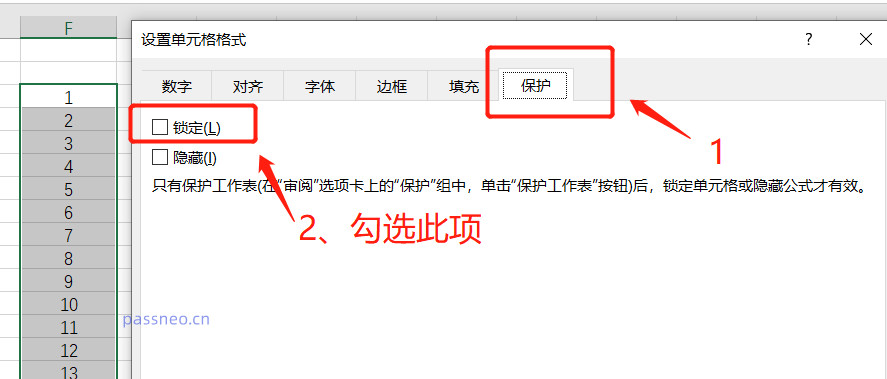
Similarly select the [Protect] option, "check" the blank box before [Lock], and then click [OK].
 .
.
Return to the cell page and click [Review]-[Protect Worksheet].
 .
.
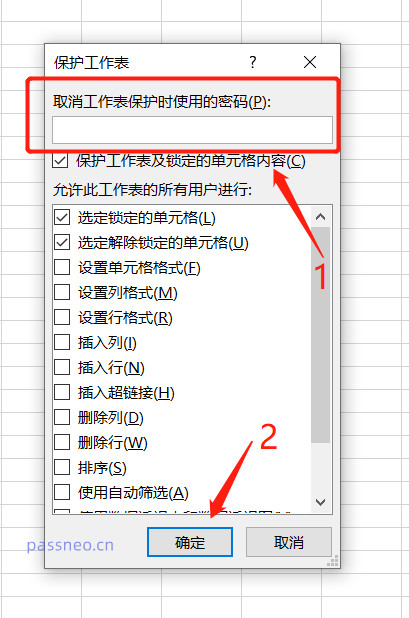
Enter the set password in the pop-up page, and you can also check the different restriction functions below as needed.
After setting, click [OK].
 .
.
After the operation is completed, the editing restriction is set, and the selected cells will be locked and cannot be edited.
If you want to edit, you need to enter a password. Therefore, be sure to save the password when you set it, because Excel cannot retrieve a forgotten password.
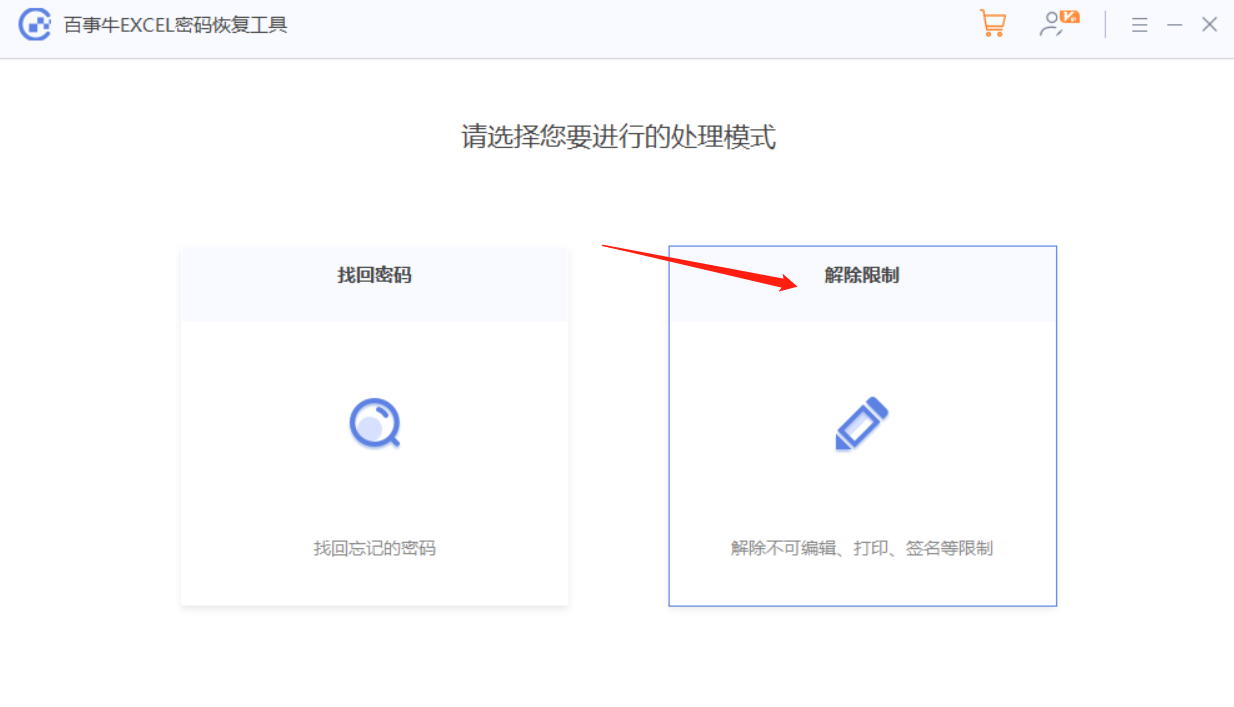
But there are still methods. We can use other tools to directly remove restricted editing without a password. For example, with the Pepsi Niu Excel password recovery tool, select the [Unrestriction] module in the tool and import the Excel table.
Tool link: Pepsi Niu Excel Password Recovery Tool
The above is the detailed content of How to limit the input content of Excel cells?. For more information, please follow other related articles on the PHP Chinese website!
 The difference between win10 home version and professional version
 What is the interrupt priority?
 How to implement color fonts in css
 Solution to slow access speed when renting a US server
 Laravel Tutorial
 Bitcoin personal trading platform
 There is an extra blank page in Word and I cannot delete it.
 How to solve the problem that wlan does not have a valid ip configuration


