在windows 10操作系统中,workgroup(工作组)是一种用于网络共享和通信的重要设置。通过更改workgroup,您可以方便地连接到其他计算机和资源。那么,如何在win10中更改workgroup呢?在本篇文章中,php小编柚子将为您介绍win10更改workgroup工作组的简单方法,让您轻松完成设置,实现网络共享和通信的顺畅连接。
Win10更改Workgroup工作组的方法
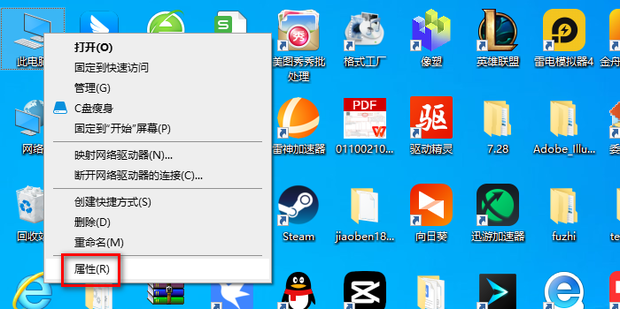
1、首先右键此电脑,点击【属性】。
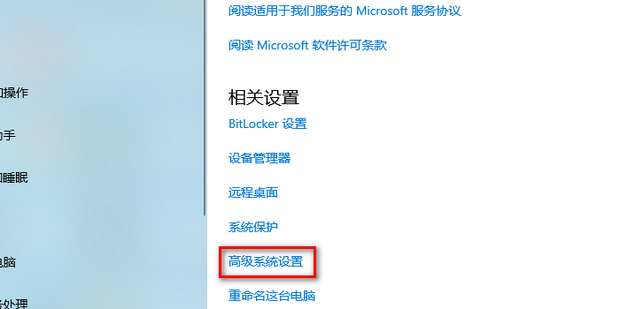
2、点击进入【高级系统设置】。
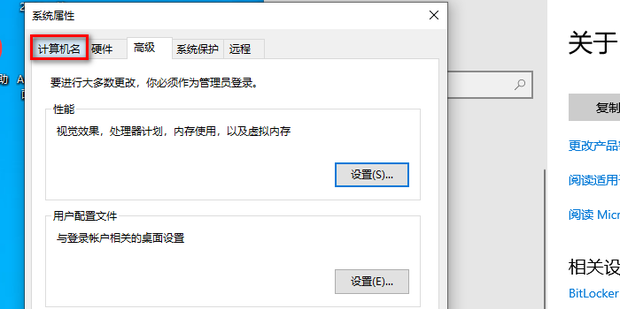
3、点击【计算机名】,切换到计算机名标签。
4、点击【更改】。
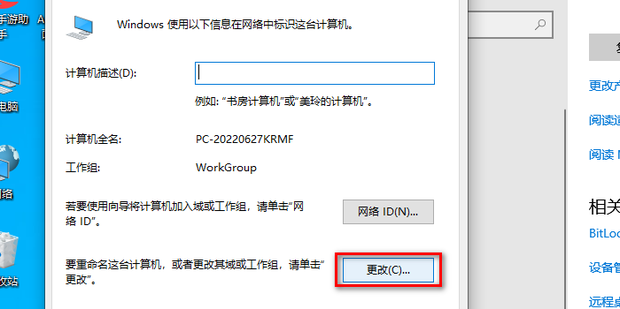
5、接着在工作组窗口中修改新的工作组名称。

6、这里修改成了【WORKGROUP1】,点击【确定】。

7、这样就弹出了一个欢迎提示,这样就修改并创建加入了新的工作组。

8、出现提示需要重启计算机的窗口,点击确定即可。

9、在这里可以看见,刚刚的更改将在你重新启动此计算机后生效。

10、最后重启计算机即可。
以上就是Win10怎么更改Workgroup工作组?Win10更改Workgroup工作组的方法的详细内容,更多请关注php中文网其它相关文章!

每个人都需要一台速度更快、更稳定的 PC。随着时间的推移,垃圾文件、旧注册表数据和不必要的后台进程会占用资源并降低性能。幸运的是,许多工具可以让 Windows 保持平稳运行。

Copyright 2014-2025 //m.sbmmt.com/ All Rights Reserved | php.cn | 湘ICP备2023035733号