
As we all know,In a Linux system, everything is a file!
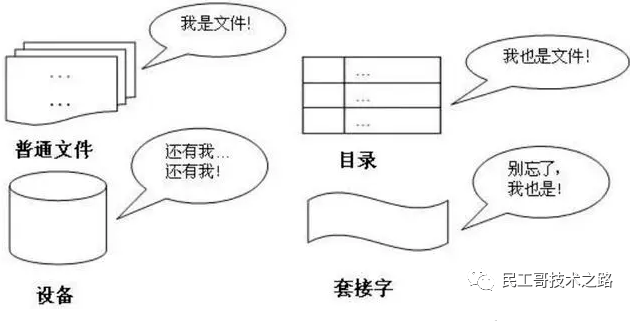
Therefore, the operation and management of files is particularly important in Linux systems. Today, I will introduce to you a file management command mv.
This article mainly explains the specific usage of the mv command and the points that should be paid attention to in practice. Let us study and learn the mv command together throughtheory and examples.
The mv command is the abbreviation of move and is also one of the commonly used commands in Linux systems. The mv command is often used to move and rename files or directories. Or move a file from one directory to another. If you move a file to an existing target file, the contents of the target file will be overwritten by the contents of the file.
If the source is a file and the target is a directory, mv will move the file location. If the source is a directory, the target can only be a directory (not a file), and mv will rename the directory.
When the mv command moves files,there will be the following 4 different results:
mv [选项] 源文件或目录 目标文件或目录 mv [options] source destination
-b #当目标文件存在时,覆盖之前创建一个备份 -f #如果移动的文件或目录与目标重复,则直接覆盖(无需确认) -i #交互式操作,覆盖前会提示用户进行确认操作,用户通过输入Y/N来确认是否覆盖 -u #若目标文件已存在,且与需移动的文件同名,只有在源文件比目标文件较新时,才会更新目标文件 -t #指定mv的目标目录,此选项使用于移动多个文件到一个目录的情况,目标文件在前,源文件在后。 -S:#为备份文件指定(自定义的)后缀 -n #不覆盖任何现有文件 -T #将目标当作普通文件,而不是目录 -v #详细输出命令的执行过程信息
Command format:mv source file target file or mv source directory target directory
Note: When we use this command, we must ensure that the source file (directory) and the target file (directory) are in the same directory, and the target file (directory) does not exist. , otherwise the effect of using this command will change from renaming to moving files (directories).First, we create the files and directories needed for testing
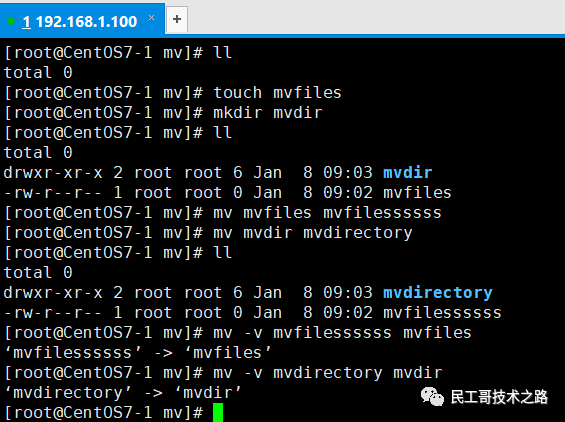
[root@CentOS7-1 mv]# ll total 0 [root@CentOS7-1 mv]# touch mvfiles [root@CentOS7-1 mv]# mkdir mvdir [root@CentOS7-1 mv]# ll total 0 drwxr-xr-x 2 root root 6 Jan 8 09:03 mvdir -rw-r--r-- 1 root root 0 Jan 8 09:02 mvfiles
Perform renaming operation
[root@CentOS7-1 mv]# mv mvfiles mvfilessssss [root@CentOS7-1 mv]# mv mvdir mvdirectory [root@CentOS7-1 mv]# ll total 0 drwxr-xr-x 2 root root 6 Jan 8 09:03 mvdirectory -rw-r--r-- 1 root root 0 Jan 8 09:02 mvfilessssss
If you need the command execution process, you can add parameters
-v[root@CentOS7-1 mv]# mv -v mvfilessssss mvfiles ‘mvfilessssss’ -> ‘mvfiles’ [root@CentOS7-1 mv]# mv -v mvdirectory mvdir ‘mvdirectory’ -> ‘mvdir’
 Move single or multiple files (directories) simultaneously
There are two ways to move multiple files (directories) at the same time:
注意:目标目录下如果存在相同的文件名或目录名,容易误操作将同名文件或目录覆盖。
创建测试用的文件和目录
[root@CentOS7-1 mv]# touch 1.txt 2.txt 3.txt [root@CentOS7-1 mv]# mkdir 1 2 3 [root@CentOS7-1 mv]# ll total 0 drwxr-xr-x 2 root root 6 Jan 8 09:20 1 -rw-r--r-- 1 root root 0 Jan 8 09:19 1.txt drwxr-xr-x 2 root root 6 Jan 8 09:20 2 -rw-r--r-- 1 root root 0 Jan 8 09:19 2.txt drwxr-xr-x 2 root root 6 Jan 8 09:20 3 -rw-r--r-- 1 root root 0 Jan 8 09:19 3.txt
移动文件
[root@CentOS7-1 mv]# mv -v 1.txt 2.txt 3.txt /root/mv1/ ‘1.txt’ -> ‘/root/mv1/1.txt’ ‘2.txt’ -> ‘/root/mv1/2.txt’ ‘3.txt’ -> ‘/root/mv1/3.txt’ [root@CentOS7-1 mv]# ll /root/mv1/ total 0 -rw-r--r-- 1 root root 0 Jan 8 09:19 1.txt -rw-r--r-- 1 root root 0 Jan 8 09:19 2.txt -rw-r--r-- 1 root root 0 Jan 8 09:19 3.txt

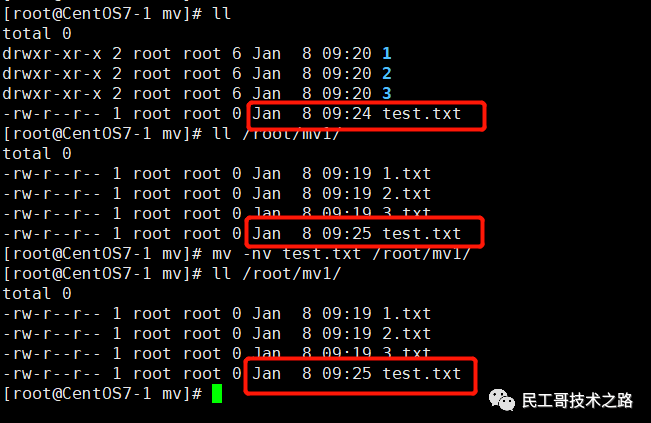
目录的移动其实也是一样操作,也非常的简单。如果目标位置有同名文件,我们不希望它被覆盖,可以加上-n选项
[root@CentOS7-1 mv]# ll total 0 drwxr-xr-x 2 root root 6 Jan 8 09:20 1 drwxr-xr-x 2 root root 6 Jan 8 09:20 2 drwxr-xr-x 2 root root 6 Jan 8 09:20 3 -rw-r--r-- 1 root root 0 Jan 8 09:24 test.txt [root@CentOS7-1 mv]# ll /root/mv1/ total 0 -rw-r--r-- 1 root root 0 Jan 8 09:19 1.txt -rw-r--r-- 1 root root 0 Jan 8 09:19 2.txt -rw-r--r-- 1 root root 0 Jan 8 09:19 3.txt -rw-r--r-- 1 root root 0 Jan 8 09:25 test.txt [root@CentOS7-1 mv]# mv -nv test.txt /root/mv1/ [root@CentOS7-1 mv]# ll /root/mv1/ total 0 -rw-r--r-- 1 root root 0 Jan 8 09:19 1.txt -rw-r--r-- 1 root root 0 Jan 8 09:19 2.txt -rw-r--r-- 1 root root 0 Jan 8 09:19 3.txt -rw-r--r-- 1 root root 0 Jan 8 09:25 test.txt
这个操作只需要添加一个参数(-i)即可
[root@CentOS7-1 mv]# mv test.txt -v -i /root/mv1/ mv: overwrite ‘/root/mv1/test.txt’? y ‘test.txt’ -> ‘/root/mv1/test.txt’ [root@CentOS7-1 mv]# ll /root/mv1/ total 0 -rw-r--r-- 1 root root 0 Jan 8 09:19 1.txt -rw-r--r-- 1 root root 0 Jan 8 09:19 2.txt -rw-r--r-- 1 root root 0 Jan 8 09:19 3.txt -rw-r--r-- 1 root root 0 Jan 8 09:24 test.txt
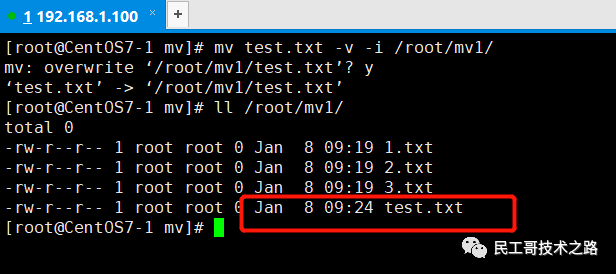
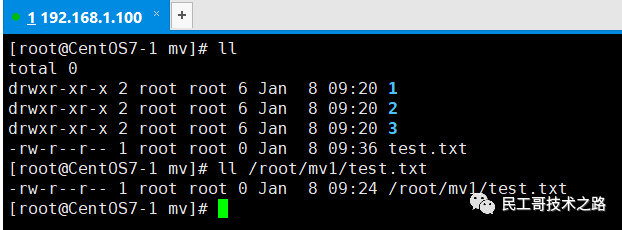
从上图中可以看出,mv 目录下的 test.txt 文件较新,如果我们执行反向操作,并且带上-u参数,来测试旧文件是否会覆盖掉新文件:
[root@CentOS7-1 mv]# mv -v -u /root/mv1/test.txt ./ [root@CentOS7-1 mv]# ll total 0 drwxr-xr-x 2 root root 6 Jan 8 09:20 1 drwxr-xr-x 2 root root 6 Jan 8 09:20 2 drwxr-xr-x 2 root root 6 Jan 8 09:20 3 -rw-r--r-- 1 root root 0 Jan 8 09:36 test.txt
结果表明并没有覆盖掉新文件,接下来,我们测试仅当源文件(目录)较新时才覆盖这个功能。
[root@CentOS7-1 mv]# mv -v -u ./test.txt /root/mv1/ mv: overwrite ‘/root/mv1/test.txt’? y ‘./test.txt’ -> ‘/root/mv1/test.txt’ [root@CentOS7-1 mv]# ll /root/mv1/ total 0 -rw-r--r-- 1 root root 0 Jan 8 09:19 1.txt -rw-r--r-- 1 root root 0 Jan 8 09:19 2.txt -rw-r--r-- 1 root root 0 Jan 8 09:19 3.txt -rw-r--r-- 1 root root 0 Jan 8 09:36 test.txt
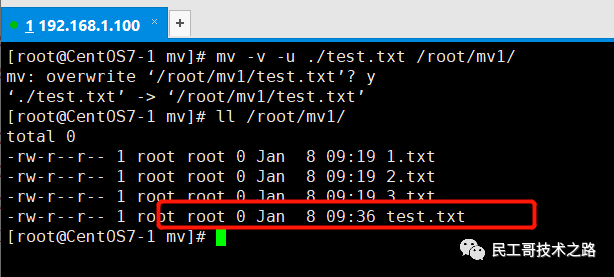
从上图结果中可以看出覆盖成功,这种操作可以用在大量文件移动时,也可以用在更新文件或目录时。
[root@CentOS7-1 mv]# cat test1.txt 1 [root@CentOS7-1 mv]# cat test2.txt 2
如果test2.txt存在,原来的文件会被备份
[root@CentOS7-1 mv]# mv -v -b test1.txt test2.txt mv: overwrite ‘test2.txt’? y ‘test1.txt’ -> ‘test2.txt’ (backup: ‘test2.txt~’) [root@CentOS7-1 mv]# ll total 12 -rw-r--r-- 1 root root 2 Jan 8 09:49 test2.txt -rw-r--r-- 1 root root 2 Jan 8 09:49 test2.txt~ -rw-r--r-- 1 root root 2 Jan 8 09:49 test3.txt [root@CentOS7-1 mv]# cat test2.txt 1 [root@CentOS7-1 mv]# cat test2.txt~ 2
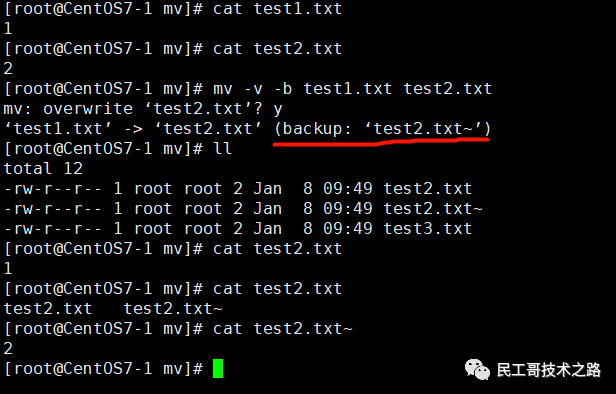
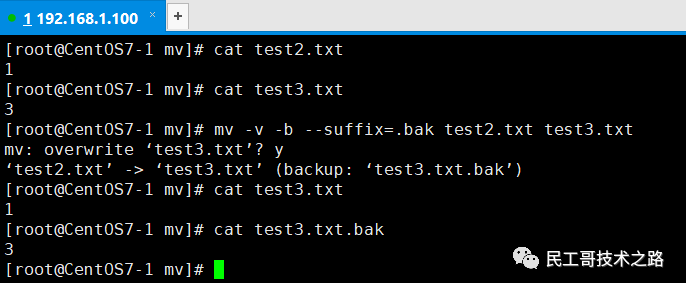
在备份的过程中,我们还可以通过参数--suffix=xxx来自定义文件的后缀名:
[root@CentOS7-1 mv]# cat test2.txt 1 [root@CentOS7-1 mv]# cat test3.txt 3 [root@CentOS7-1 mv]# mv -v -b --suffix=.bak test2.txt test3.txt mv: overwrite ‘test3.txt’? y ‘test2.txt’ -> ‘test3.txt’ (backup: ‘test3.txt.bak’) [root@CentOS7-1 mv]# cat test3.txt 1 [root@CentOS7-1 mv]# cat test3.txt.bak 3
The above is the detailed content of Read this article! I just know how to use Linux mv command. For more information, please follow other related articles on the PHP Chinese website!


