


php editor Banana will introduce to you how to enter the U disk mode of ASUS x555l. Entering USB disk mode allows you to easily install, repair or restore the system, as well as back up and restore important data. Here are the simple steps to enter USB flash drive mode: First, shut down the computer and insert the USB flash drive. Then, press the power button while holding down the F2 key to enter the BIOS setup. In the BIOS settings, find the "Boot" option and set the USB flash drive as the first boot option. After saving the settings, restart the computer. Now, ASUS x555l can successfully enter U disk mode. Hope this simple guide helps you all!
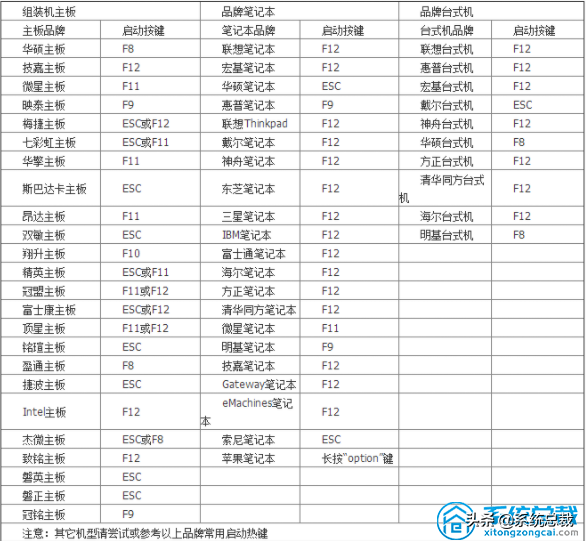
Use Xiaobai’s one-click reinstallation system to create a USB boot disk, and set the Bios boot item to USB boot. Different models have different setting interfaces. You can refer to the shortcut keys in the table below to start the USB disk.
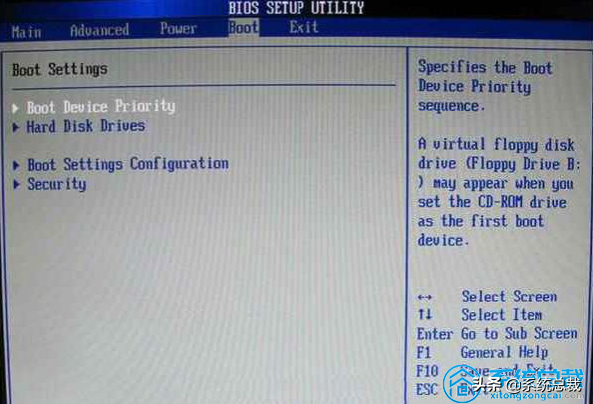
#2. Insert the USB boot disk, restart the computer, and hold down the DEL key during startup.
#3. Move the left and right arrows on the keyboard and move the cursor to the BOOT option.
#4. Move the cursor down to the hard disk, disk, drive, and then press the Enter key to enter the next interface.
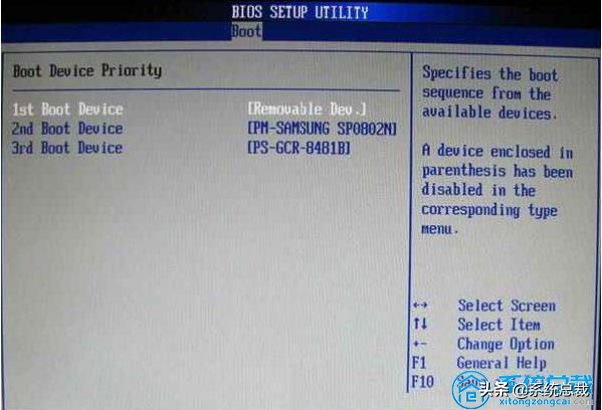
5. Move the cursor to the first one, drive, LSATA, and press Enter to enter the next interface.

6. Move the cursor to USB:Kingstom, DT and press the Enter key.
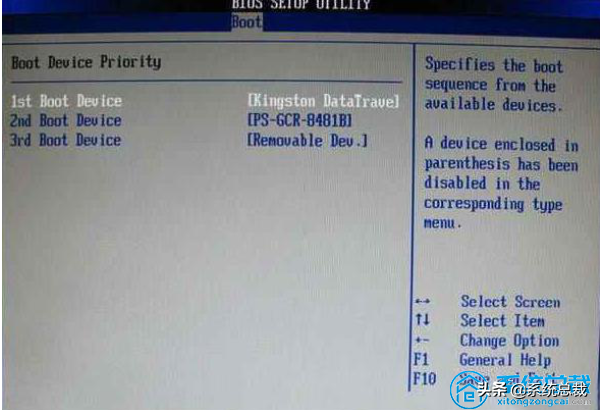
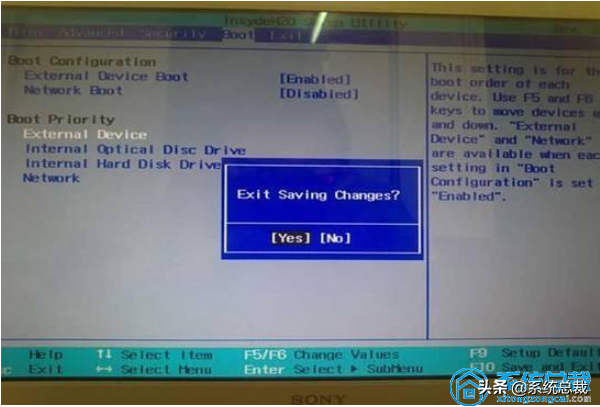
#7. First, Drive appears on the page, indicating that the first startup item is changed to USB disk startup. Press F10 to save and restart your computer.
The above is the detailed content of How to insert USB flash drive into ASUS x555l. For more information, please follow other related articles on the PHP Chinese website!
 How to save files to USB drive
 What should I do if the USB disk cannot be read on the computer?
 A complete list of CAD shortcut key commands
 What is the reason for DNS resolution failure?
 Steps to delete one of dual systems
 Linux modify file name command
 What does bios mean?
 How to export word from powerdesigner


![[Web front-end] Node.js quick start](https://img.php.cn/upload/course/000/000/067/662b5d34ba7c0227.png)


