


Use vscode to remotely debug the Linux kernel

Preface
The previous article introduced the use of QEMU GDB to debug the Linux kernel. However, sometimes it is not very convenient to directly use GDB to debug and view the code. Therefore, on such an important occasion, how can the artifact of vscode be missing? This article introduces how to use vscode to remotely debug the kernel.
Environment of this article:
- windows10
- vscode
- ubuntu 20.04
I personally use Tencent Cloud Server, so I save the process of installing a virtual machine. Start directly from vscode configuration.
vscode plug-in installation
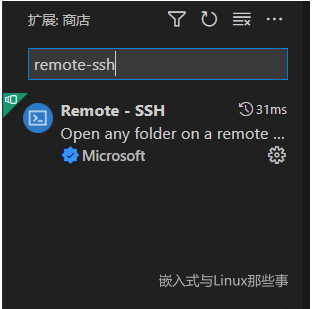
remote-ssh
Find the Remote-SSH plug-in in the plug-in library and install it.
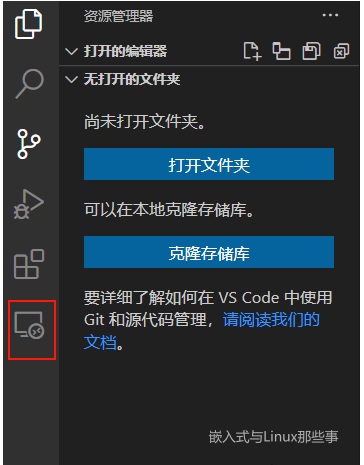
After the installation is complete, there will be an additional function on the right toolbar
Press F1 to call out the dialog box, enter remote-ssh, and select open ssh configuration file.
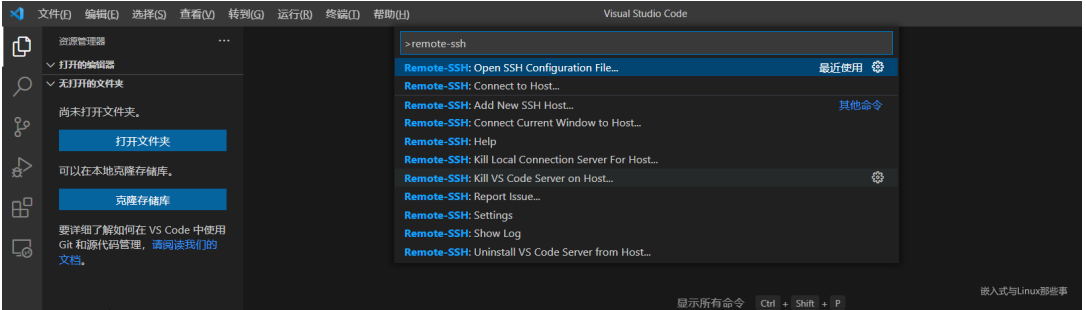
Select the first configuration file

# Read more about SSH config files: https://linux.die.net/man/5/ssh_config
Host ubuntu
    HostName 服务器IP地址
    User 用户名
    IdentityFile 私钥路径
I am using the private key method to log in to the server, and IdentityFile fills in the absolute path of the private key.
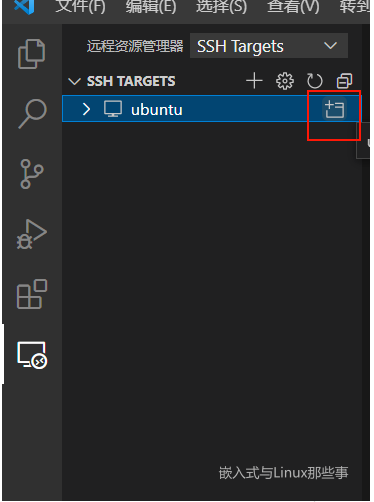
After configuration, click the plus button to log in to the server
Error: Setting up SSH Host XX:Copying VS Code Server to host with scp
I got stuck while connecting and have been waiting for Setting up SSH Host XX:Copying VS Code Server to host with scp.
reason
It’s because the home directory ~/.vscode-server/bin/commit_id/vscode-servlet.tar.gz is not downloaded under the remote server.
commit_id can be viewed in vscode [Help]->[Terminal].
Solution
Then we will download vscode-servlet.tar.gz manually. Download via the link below.
#注意把:${commit_id}替换成对应的Commit ID
https://update.code.visualstudio.com/commit:${commit_id}/server-linux-x64/stable
Run the following line of command. Delete everything in the ~/.vscode-server/bin directory.
rm ~/.vscode-server/bin/* -rf
If there is no ~/.vscode-server/bin directory, create it. If there is, please ignore this step*.
mkdir -p ~/.vscode-server/bin
Place the downloaded compressed package vscode-server-linux-x64.tar.gz in the ~/.vscode-server/bin directory.
Run the following three lines of commands, where ${commit_id} needs to be replaced with the commit_id recorded in step 2.
cd ~/.vscode-server/bin
tar -zxf vscode-server-linux-x64.tar.gz
mv vscode-server-linux-x64 ${commit_id}
报错:Permissions for ‘vscode_rsa’ are too open.
然后就可以在原来的文件浏览界面,打开远程的文件夹。但是在配置好进行连接的时候,VScode的终端报错了:
@@@@@@@@@@@@@@@@@@@@@@@@@@@@@@@@@@@@@@@@@@@@@@@@@@@@@@@@@@@
@     WARNING: UNPROTECTED PRIVATE KEY FILE!     @
@@@@@@@@@@@@@@@@@@@@@@@@@@@@@@@@@@@@@@@@@@@@@@@@@@@@@@@@@@@
Permissions for 'vscode_rsa' are too open.
It is required that your private key files are NOT accessible by others.
This private key will be ignored.
Load key "vscode_rsa": bad permissions
根本原因是私钥的权限问题。这要是在Linux里,直接使用chmod,就可以修改,修改为644即可,但是windows,就稍微麻烦点。
在私钥上右击选择属性,然后选择【安全】选项卡,然后点击下面的【高级】按钮,然后在新弹出的窗口下方点击【禁用继承】,然后点击继承那个按钮上面的【添加】按钮重新将当前window登录用户设置为私钥的所有者,并勾选所有权限。最后跟下面一样即可:
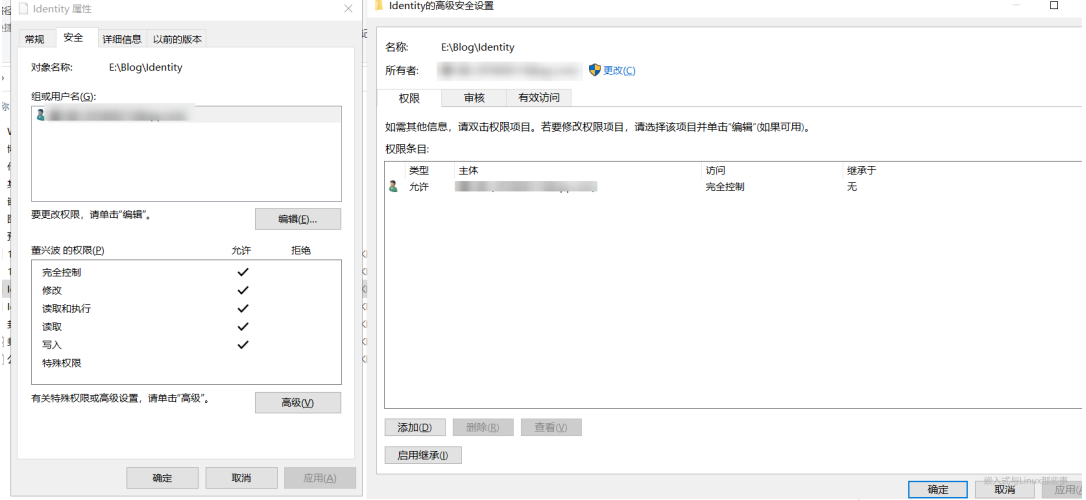
这时再次打开VScode远程连接,就没有问题了。
C/C++
安装C/C++插件

依次点击【运行】->【打开配置】,将以下配置复制到launch.json中。
{
    "version": "0.2.0",
    "configurations": [
        {
            "name": "kernel-debug",
            "type": "cppdbg",
            "request": "launch",
            "miDebuggerServerAddress": "127.0.0.1:1234",
            "program": "${workspaceFolder}/vmlinux",
            "args": [],
            "stopAtEntry": false,
            "cwd": "${workspaceFolder}",
            "environment": [],
            "externalConsole": false,
            "logging": {
                "engineLogging": false
            },
            "MIMode": "gdb",
        }
    ]
}
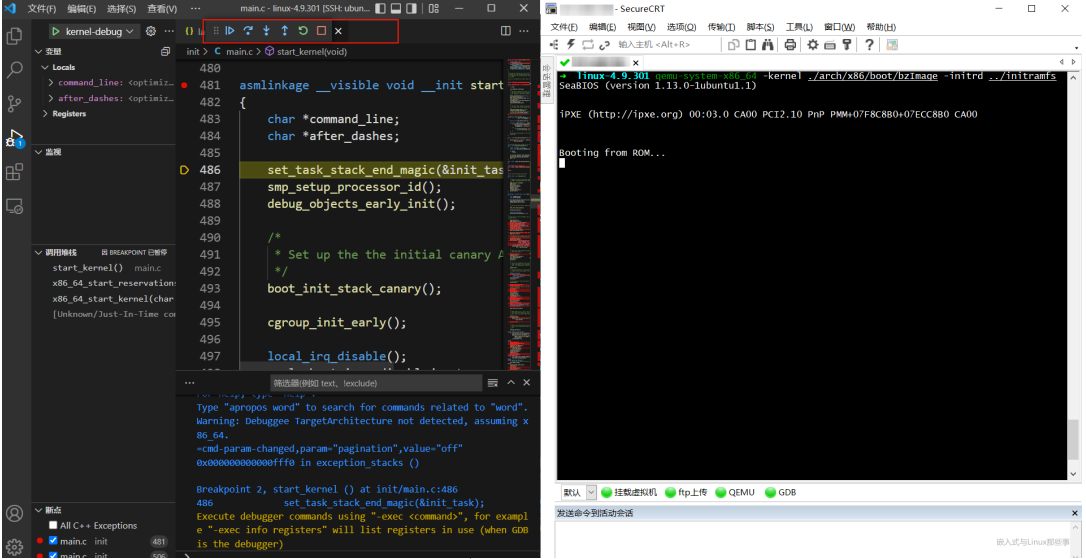
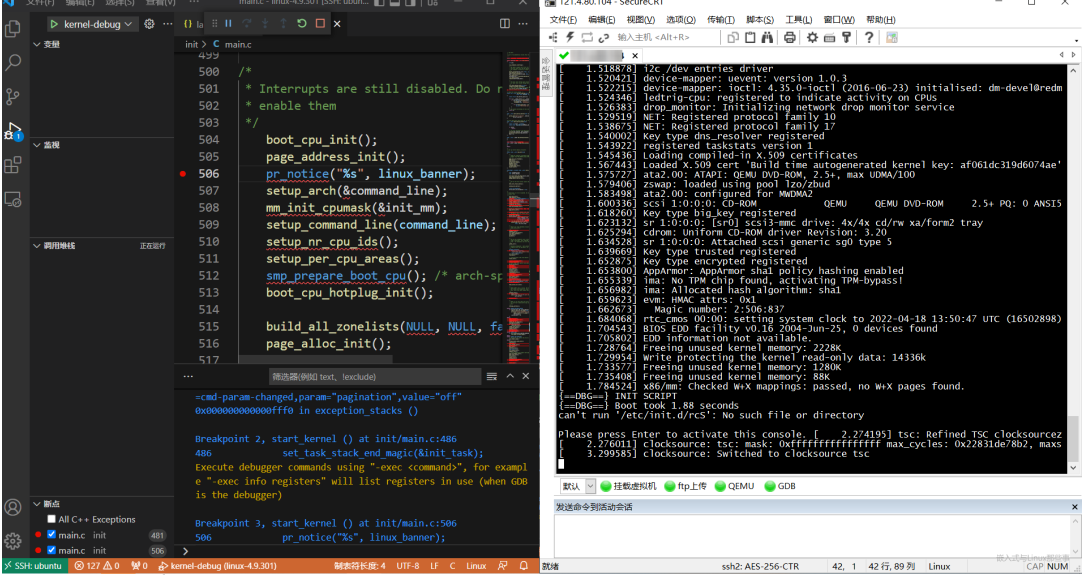
然后在main函数中,打上两个断点,在服务器上开启QEMU,F5即可开启调试。
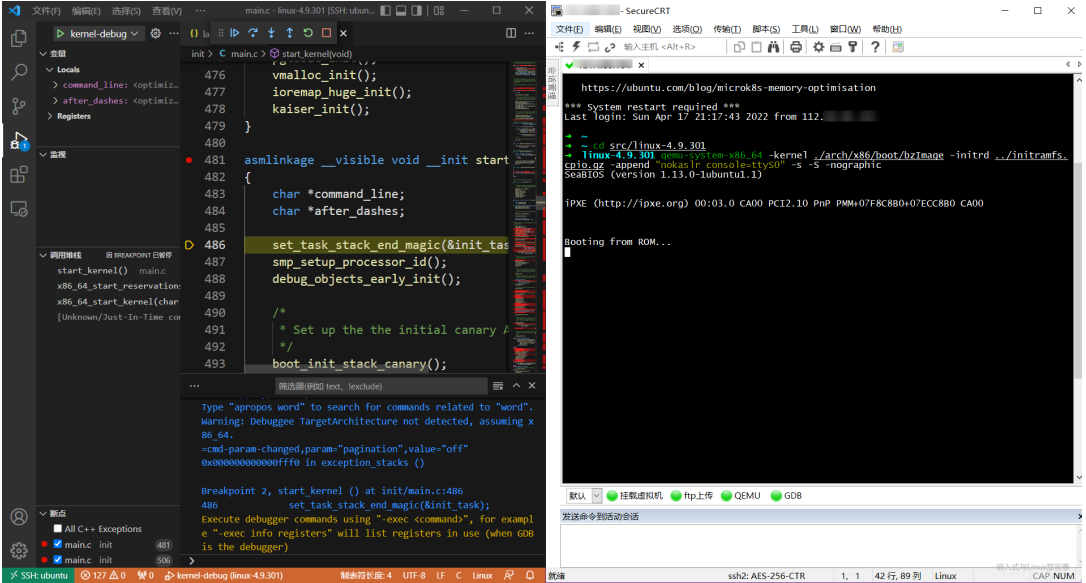
在vscode中调试内核,和正常的在windows调试代码是一样的,侧边栏可以看到变量,监视变量,调用堆栈等,非常方便。
大功告成,以后就可以在可视化界面调试内核了!
The above is the detailed content of Use vscode to remotely debug the Linux kernel. For more information, please follow other related articles on the PHP Chinese website!

Hot AI Tools

Undress AI Tool
Undress images for free

Undresser.AI Undress
AI-powered app for creating realistic nude photos

AI Clothes Remover
Online AI tool for removing clothes from photos.

Clothoff.io
AI clothes remover

Video Face Swap
Swap faces in any video effortlessly with our completely free AI face swap tool!

Hot Article
Hot Tools

Notepad++7.3.1
Easy-to-use and free code editor

SublimeText3 Chinese version
Chinese version, very easy to use

Zend Studio 13.0.1
Powerful PHP integrated development environment

Dreamweaver CS6
Visual web development tools

SublimeText3 Mac version
God-level code editing software (SublimeText3)


 How to add a new disk to Linux
Jun 27, 2025 am 12:15 AM
How to add a new disk to Linux
Jun 27, 2025 am 12:15 AM
The steps to add a new hard disk to the Linux system are as follows: 1. Confirm that the hard disk is recognized and use lsblk or fdisk-l to check; 2. Use fdisk or parted partitions, such as fdisk/dev/sdb and create and save; 3. Format the partition to a file system, such as mkfs.ext4/dev/sdb1; 4. Use the mount command for temporary mounts, such as mount/dev/sdb1/mnt/data; 5. Modify /etc/fstab to achieve automatic mount on the computer, and test the mount first to ensure correctness. Be sure to confirm data security before operation to avoid hardware connection problems.
 Fixed the failure to upload files in Windows Google Chrome
Jul 08, 2025 pm 02:33 PM
Fixed the failure to upload files in Windows Google Chrome
Jul 08, 2025 pm 02:33 PM
Have problems uploading files in Google Chrome? This may be annoying, right? Whether you are attaching documents to emails, sharing images on social media, or submitting important files for work or school, a smooth file upload process is crucial. So, it can be frustrating if your file uploads continue to fail in Chrome on Windows PC. If you're not ready to give up your favorite browser, here are some tips for fixes that can't upload files on Windows Google Chrome 1. Start with Universal Repair Before we learn about any advanced troubleshooting tips, it's best to try some of the basic solutions mentioned below. Troubleshooting Internet connection issues: Internet connection
 What is the sudo command and when should I use it?
Jul 02, 2025 am 12:20 AM
What is the sudo command and when should I use it?
Jul 02, 2025 am 12:20 AM
sudo stands for "substituteuserdo" or "superuserdo", allowing users to run commands with permissions of other users (usually root). Its core uses include: 1. Perform system-level operations such as installing software or editing system files; 2. Accessing protected directories or logs; 3. Manage services such as restarting nginx; 4. Modify global settings such as /etc/hosts. When using it, the system will check the /etc/sudoers configuration and verify the user password, provide temporary permissions instead of continuously logging in as root, ensuring security. Best practices include: only when necessary, avoid blindly executing network commands, editing sudoers files with visudo, and considering continuous operations.
 How to manage groups on Linux
Jul 06, 2025 am 12:02 AM
How to manage groups on Linux
Jul 06, 2025 am 12:02 AM
To manage Linux user groups, you need to master the operation of viewing, creating, deleting, modifying, and user attribute adjustment. To view user group information, you can use cat/etc/group or getentgroup, use groups [username] or id [username] to view the group to which the user belongs; use groupadd to create a group, and use groupdel to specify the GID; use groupdel to delete empty groups; use usermod-aG to add users to the group, and use usermod-g to modify the main group; use usermod-g to remove users from the group by editing /etc/group or using the vigr command; use groupmod-n (change name) or groupmod-g (change GID) to modify group properties, and remember to update the permissions of relevant files.
 How to find my private and public IP address in Linux?
Jul 09, 2025 am 12:37 AM
How to find my private and public IP address in Linux?
Jul 09, 2025 am 12:37 AM
In Linux systems, 1. Use ipa or hostname-I command to view private IP; 2. Use curlifconfig.me or curlipinfo.io/ip to obtain public IP; 3. The desktop version can view private IP through system settings, and the browser can access specific websites to view public IP; 4. Common commands can be set as aliases for quick call. These methods are simple and practical, suitable for IP viewing needs in different scenarios.
 PHP integrated AI intelligent picture recognition PHP visual content automatic labeling
Jul 25, 2025 pm 05:42 PM
PHP integrated AI intelligent picture recognition PHP visual content automatic labeling
Jul 25, 2025 pm 05:42 PM
The core idea of integrating AI visual understanding capabilities into PHP applications is to use the third-party AI visual service API, which is responsible for uploading images, sending requests, receiving and parsing JSON results, and storing tags into the database; 2. Automatic image tagging can significantly improve efficiency, enhance content searchability, optimize management and recommendation, and change visual content from "dead data" to "live data"; 3. Selecting AI services requires comprehensive judgments based on functional matching, accuracy, cost, ease of use, regional delay and data compliance, and it is recommended to start from general services such as Google CloudVision; 4. Common challenges include network timeout, key security, error processing, image format limitation, cost control, asynchronous processing requirements and AI recognition accuracy issues.
 What is the code number of Bitcoin? What style of code is Bitcoin?
Jul 22, 2025 pm 09:51 PM
What is the code number of Bitcoin? What style of code is Bitcoin?
Jul 22, 2025 pm 09:51 PM
As a pioneer in the digital world, Bitcoin’s unique code name and underlying technology have always been the focus of people’s attention. Its standard code is BTC, also known as XBT on certain platforms that meet international standards. From a technical point of view, Bitcoin is not a single code style, but a huge and sophisticated open source software project. Its core code is mainly written in C and incorporates cryptography, distributed systems and economics principles, so that anyone can view, review and contribute its code.
 System requirements to install linux
Jul 20, 2025 am 03:49 AM
System requirements to install linux
Jul 20, 2025 am 03:49 AM
Linuxcanrunonmodesthardwarewithspecificminimumrequirements.A1GHzprocessor(x86orx86_64)isneeded,withadual-coreCPUrecommended.RAMshouldbeatleast512MBforcommand-lineuseor2GBfordesktopenvironments.Diskspacerequiresaminimumof5–10GB,though25GBisbetterforad
