In this article, editor Xigua of php will introduce in detail how to create and transfer NFT in the Ouyi NFT market. Whether on the web or in the app, we will provide you with a clear operation process to help you complete these steps easily. As a platform focused on digital art trading, Ouyi NFT Market provides creators and collectors with an opportunity to display and trade their works. Now, let us learn how to create and transfer NFT on the Ouyi NFT market!
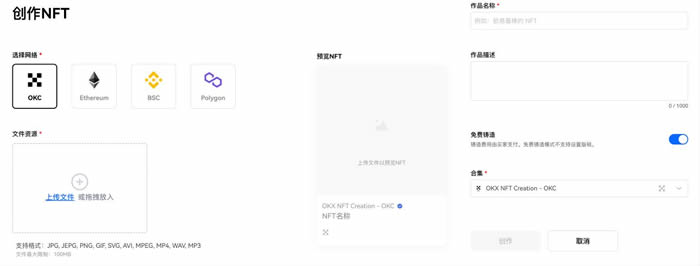
Open Ouyi official website > Web3 wallet, connect the wallet, click NFT Market > Hotspot > Create NFT.

Enter the creation NFT page, select the network, and upload the file. Fill in the title and description of your work, set your royalties, and click Create when finished.
Note:
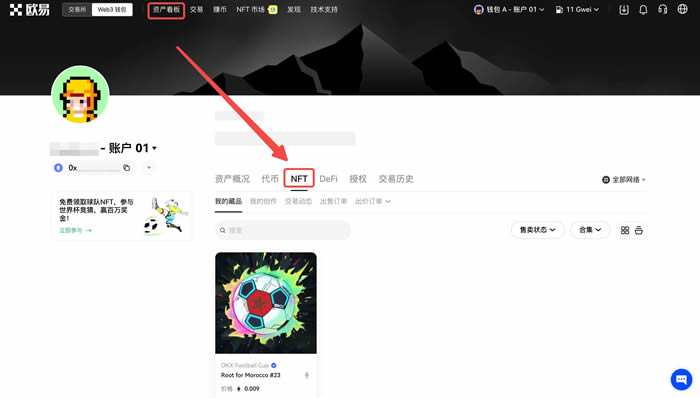
Complete the signature and transaction confirmation in the pop-up wallet window. Uploading NFT works requires payment of network fees (the fee depends on the gas price of the current network), click to confirm payment. After creation, click Asset Dashboard > NFT to view your minted NFT works.
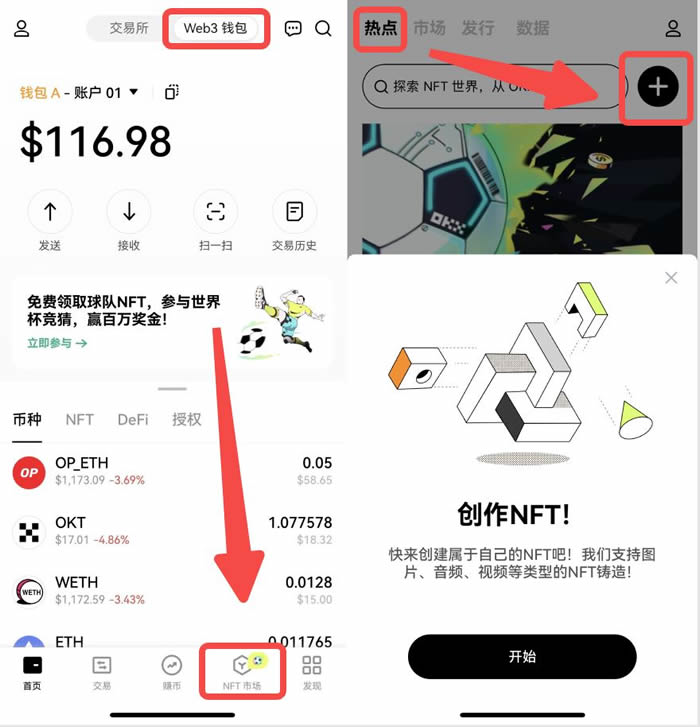
Download the Ouyi official App, switch to Web3 Wallet > NFT Market > Hotspot, then click on the number to create NFT.
Enter the NFT creation page and select Network in the upper right corner. Currently, NFT casting and file upload are supported on OKC, Ethereum, BSC, and Polygon. Fill in the title and introduction of the work, set the royalties, and click Next when completed.
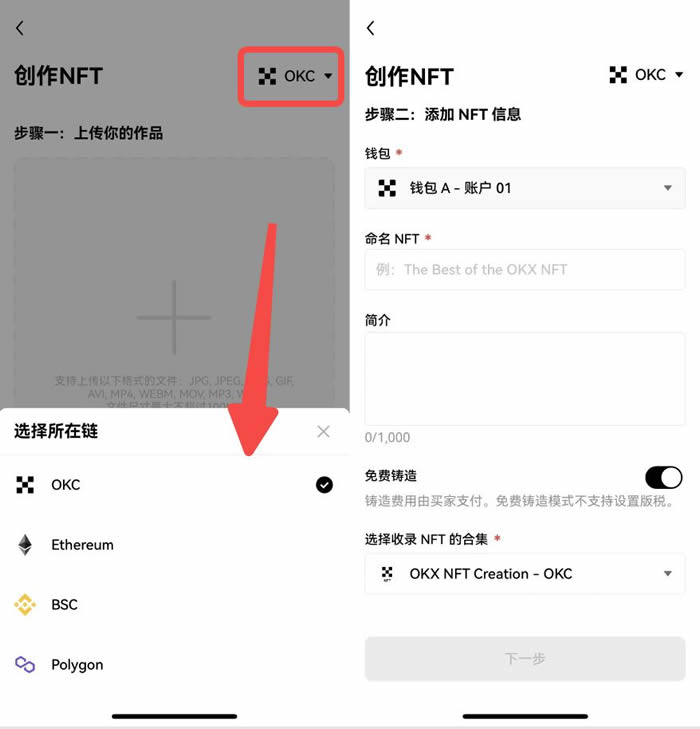
It is recommended that you set a royalty for your work, so that when the NFT is traded for a second time in the future, as the author, you can get the proportion of the selling price. Batch upload is not supported yet.
Complete the signature and transaction confirmation in the pop-up wallet window. Network fees are required when uploading NFT works (the specific fees depend on the gas price of the current network). After creation, return to the Web3 wallet homepage and click NFT > My Collection to view your minted NFT works.
Once the NFT is created, it is permanently stored on the blockchain and cannot be tampered with or deleted, but it can be transferred. On Ouyi, you can easily transfer NFT to friends, community members, another wallet of your own, or others.
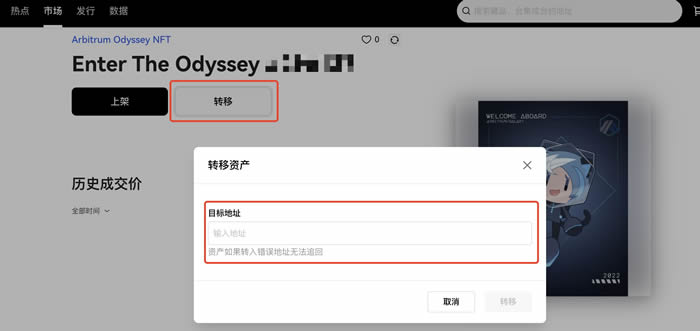
Click Asset Dashboard > NFT > My Collection, select and click the NFT you want to transfer, and enter the NFT details page. Click Transfer and enter the destination address.
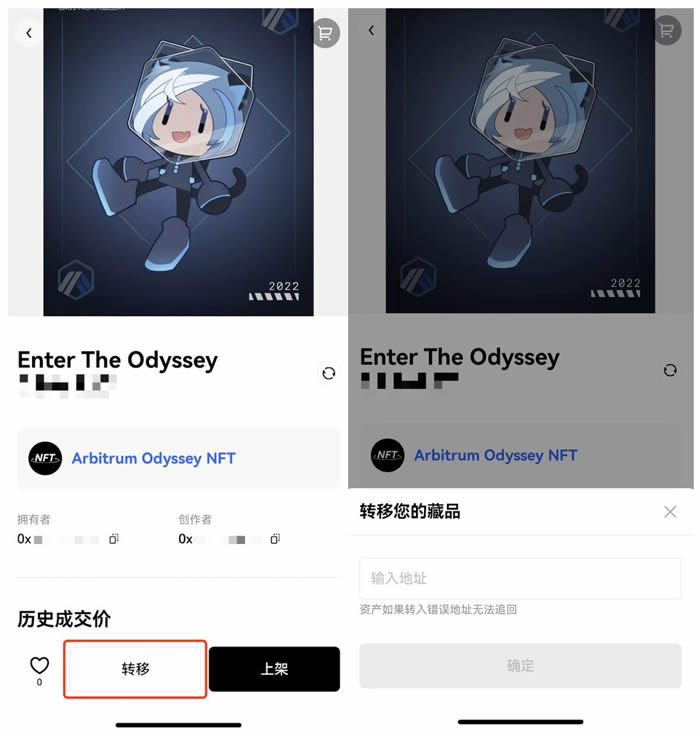
Click NFT > My Collection on the wallet homepage, select and click the NFT you want to transfer, and enter the NFT details page. Click Transfer and enter the destination address.
The above is the detailed content of Ouyi NFT market web/application operation guide: steps to create and transfer NFT. For more information, please follow other related articles on the PHP Chinese website!
 What are the development tools?
 How to set both ends to be aligned in css
 How to shut down your computer quickly
 Introduction to shortcut keys for minimizing windows windows
 What are the network file server tools?
 Connected to wifi but unable to access the Internet
 How oracle rounds
 What are the parameters of marquee?


