


Comprehensive detailed explanation of CentOS commands

1, displays the currently used shell
[root@localhost ~]# echo $SHELL
2, display all shells used by the current system
[root@localhost ~]# cat /etc/shells
3, display hash cache
hash: show cache -r: clear cache
4, multiple commands can be used; separated by symbols
5,history
-c: Clear command history
-d: Delete the specified command in the history
#: Display the latest # history
-a: Append the newly executed command history of this session to the list and to the history file
-n: Read unread lines in the history file to the history list
-r: Read history files and append them to the history list
-w: Save the history list to the specified history file
-p: Expand historical parameters into multiple lines, but do not exist in the history list
-s: Expand the historical parameters into one line and append them to the history list
6,Ctrl
l: Clear screen, equivalent to clear command
c: Cancel the execution of the command
-a: Move the cursor to the front of the command line
-e: Move the cursor to the end of the command line
-u: Delete the current cursor position to the beginning of the line
-k: Delete the current cursor position to the end of the line
7,Esc
-b: Move one word to the left
-f: Move one word to the right
8, local help file storage location/usr/share/doc/
9. After the CentOS system is installed, if there is no man help, you can use the following command to create the database
CentOS6 uses: makewhatis
CentOS7 uses: mandb
10, How to operate the man command
space, ^v, ^f, ^F: scroll to the end of the file
b, ^b: Flip to the beginning of the file
d, ^d: turn half the screen to the end of the file
u, ^u: turn half the screen to the beginning of the file
^n or ^e or ^j: Turn one line to the end of the file
^y or ^p or ^k: turn a line to the beginning of the file
q:Exit
#: jump to line
# 1g: Return to the beginning of the file
g: Go to the end of the file
/keywork: Use string as keyword, search from the current position to the end, the characters are not case-sensitive
n: Next N: Previous
?keywork: Use string as keyword, search from the current position to the beginning, the characters are not case-sensitive
n: Next N: Previous
11, File system structure
/boot: Boot file storage directory, kernel files (vmlinuz), boot loader (bootloader, grub) are stored in this directory.
/bin: Basic commands for all users; cannot be associated with independent partitions, and are programs used when the OS starts.
/sbin: Basic management commands; it cannot be associated with independent partitions and is a program used when the OS starts.
/lib: Basic shared library files and kernel module files (/lib/modules) that the program depends on during startup
/lib64: Auxiliary shared library file storage location dedicated to x86_64 systems
/etc: Configuration file directory
/home/USERNAME: Ordinary user home directory
/root: Administrator’s home directory
/media: Portable mobile device mount point
/mnt: Temporary file system mount point
/dev: Storage location of device files and special files
b: block device, random access
c: character device, linear access
/opt: The installation location of third-party applications
/srv: Data used by services running on the system
/tmp: Temporary file storage location
/usr: universal shared, read-only data
lib: 32-bit use
lib64: Only exists in 64-bit systems
include: C program header files (header files)
share: structured independent data, such as doc, man, etc.
Local: The installation location of third-party applications
/var:variable data files
cache: Application cache data directory
lib: application status information data
Local: Dedicated to storing variable data for applications under /usr/local
lock: lock file
Log: Log directory and files
run: running process-related data; usually used to store process pid files
spool: application data pool
tmp: Save temporary data generated between two system restarts
/proc: A virtual file system used to output kernel and process information
/sys: Virtual file system used to output information related to hardware devices on the current system
/selinux: security enhanced linux, the storage location of selinux-related security policies and other information
12, file type
-: Ordinary file
d: directory file
b: block device
c: Character device
l: Symbolic link file
p: Pipe file pipe
s: socket file socket
13, ls usage
-a: Include hidden files
-l: Display additional information
-R: Directory recursion through
-ld: Directory and symbolic link information
-1: Files are displayed in separate lines
-S: Sort from large to small
-u: With the -t option, display and sort by time from new to old
-U: Display in directory storage order without sorting
14, stat displays three timestamps of the file
access time: access time, atime, read file content
Modify time: modification time, mtime, change file content (data)
change time: change time, ctime, metadata changes
15, touch command
touch [OPTION]... FILE...
-a: only change atime
-m: only change mtime
-t:STAMP:
[[cc]yy]mmddhhmm[.ss]
-c: If the file does not exist, it will not be created
16, cp command
-i: interactive
-r, R: Recursively copy the directory and all its contents
-a: Archive, equivalent to -dR --preserv=all
-d: --no-dereference --preserv=links Do not copy the original file, only copy the link name
-p: Same as --preserv=mode, ownership, timestamp
-v:--verbose
-f:--force
17, alias defines alias
Display all available command aliases of the current shell process
[root@localhost ~]# alias
Define the alias NAME, which is equivalent to executing the command VALUE
[root@localhost ~]# alias NAME='VALUE'
Aliases defined in the command line are only valid for the current shell process.
If you want it to be permanently valid, it must be defined in the configuration file
Only for the current user: ~/.bashrc
Valid for all users: /etc/bashrc
Undo the use of aliases: unalias
18, mv command uses
Frequently used options:
-i: interactive
-f: Force
19, use the rm command
Frequently used options:
-i: interactive
-f: Forced deletion
-r: Recursion
20, tree displays the directory tree
-d: Only show directories
-L level: Specify the number of levels to display
-P pattern: Only display paths matched by the specified pattern
21, mkdir creates directory
-p: Exists without reporting errors and can automatically create the required directories
-v: Display detailed information
-m MODE: Specify permissions directly when creating a directory
22, rmdir deletes empty directories
-p: Recursively delete the parent empty directory
-v: Display detailed information
23, rm deletes data
-r: Recursively delete the directory tree
-f: Forced deletion without prompt
24, STDOUT and STDERR are redirected to files
Format: Command Operation Symbol File Name
>: Redirect STDOUT to a file
2>: Redirect STDERR to a file
&& gt;: Reset all outputs to the file
& gt;: The file content is covered with
set -C: It is forbidden to cover the existing documents, but you can add forced coverage: & gt; |
set C: Allow overwriting
>>: Based on the original content, additional content
2>: Override redirection error output data stream
2>>: Append redirection error output data stream
The standard output and error output are directed to different locations: the format is as follows;
COMMAND > /path/to/file.out 2> /path/to/error.out
Merge standard output and error output into the same data stream for redirection: the format is as follows;
&& gt;: Cover the redirect
COMMAND > /path/to/file.out 2> &1 (The order is important)
COMMAND >> /path/to/file.out 2>> &1
(): Merge STDOUT of multiple programs
(cal 2007; cal 2008)> all.txt
25, tr - convert and remove characters
tr [OPTION]...SET1 [SET2]Options:
-c or --complerment: Take the complement of the character set
-d or --delete: delete all characters belonging to the first character set
-s or --squeeze-repeats: Represent consecutively repeated characters as a single character
-t or --truncate-set1: Convert the characters corresponding to the first character set into the characters corresponding to the second character set
Use < to redirect standard input
Some commands can accept STDIN imported from a file
$tr ‘a-z’ ‘A-Z’ This command will convert all lowercase characters in /etc/issue into writing characters
tr –d abc < /etc/fstab Delete all characters in abc in the fstab file
[root@localhost ~]# cat > filea
mage
wangxiaochun
Press ctrl d to leave, you can use files instead of keyboard input
[root@localhost ~]# cat > filea < fileb
26, less: View input page by page
ls -l /etc | less
mail: Send via email input:
echo "testemail" | mail -s "test" user@example.com
lpr: Send input to printer
echo "testprint" | lpr-Pprinter_name
The above is the detailed content of Comprehensive detailed explanation of CentOS commands. For more information, please follow other related articles on the PHP Chinese website!

Hot AI Tools

Undress AI Tool
Undress images for free

Undresser.AI Undress
AI-powered app for creating realistic nude photos

AI Clothes Remover
Online AI tool for removing clothes from photos.

Clothoff.io
AI clothes remover

Video Face Swap
Swap faces in any video effortlessly with our completely free AI face swap tool!

Hot Article
Hot Tools

Notepad++7.3.1
Easy-to-use and free code editor

SublimeText3 Chinese version
Chinese version, very easy to use

Zend Studio 13.0.1
Powerful PHP integrated development environment

Dreamweaver CS6
Visual web development tools

SublimeText3 Mac version
God-level code editing software (SublimeText3)


 Difference between centos and ubuntu
Apr 14, 2025 pm 09:09 PM
Difference between centos and ubuntu
Apr 14, 2025 pm 09:09 PM
The key differences between CentOS and Ubuntu are: origin (CentOS originates from Red Hat, for enterprises; Ubuntu originates from Debian, for individuals), package management (CentOS uses yum, focusing on stability; Ubuntu uses apt, for high update frequency), support cycle (CentOS provides 10 years of support, Ubuntu provides 5 years of LTS support), community support (CentOS focuses on stability, Ubuntu provides a wide range of tutorials and documents), uses (CentOS is biased towards servers, Ubuntu is suitable for servers and desktops), other differences include installation simplicity (CentOS is thin)
 Centos shutdown command line
Apr 14, 2025 pm 09:12 PM
Centos shutdown command line
Apr 14, 2025 pm 09:12 PM
The CentOS shutdown command is shutdown, and the syntax is shutdown [Options] Time [Information]. Options include: -h Stop the system immediately; -P Turn off the power after shutdown; -r restart; -t Waiting time. Times can be specified as immediate (now), minutes ( minutes), or a specific time (hh:mm). Added information can be displayed in system messages.
 Centos configuration IP address
Apr 14, 2025 pm 09:06 PM
Centos configuration IP address
Apr 14, 2025 pm 09:06 PM
Steps to configure IP address in CentOS: View the current network configuration: ip addr Edit the network configuration file: sudo vi /etc/sysconfig/network-scripts/ifcfg-eth0 Change IP address: Edit IPADDR= Line changes the subnet mask and gateway (optional): Edit NETMASK= and GATEWAY= Lines Restart the network service: sudo systemctl restart network verification IP address: ip addr
 .NET Core Quick Start Tutorial 1. The beginning: Talking about .NET Core
May 07, 2025 pm 04:54 PM
.NET Core Quick Start Tutorial 1. The beginning: Talking about .NET Core
May 07, 2025 pm 04:54 PM
1. The Origin of .NETCore When talking about .NETCore, we must not mention its predecessor .NET. Java was in the limelight at that time, and Microsoft also favored Java. The Java virtual machine on the Windows platform was developed by Microsoft based on JVM standards. It is said to be the best performance Java virtual machine at that time. However, Microsoft has its own little abacus, trying to bundle Java with the Windows platform and add some Windows-specific features. Sun's dissatisfaction with this led to a breakdown of the relationship between the two parties, and Microsoft then launched .NET. .NET has borrowed many features of Java since its inception and gradually surpassed Java in language features and form development. Java in version 1.6
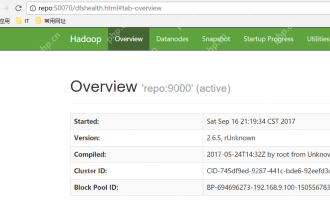 Hadoop pseudo-distributed cluster construction
May 07, 2025 pm 04:45 PM
Hadoop pseudo-distributed cluster construction
May 07, 2025 pm 04:45 PM
Software preparation I am using a virtual machine with CentOS-6.6, with the host name repo. Refer to the steps to install a Linux virtual machine in Windows, I installed JDK in that virtual machine, refer to the guide to installing JDK in Linux. In addition, the virtual machine is configured with a key-free login itself, and the settings for configuring key-free login between each virtual machine are referenced. The download address of Hadoop installation package is: https://mirrors.aliyun.com/apache/hadoop/common/. I am using hadoop 2.6.5 version. Upload the Hadoop installation package to the server and unzip [root@repo~]#tarzxv
 Postman Integrated Application on CentOS
May 19, 2025 pm 08:00 PM
Postman Integrated Application on CentOS
May 19, 2025 pm 08:00 PM
Integrating Postman applications on CentOS can be achieved through a variety of methods. The following are the detailed steps and suggestions: Install Postman by downloading the installation package to download Postman's Linux version installation package: Visit Postman's official website and select the version suitable for Linux to download. Unzip the installation package: Use the following command to unzip the installation package to the specified directory, for example /opt: sudotar-xzfpostman-linux-x64-xx.xx.xx.tar.gz-C/opt Please note that "postman-linux-x64-xx.xx.xx.tar.gz" is replaced by the file name you actually downloaded. Create symbols
 How to install centos
Apr 14, 2025 pm 09:03 PM
How to install centos
Apr 14, 2025 pm 09:03 PM
CentOS installation steps: Download the ISO image and burn bootable media; boot and select the installation source; select the language and keyboard layout; configure the network; partition the hard disk; set the system clock; create the root user; select the software package; start the installation; restart and boot from the hard disk after the installation is completed.
 CentOS: What Led to the Decision to End Support
Apr 23, 2025 am 12:10 AM
CentOS: What Led to the Decision to End Support
Apr 23, 2025 am 12:10 AM
RedHatendedsupportforCentOStoshifttowardsacommerciallyfocusedmodelwithCentOSStream.1)CentOStransitionedtoCentOSStreamforRHELdevelopment.2)ThisencourageduserstomovetoRHEL.3)AlternativeslikeAlmaLinux,RockyLinux,andOracleLinuxemergedasreplacements.
