
HTML5 adds a new element canvas, which is used for drawing. In fact, its performance is relatively close to that of div (in fact, it should belong to inline-block), and it provides many interfaces to easily draw rectangular boxes, garden triangles, etc.
PS: About the new elements of HTML5经过最近两天的学习,和以前对HTML5的认知,我认为HTML5其实还是HTML4,两者之间没多大的区别,无非是增加了点新东西。<br />我认为HTML5为我们带来的真正意义是:我们可以用javascript做更多的事情了;我们可以用javascript实现更好的产品了。比如HTML5就解决了我们头疼的跨域问题、实时通信API、与现在的canvas之所以HTML5叫HTML5,我认为他是划时代的,比如他让我们用网页开发游戏变成可能;比如他让电脑桌面只剩IE不在是传说(过于夸张)
Let’s get straight to the point, let’s draw a rectangular box and take a look. Here is a color picker for convenient color selection. PS: It feels really troublesome not to use jquery programming now. . .
Question: Defining style and defining height and width I encountered a problem as soon as I came here. Let me take a screenshot first:
Everyone is familiar with the canvas element. Figure 1 shows the case where width and height are set, and Figure 20 shows the case where style is specified:
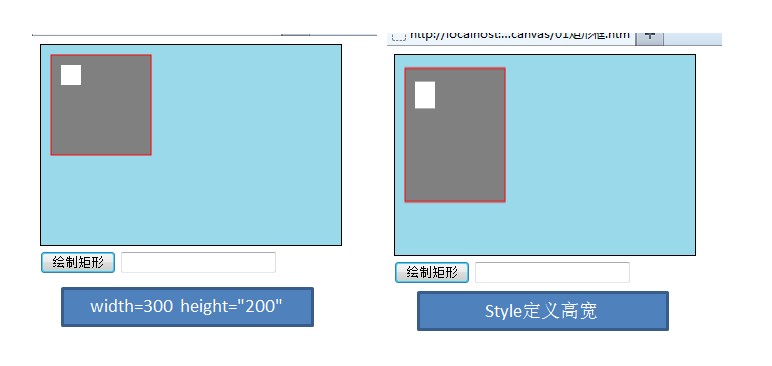
As you can see, for canvas, it is better to define the height and width honestly, and don’t use styles foolishly. Of course, this issue requires actual research to draw the final conclusion.
Okay, now let’s take a look at how to draw a rectangle:
PS:其实,使用该方法这么麻烦,完全可以将该函数封装下下,使用便会简单许多
1、使用getElementById方法获取绘制对象2、取得上下文getContext('2d'),这都是固定的写法3、指定填充的颜色fillStyle和绘制的颜色strokeStyle,即里面的颜色和边框的颜色4、指定线宽linewidth5、填充/绘制 fillRect/strokeRect 参数为 x,y,width,height6、若是要使其中一块透明,使用clearRectAt this point, drawing the rectangular frame comes to an end.
Draw a circle
Now let’s draw a circle. Speaking of drawing a circle, I actually seemed to have written one using js. I’ll post it here too:
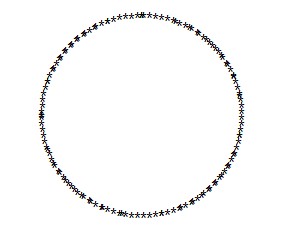
话说,他还是比较圆的说。。。
进入正题
说起画圆、正弦图等肯定会经过一定计算的,所以稍稍复杂点:
① 创建路径
② 创建图形路径
③ 路径创建完成后关闭路径
④ 设定绘制样式调用方法绘制之
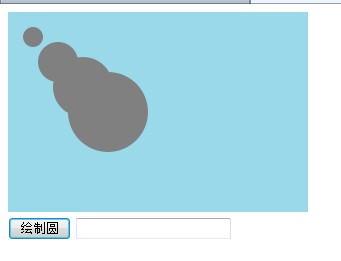
我们来看看绘制圆过程中其它地方都没有问题,但是创建圆路径这块值得考虑:
arc方法参数很多,依次是:xy半径开始弧度(我们一般喜欢角度,所以要转换)结束弧度顺时针或者逆时针true为顺时针<br />其它都好说,主要这个开始角度和结束角度我们来研究下,因为开始我没搞懂,但后来我发现他其实很简单了。。。就是开始的角度和结束的角度嘛,和我们高中学的知识一样的,只不过单位换算Math.PI/180为一度。。。。<br />反正还是没说清楚,对了,记得我们高中画圆的除了圆规和一个计量三角形角度的半圆直尺了吗,我要说的角度就是那个。。。太坑爹了!<br />好像最右边是0度,垂直是90度,水平是180度,既然如此,我们再来看看<br /><br><div class="msgheader"><div class="right"><span style="CURSOR: pointer" onclick="copycode(getid('phpcode20'));"><u>复制代码</u></span></div>代码如下:</div><div class="msgborder" id="phpcode20"><br /> 正时针逆时针 <br /> <!DOCTYPE html><br /> <html xmlns="http://www.w3.org/1999/xhtml"><br /> <head><br /> <title></title><br /> <script type="text/javascript"><br /> function draw() {<br /> //获取canvas对象<br /> var canvas = document.getElementById('canvas');<br /> if (canvas == null) {<br /> return false;<br /> }<br /> var context = canvas.getContext('2d');<br /> context.fillStyle = '#99d9ea';<br /> context.fillRect(0, 0, 400, 300); //填充画布结束<br /> <br /> context.beginPath();<br /> context.arc(80, 80, 50, 0, 180 * Math.PI / 180, true);<br /> context.closePath();<br /> context.fillStyle = 'gray';<br /> context.fill();<br /> <br /> context.beginPath();<br /> context.arc(180, 180, 50, 0, 180 * Math.PI / 180, false);<br /> context.closePath();<br /> context.fillStyle = 'gray';<br /> context.fill();<br /> <br /> <br /> }<br /> </script><br /> </head><br /> <body><br /> <canvas id="canvas" width="400" height="300"><br /> </canvas><br /> <br /> <button onclick="draw();"><br /> 绘制圆</button><br /> <input type="color" /><br /> </body><br /> </html><br /> </div><br /><p><img alt="" src="http://files.jb51.net/file_images/article/201304/2013042416135933.jpg" /></p><p>我们发现正时针与逆时针还是有所不同的,</p><div class="cnblogs_code"><pre class="brush:php;toolbar:false"> context.arc(180, 180, 50, 90 * Math.PI / 180, 290 * Math.PI / 180, true);原谅我这里居然思考了半个小时,我甚至搜索了高中的资料。。。。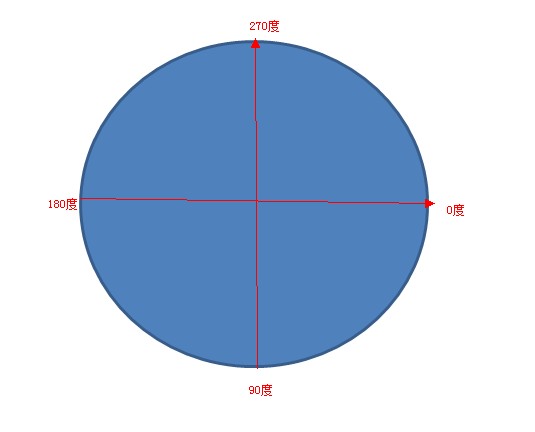
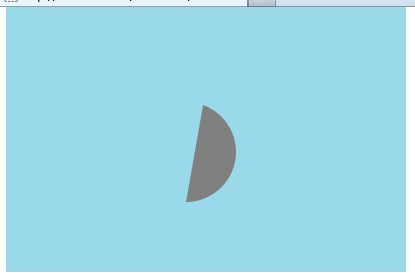
于是我好像明白了点什么。。。。。。
moveTo与lineTo现上实验结果:
以上代码几乎一样,但是他产生的结果却不同: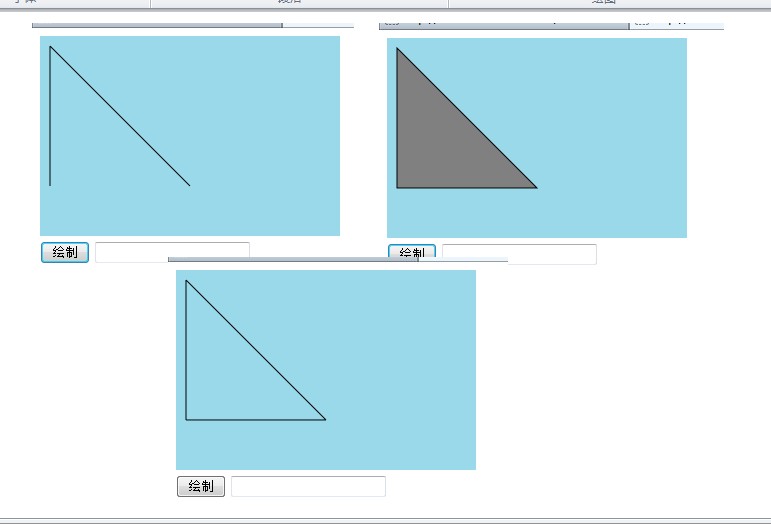
我认为,使用moveto后相当于新开一起点,之前的一笔勾销,若是只使用lineto的话,他会将几个点连成线,若是可以组成图形便会拥有中间色彩


