
Forms enable you to collect information from website visitors. Whether it's registering an account, logging into your website, providing you with feedback about a product, contacting you, or subscribing to a newsletter, you can collect data through forms.
With WordPress, it is very easy to integrate forms into your website. Most themes will provide you with common forms right out of the box, such as login, registration, and contact forms.
But the problem is that you may not like what is included by default. Maybe you want a tool that fits better into your overall theme or collects additional data.
In this article, I'll show you how to create beautiful forms that match your theme design and color scheme without writing any HTML or CSS code.
You can use dozens of free and paid plugins to create custom forms. In this example, we will use a free plugin called Ultimate Member.
The best thing about this plugin is that it creates everything for you – forms, pages, email newsletters, and more. It also features a super customizable form builder that offers tons of field types (such as date pickers and file uploads), as well as thousands of icons that can be included in your forms to make them eye-catching.
Before we begin, you need to install the plugin. To do this, follow these steps:
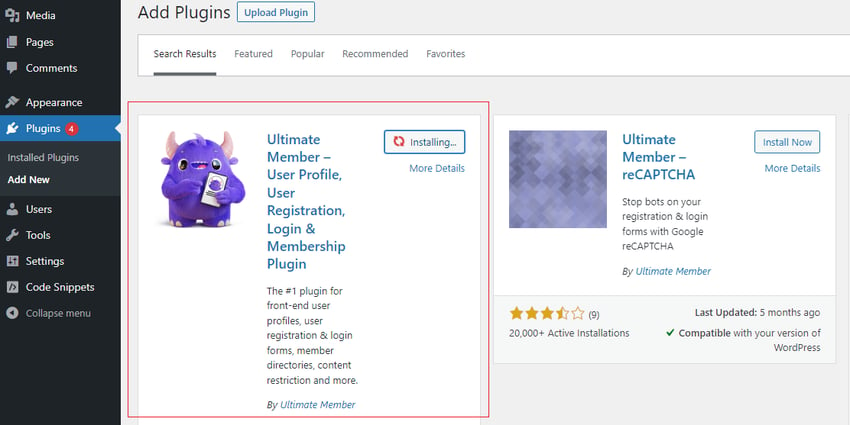
After the installation is complete, you will find theUltimate Membertag in the information center. Navigate toUltimate Membership > Settingsto see all options.
As I mentioned at the beginning of this article, the Ultimate Member plugin helps you create different types of pages that are typically required in your website.
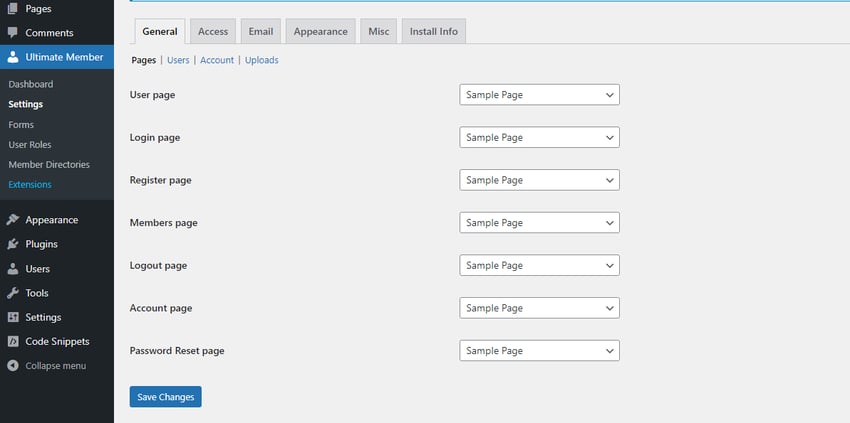
You can also add a newsletter sign-up prompt to your website and customize the welcome email (Account Activation Email) to your liking.
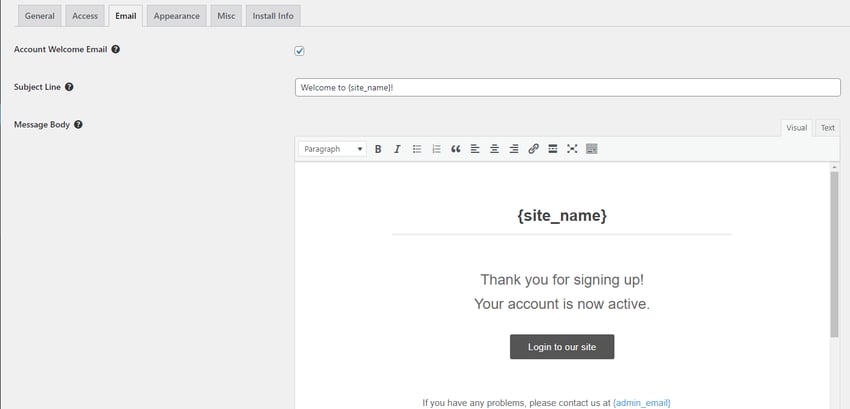
You can customize various pages and forms from theAppearancetab. Now, let's see how to create a form in your website.
Navigate toUltimate Members > Formsin your WordPress dashboard. There you should find the defaultLogin,Register,andProfileforms.
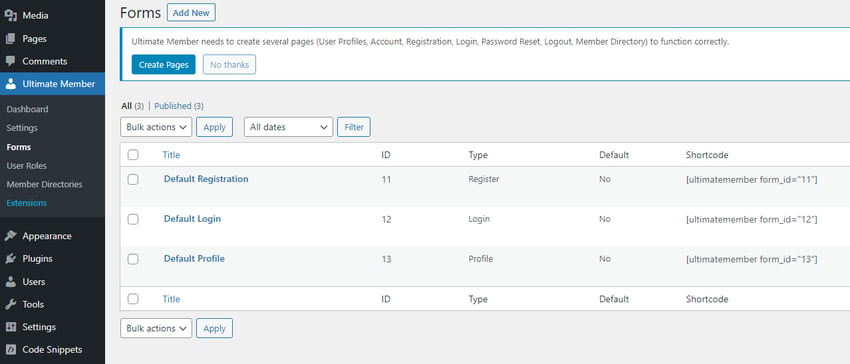
You can edit one of these forms or create a new one from scratch. ClickEditon any form to enter the form builder.
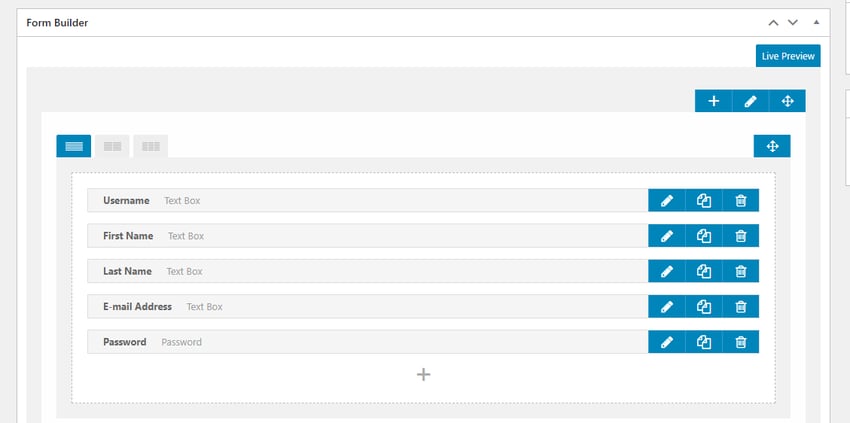
There are fields for username, first name, last name, email address, and password. The first four are all text boxes, while password is a password type field, similar to a text field, but with masked input.
You can add new fields or customize existing fields. To customize an existing field, simply click on the pencil icon next to the field name and a schema will appear containing the field details.
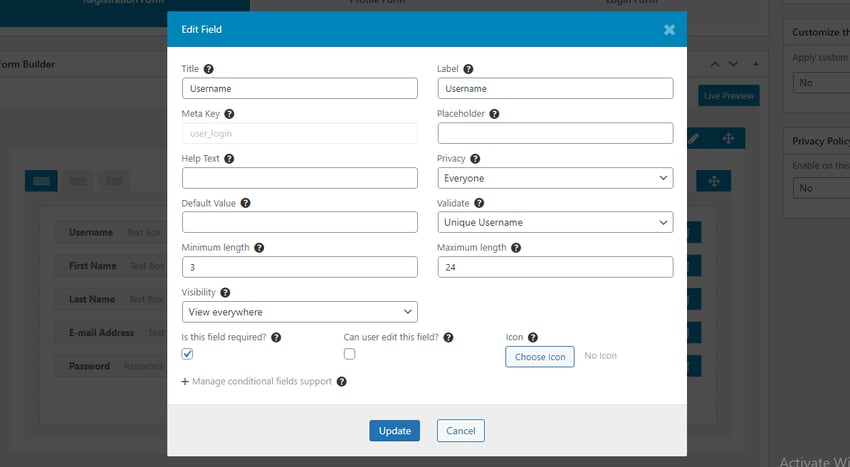
Here you can see a bunch of input customization options. You can get more information about each option by hovering over the question mark icon above each option. This will display a tooltip.
To add a new field, click theicon below the other fields to open the Field Manager.
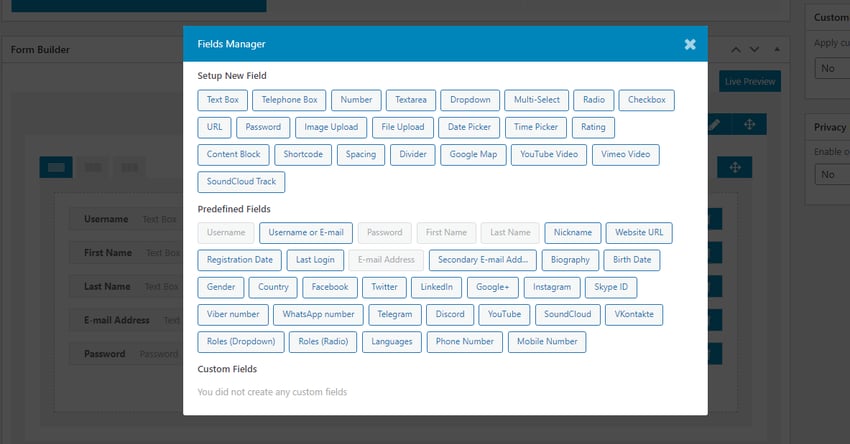
Use this input to select the type that matches what you want to collect. You can also select a custom field below if you have created one before.
After selecting a field, a new modal will appear where you can provide details about the input (title, placeholders, etc.) and add an icon. Once completed, click theAddbutton to add the field to your form.
To see how your form will look, click theLive Previewbutton at the top of the form builder.
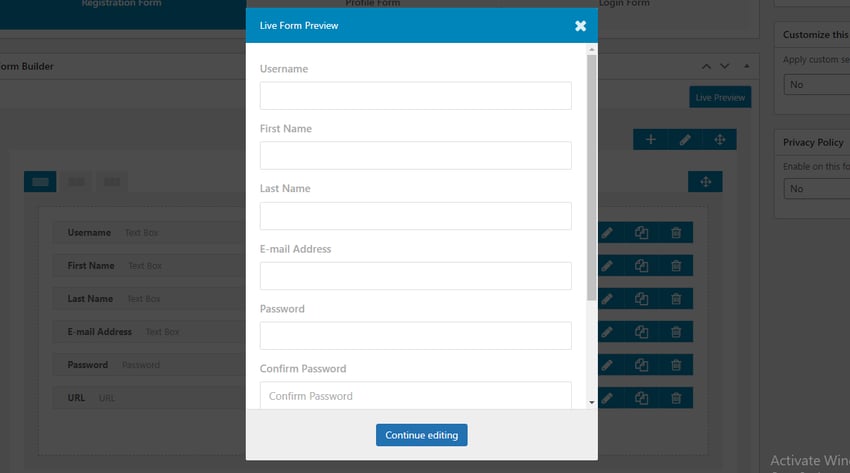
You can also add margins, padding, border color, border radio, etc. You can even use the line editor to link CSS classes to each input (click the pencil icon belowLive Preview).
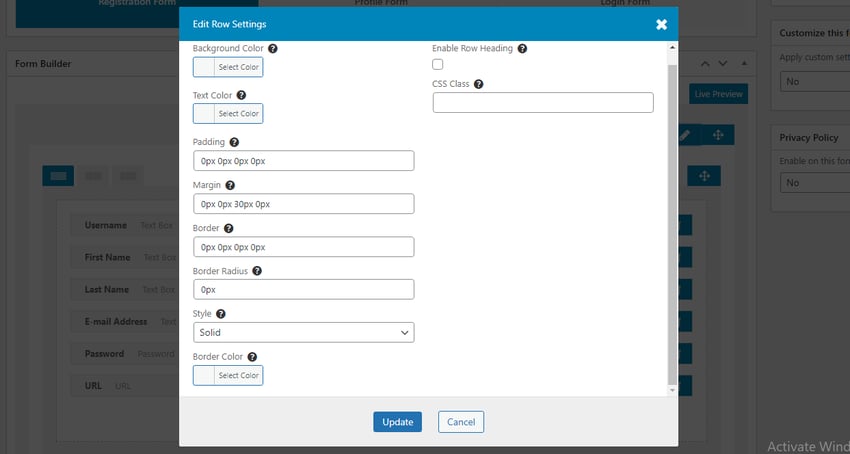
Using these tools, you can easily create attractive forms and make them blend in with your overall theme design.
While there are many other plugins for creating forms, Ultimate Member is definitely one of the most feature-rich. Not to mention it's free!
The above is the detailed content of Create Custom Forms in WordPress: A Step-by-Step Guide. For more information, please follow other related articles on the PHP Chinese website!


