If win7vt virtualization is turned on, it must be set in the BIOS. Many friends don’t know how to turn it on. Let’s talk to you about how to turn on vt virtualization in win7 system.
Method 1:
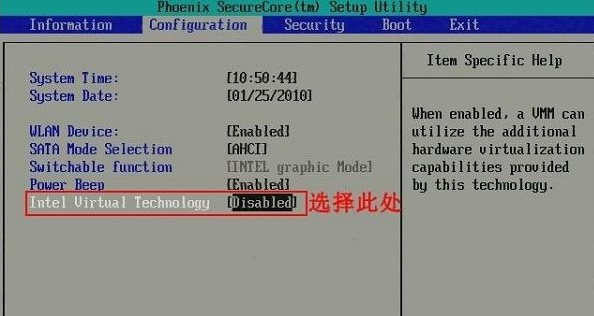
1. After entering the BIOS settings, switch to the "Configuration" option, move the cursor to "Intel Virtual Technology" and press Enter. If the VT option is not found or Unchangeable, indicating that VT technology is not supported.

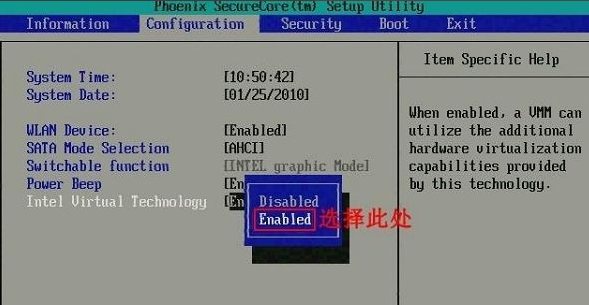
#2. After opening the options, select "Enabled" and press Enter.

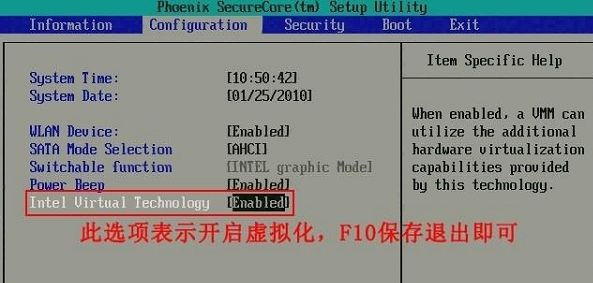
#3. At this time, the option will change to Enabled. Press the F10 hotkey to save and exit to enable the VT function.

Method 2:
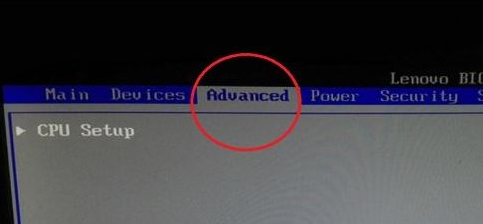
1. After entering the bios settings, switch to the "Advanced" option, select "CPU Setup" and press the Enter key.

2. Then move to "Intel(R)Virtualization Technology", press Enter, set it to "Enabled", and then press F10 to save.

The above content is about how to enable vt virtualization in Lenovo win7. You can follow the above operations to set up. I hope this article will be helpful to you.
The above is the detailed content of How to enable vt virtualization in Lenovo win7 ultimate version. For more information, please follow other related articles on the PHP Chinese website!


