
When a newly purchased laptop or desktop computer is shipped from the factory, it usually has only one partition, but only one drive letter. This will more or less confuse the software, and it is also easy to mix it with system files. At this time, we will think Partition the system. So how to partition the hard disk of the win7 system? The editor below has compiled a tutorial on win7 system partitioning for everyone, let’s take a look.
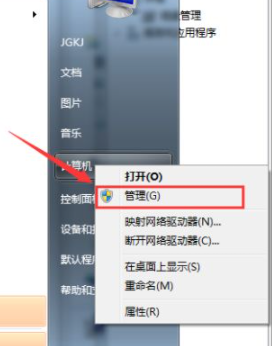
1. Select "My Computer", right-click and select Manage, and then you will enter the "Computer Management" page.
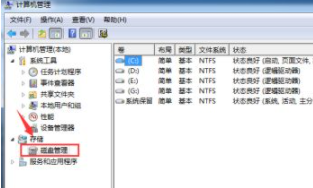
2. After that, you will enter the "Computer Management" page, and then we find "Disk Management" on the left and click to open it.
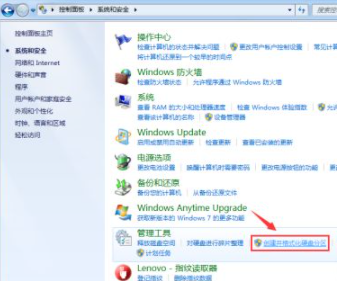
3, or you can go to Control Panel-System and Security, and then click "Create and format hard disk partition".
4. You will then enter the "Disk Management" page.
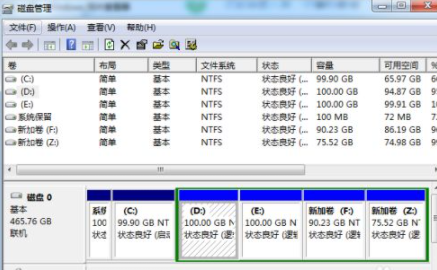
5. After that, right-click to select the partition and select "Compress Volume" through the menu to adjust the partition size.
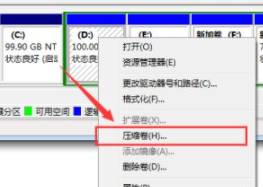
6. Finally, select the space that needs to be compressed and click "Compress" to compress it.
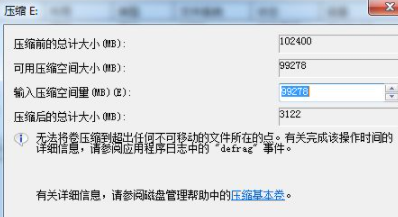
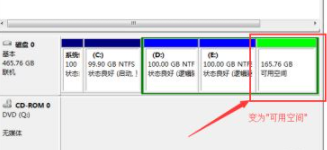
7. After completing the transformation from one partition to two partitions, you need to divide the large partition into small partitions.
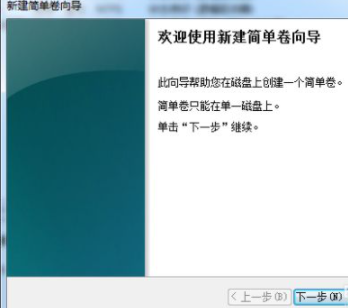
First format it to "available space", then right-click and select "New Simple Volume" in the available space option
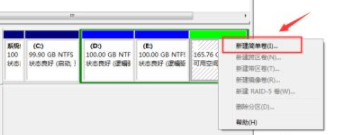
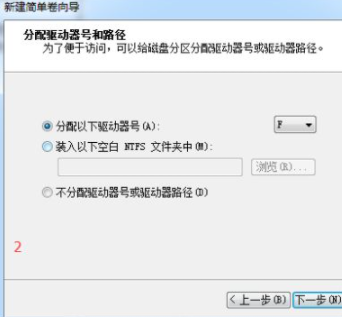
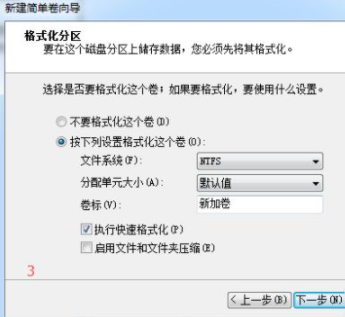
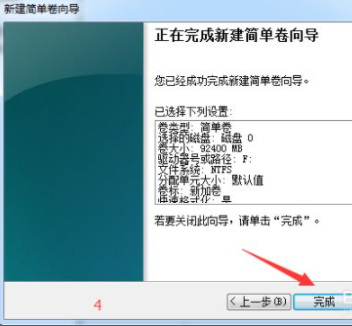
8. Then enter the New Volume Wizard, click Next, enter the drive letter selection, and then enter the "Format" stage. After selecting whether to format, click "Next" and finally click "Finish" (Figure 4). The new partition is completed.
The above is the detailed content of How to partition win7. For more information, please follow other related articles on the PHP Chinese website!
 How to solve the problem that the hard disk partition cannot be opened
 Two-way data binding principle
 Web page opens slowly
 What to do if the computer has no sound
 How to convert lowercase to uppercase in c language
 Springcloud five major components
 How to type double quotes in latex
 Ranking of foreign CDN service providers


