


In the windows7 system we use, there is a certain amount of system cache space. The purpose of these spaces is to help the computer read and write data faster. If there is insufficient cache space, the system will run slower. We'll detail how to set up a cache to resolve the issue in this case.
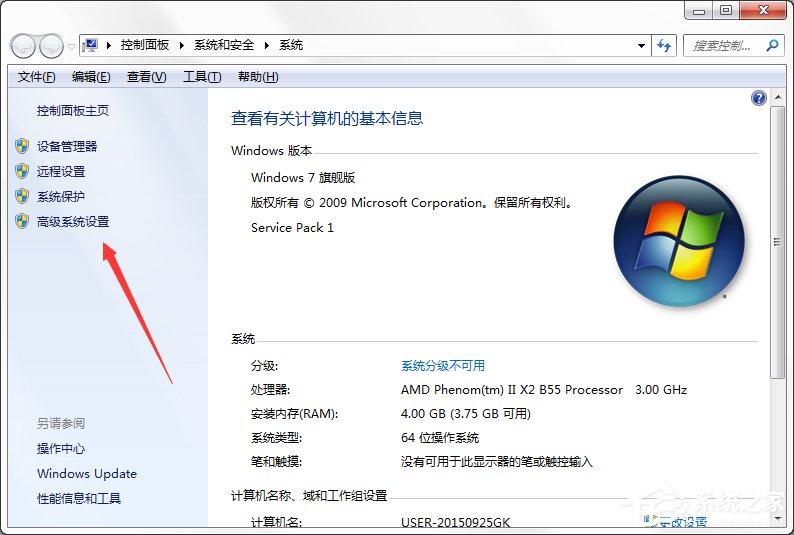
1. Turn on the computer, use the mouse to select the computer on the desktop, then right-click the mouse and select Properties;
2. Select Advanced System Settings level system settings;
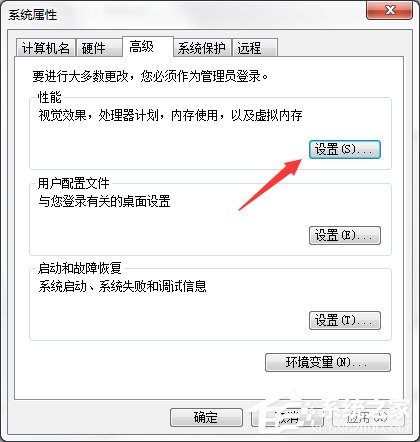
3. Enter the system properties window, select Advanced and select Settings under Performance Settings;
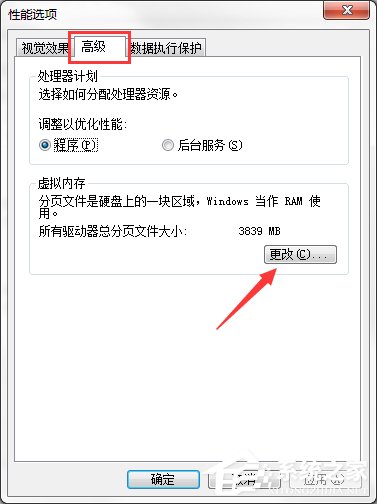
4. Select Advanced and click Change;
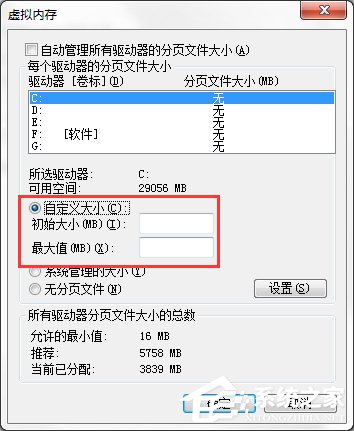
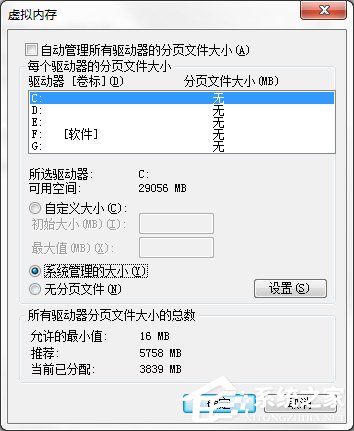
5. Enter the virtual memory setting window. If you don’t know how to set it up, you can choose to automatically allocate hosting and let the system set it up automatically;

6. Of course, as long as you cancel the automatic allocation option, you can also set it manually;

7. Select Custom, and then enter the virtual space size you need to set, Or select System Management Size;
8. After the settings are completed, click OK and restart the computer.
As long as the system cache is cleaned, the computer's cache space will be released, even if the cache space becomes smaller after long-term use. You can follow the guide above to set your system's default cache size if you think the default size is insufficient.
The above is the detailed content of How to set up Windows 7 system cache space. For more information, please follow other related articles on the PHP Chinese website!


![[Web front-end] Node.js quick start](https://img.php.cn/upload/course/000/000/067/662b5d34ba7c0227.png)


