
How to enable udma function in Win7 system?After we use the computer for a period of time, we often find that the read and write speed of the disk begins to slow down, which will take up more CPU resources to run the program. In fact, we can just turn on the udma function, which can speed up disk reading. Write speed to save more CPU resources, so how to enable the udma function in win7? The following editor will share with you a tutorial on how to enable the udma function in win7 system, let’s take a look!

1. Shortcut key win r to bring up the running window; as shown in the figure:

2. Enter regedit and click OK. Open the registry; as shown in the picture:

3. Find hkey_local_machine in the registry and open it; as shown in the picture:
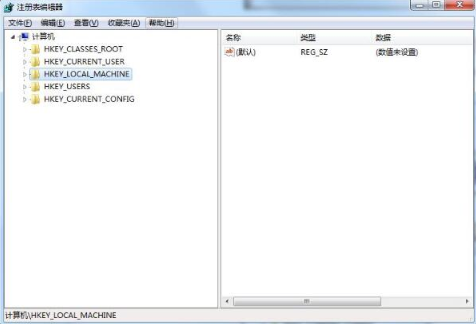
4. Locate system and open it; as shown in the picture:
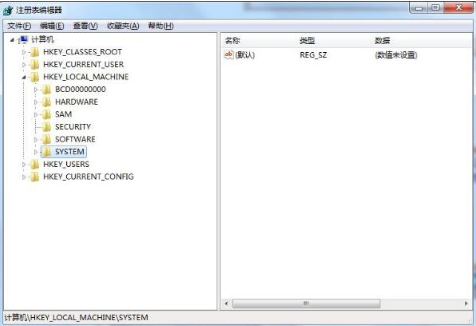
5. Continue to find currentcontrolset in system and open it; as shown in the picture:
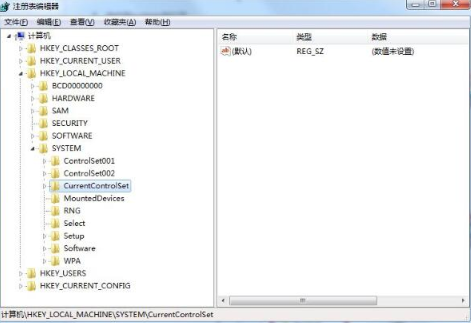
6. Then find the control and open it; as shown in the picture:
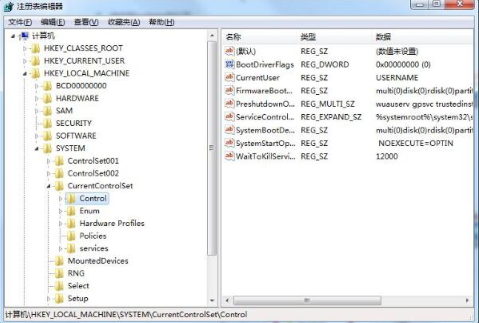
7. Then locate the class , and expand; as shown in the picture:
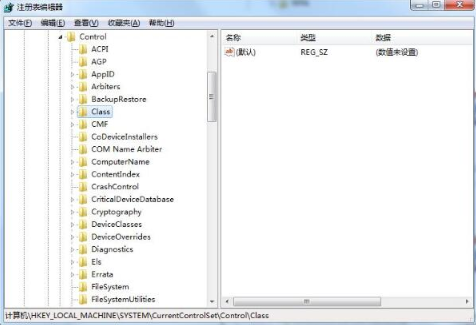
8. Navigate to the following folder, and then find the 0000 folder under the folder, we double-click 0000; as shown in the picture Display:

9. On the right side of the registry editor, right-click and select New;;DWOR Value; as shown in the figure:
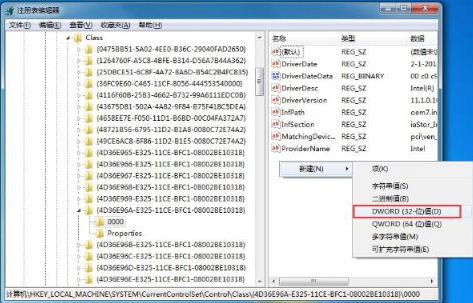
10. Name the new value REG_DWORD; as shown in the figure:

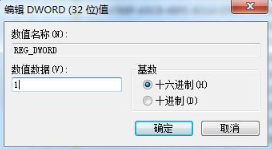
11. Right-click the file, select Modify, and change the value Modify the data to 1 and click OK. As shown in the picture:
The above is the entire content of [How to enable udma function in Win7 system - Tutorial sharing of enabling udma function in Win7 system]. More exciting tutorials are available on this site. !
The above is the detailed content of How to enable UDMA in Win7?. For more information, please follow other related articles on the PHP Chinese website!
 What to do if css cannot be loaded
 Undervalued coins to hoard in 2024
 Modify file name in linux
 What to do if an error occurs in the script of the current page
 How to set up virtual memory
 The difference between large function and max
 oracle database running sql method
 How to use return in C language


