How to set the account to a normal account in win7?When we use a computer, we will register a computer account to help us manage content and ensure security. Some users will choose to create multiple accounts for content management. , to better distinguish between life and work, but you don’t know how to set the account as a normal account to prevent the accounts from interfering with each other. Below, the editor will show you how to set the account as a normal account in win7.

1. Click "Start" in the lower left corner of the desktop and find "Control Panel" on the right.

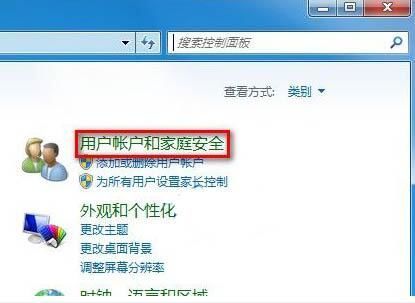
2. Open "Control Panel" and click "User Accounts and Family Safety".

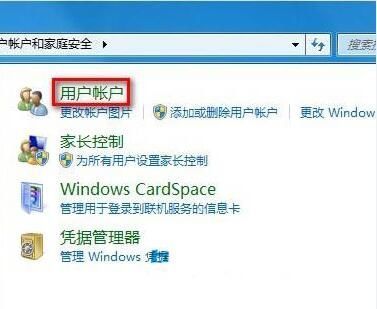
3, click on the "User Account" option.

4. Click to open "User Account" and then find the "Change Account Type" option.

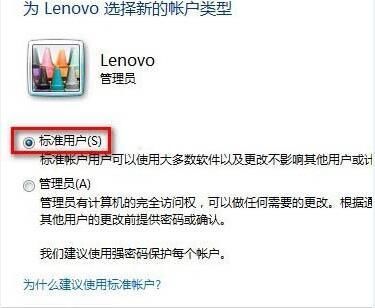
5, click to open "Change Account Type", then you can select "Standard User" to downgrade administrator rights to standard user rights.

6. After selecting, click "Change Account Type" in the lower right corner to confirm.

7, at this time the account "Lenovo" has become a modified "standard account". If the only administrator account on this computer is downgraded, be careful not to lower the account's permissions.

The above is the entire content ofHow to set the account as a normal account in win7-Win7 set the account as a normal account method. Please lock this site for more exciting content.
The above is the detailed content of How to set the account to a normal account in win7. For more information, please follow other related articles on the PHP Chinese website!


