


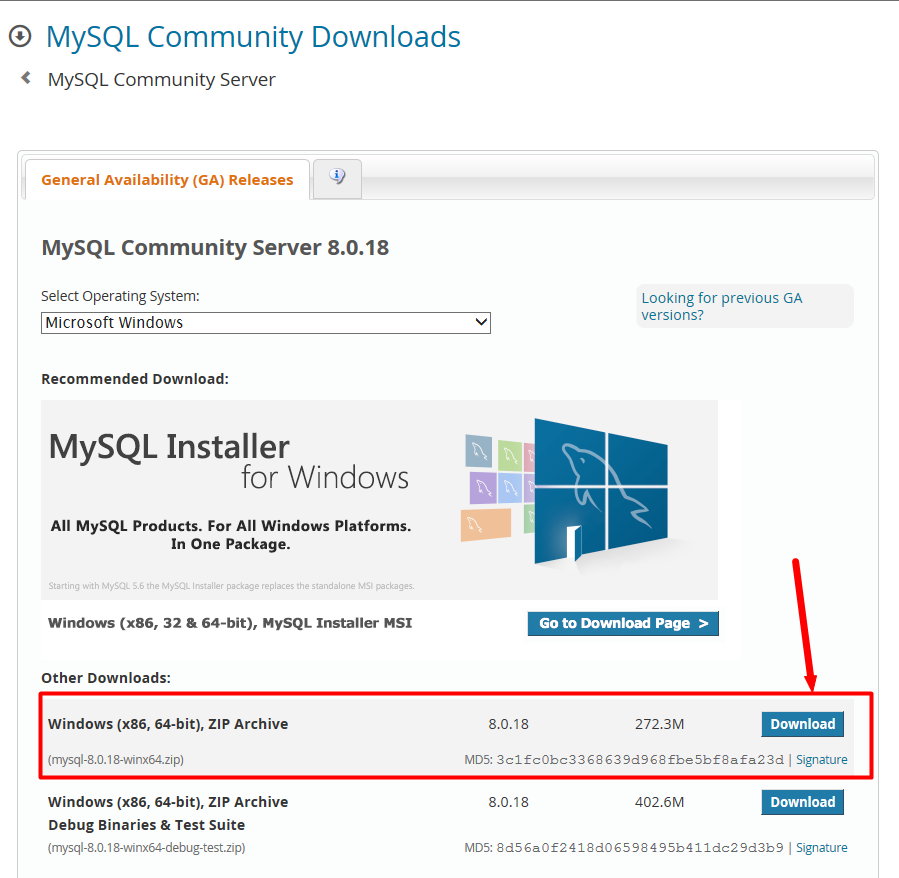
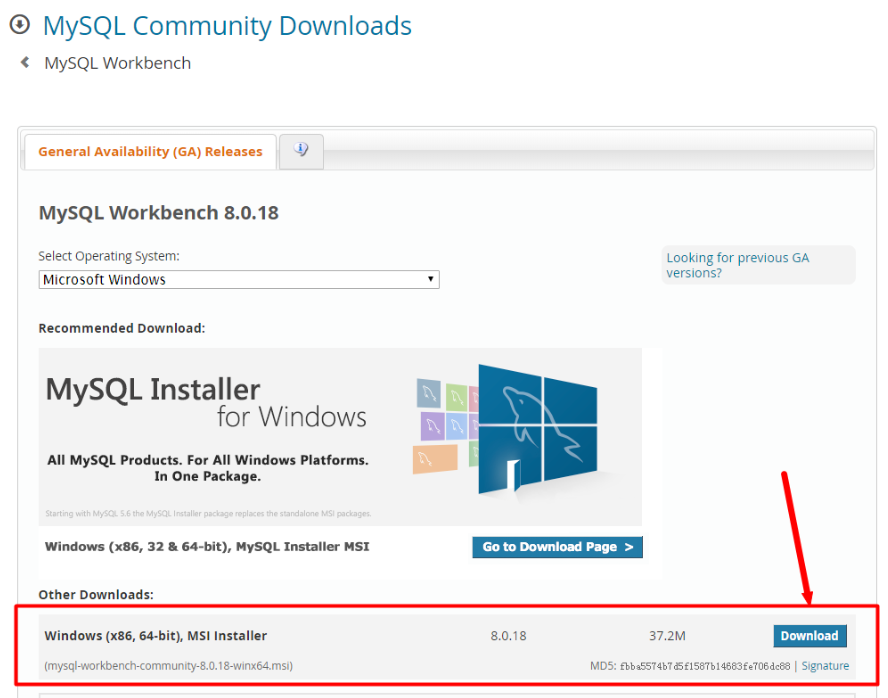
Open the URL, the page is as follows, confirm the requirements Download the operating system, click Download.
You don’t need to log in or register, just click No thanks, just start my download to download.
Put the decompressed folder into any directory to complete the setting of the mysql installation directory. Mine is C:\mysql-8.
In Windows systems, the configuration file defaults to the my.ini file (or my-default.ini) in the installation directory. Add my.ini in the installation root directory. , for example, here is: C:\mysql-8\my.ini, write the basic configuration.
my.ini reference configuration
[mysqld]
#设置3306端口
port = 3306
# 设置mysql的安装目录
basedir=C:\mysql-8
# 设置mysql数据库的数据的存放目录
datadir=C:\mysql-8\data
# 允许最大连接数
max_connections=200
# 服务端使用的字符集默认为8比特编码的latin1字符集
character-set-server=utf8
# 创建新表时将使用的默认存储引擎
default-storage-engine=INNODB
# 允许连接失败的次数。这是为了防止有人从该主机试图攻击数据库系统
max_connect_errors=10
# 默认使用“mysql_native_password”插件认证
default_authentication_plugin=mysql_native_password
[mysql]
# 设置mysql客户端默认字符集 default-character-set=utf8
[client]
# 设置mysql客户端连接服务端时默认使用的端口
port=3306
default-character-set=utf8
Note that basedir is my local installation directory and datadir is the location where my database data files are stored. Each configuration needs to be done according to your own environment. configuration.
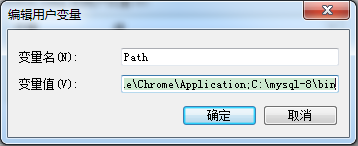
Add after the system variable PATH: the path to your mysql bin folder (such as C:\mysql-8\bin)
Execute the command in the bin directory of the MySQL installation directory:
mysqld --initialize --console
After the execution is completed, the root user's ID will be printed Initial default password, such as:

Attention! There is a paragraph in the execution output result: [Note] [MY-010454] [Server] A temporary password is generated for root@localhost: gFDdBy;e4JS. The "gFDdBy;e4JS" after root@localhost: is the initial password (excluding the first digit). space). Before changing the password, you need to remember this password and use it for subsequent logins.
If you are stupid, shut down too quickly, or don’t remember it, it’s okay. Delete the initialized datadir directory, execute the initialization command again, and it will be regenerated. Of course, you can also use security tools to force a password change.
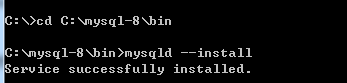
After opening the cmd window as an administrator, switch the directory to the bin directory where you decompressed the file, enter and press Enter to run
mysqld --install [Service name]
mysqld --install
You don’t need to write the service name after that. The default name is mysql. Of course, if you need to install multiple MySQL services on your computer, you can use different names to distinguish them, such as mysql5 and mysql8.
(The executable file path on my computer is always mapped to C:\Program Files\MySQL 8.0, not my actual installation directory, so I switched to C :\mysql-8\binReinstall)
As an administrator, enter in cmd:
net start mysql
service After the startup is successful, you can log in.
Note: There is no command to restart the mysql service on the Windows operating system. If you want to restart the service, you can only stop and then start.
net stop mysql #停止mysql
Uninstall the service:
mysqld --remove mysql
Execute the command in the bin directory of the MySQL installation directory :
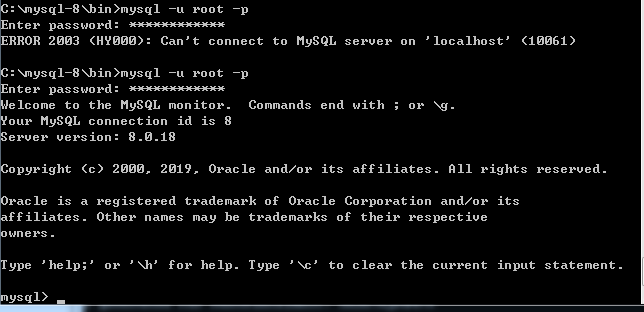
mysql -u root –p
At this time, you will be prompted to enter the password. Remember the password during installation in step 7 above. Fill it in and you will be able to log in successfully and enter the MySQL command mode.
Before MySQL 8.0.4, the password authentication plug-in for MySQL was "mysql_native_password", and you can change the password by executing it.
SET PASSWORD=PASSWORD('[修改的密码]');
But starting from MySQL8.0.4, "caching_sha2_password" is used. You can change the password like this:
ALTER USER 'root'@'localhost' IDENTIFIED BY 'root-password';

Because there are currently many database tools and link packages None of them support "caching_sha2_password". For convenience, I temporarily changed it back to the "mysql_native_password" authentication plug-in.
Modify the password verification plug-in and change the password at the same time. Execute the command in MySQL:
ALTER USER 'root'@'localhost' IDENTIFIED WITH mysql_native_password BY '新密码';
If you want to use the "mysql_native_password" plug-in authentication by default, you can configure the default_authentication_plugin item in the configuration file.
[mysqld]
default_authentication_plugin=mysql_native_password
You can use the command to check the default installed database:
show databases;
use mysql;
show tables;

It is found that the MySQL database is initialized by default, user The table stores MySQL user information. We can take a look at the default MySQL user:
select user, host, plugin, authentication_string from mysql.user;

管理员root的host是localhost,代表仅限localhost登录访问。如果要允许开放其他ip登录,则需要添加新的host。如果要允许所有ip访问,可以直接修改成“%”
--创建用户:
CREATE USER 'test'@'%' IDENTIFIED WITH mysql_native_password BY '123456';

--(需要注意:mysql8.0加密方式修改了)
--检查用户
select user, host, plugin, authentication_string from user\G;

--授权远程数据库

--授权所有权限
GRANT ALL PRIVILEGES ON *.* TO 'test'@'%';

--授权基本的查询修改权限,按需求设置
GRANT SELECT,INSERT,UPDATE,DELETE,CREATE,DROP,ALTER ON *.* TO 'test'@'%';

--查看用户权限
show grants for 'test'@'%';
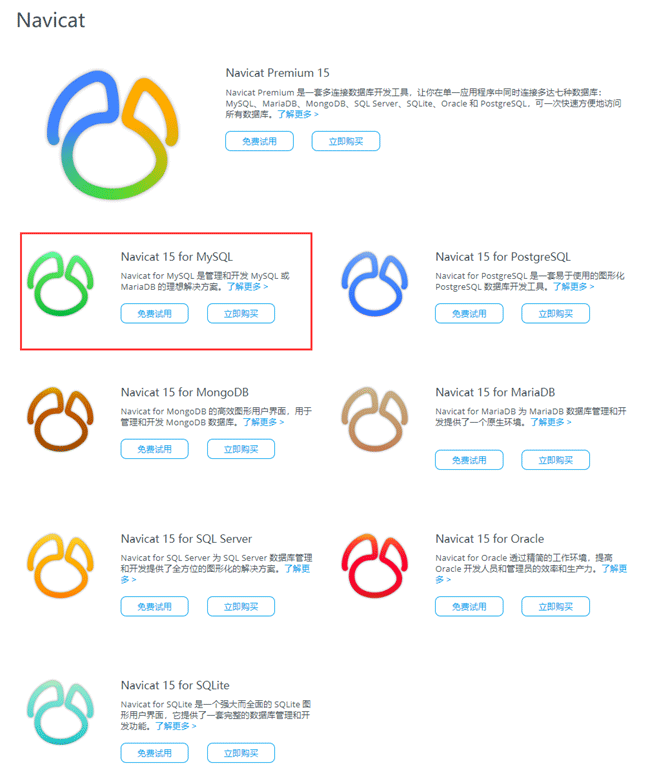
目前开发者用的最多的一款mysql图形用户管理工具,界面简洁、功能也非常强大,与微软的SQLServer管理器很像,简单易学,支持中文。
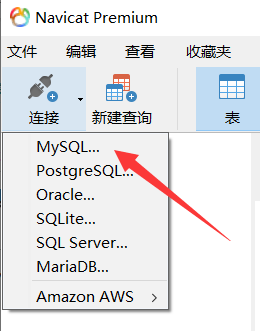
建立连接:
Mysql 官方的一个图形管理工具,用Python写的。支持数据库的创建、设计、迁移、备份、导出、导入等功能,支持windows、linux、mac主流的操作系统,使用起来非常的棒。
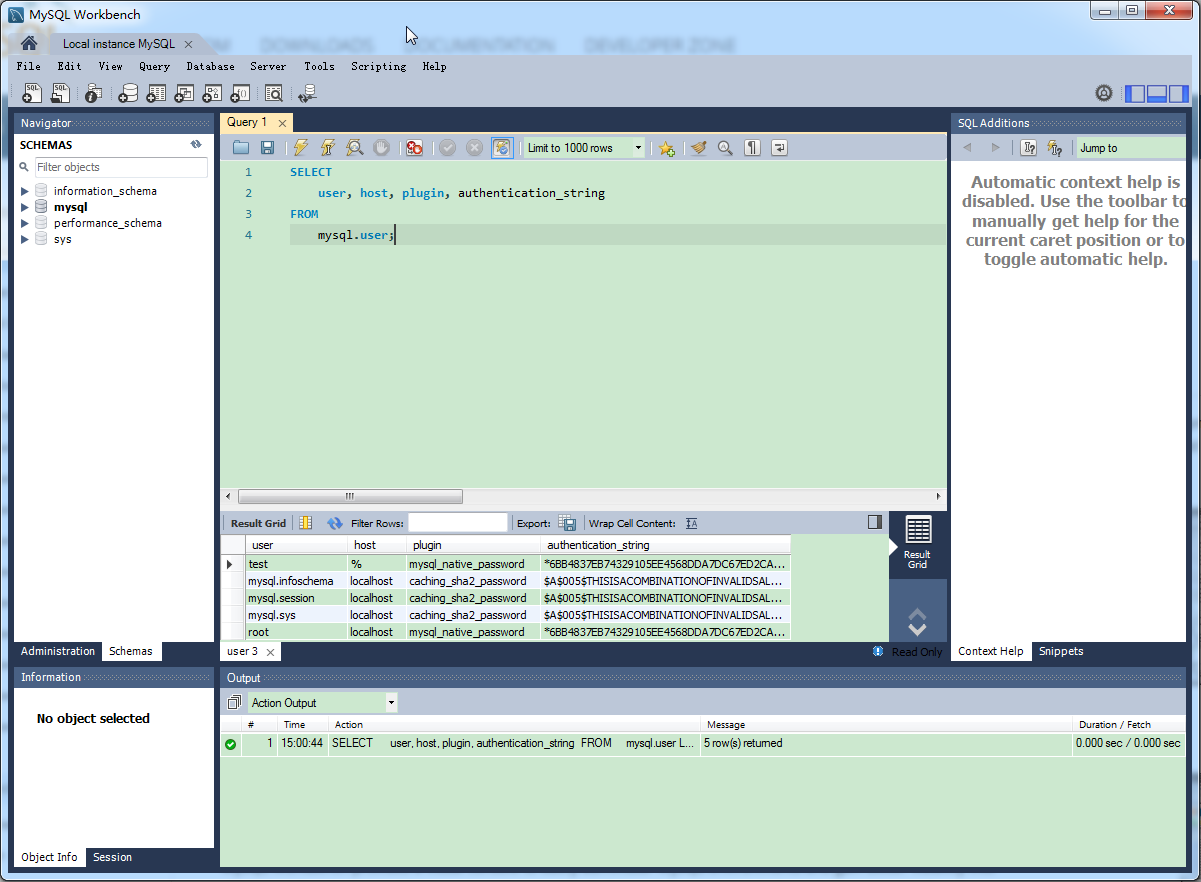
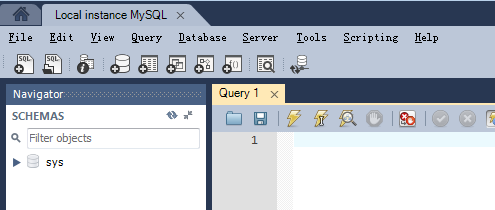
默认只显示:sys数据库
Mysql Workbench显示数据库元数据三个库information_schema库、performance_schema以及mysql库的方法:
先创建连接,连接到对应数据库,选择工具栏Edit ->Preference或者在右上角选择图标:

在对话框中勾选:show Metadata and Internal Schemas(显示元数据和内容的Schemas).。
不用重启软件,重新连接即可。
*** centos 7 ***
# 查看和mysql有关的安装包
yum search mysql

# 安装mysql社区版本yum源
yum -y install http://repo.mysql.com/yum/mysql-5.6-community/el/7/x86_64/mysql-community-release-el7-5.noarch.rpm


# 找到community社区版本的mysql包
yum search mysql |grep community

# 使用yum安装下列
yum -y install mysql-community-server.x86_64 mysql-community-client.x86_64 mysql-community-server.x86_64 mysql-community-client.x86_64
# 下载离线包
yumdownloader mysql-community-server.x86_64 mysql-community-client.x86_64 mysql-community-libs.x86_64 mysql-community-common.x86_64

# 安装
yum -y install mysql-community-client-5.6.41-2.el7.x86_64.rpm mysql-community-server-5.6.41-2.el7.x86_64.rpm mysql-community-common-5.6.41-2.el7.x86_64.rpm mysql-community-libs-5.6.41-2.el7.x86_64.rpm
# 启停服务
systemctl {start|stop|restart|status} mysqld.service
systemctl start mysqld.service

# 查看服务状态
systemctl status mysqld.service

# 安全初始化
/usr/bin/mysql_secure_installation

# 停系统防火墙
systemctl stop firewalld.service

# 查看强制访问控制状态
getenforce

# 关闭强制访问控制策略
setenforce 0# 创建root远程登陆密码 mysql -h 127.0.0.1 -u root -p mysql> grant all privileges on *.* to root@'%' identified by "root"; mysql> flush privileges;
The above is the detailed content of How to install MySQL database and use graphical management tools. For more information, please follow other related articles on the PHP Chinese website!


![[Web front-end] Node.js quick start](https://img.php.cn/upload/course/000/000/067/662b5d34ba7c0227.png)


