

First you need to install the gcc compiler:
yum -y install gcc-c++

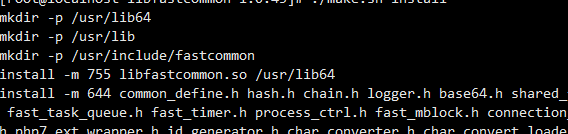
tar -zxvf V1.0.43.tar.gz
cd libfastcommon-1.0.43
./make.sh
./make.sh install
ln -s /usr/lib64/libfastcommon.so /usr/local/lib/libfastcommon.so
ln -s /usr/lib64/libfastcommon.so /usr/lib/libfastcommon.so
ln -s /usr/lib64/libfdfsclient.so /usr/local/lib/libfdfsclient.so
ln -s /usr/lib64/libfdfsclient.so /usr/lib/libfdfsclient.so
tar -zxvf V6.06.tar.gz
cd fastdfs-6.06
./make.sh
./make.sh install
mkdir -p /data/fastdfs/tracker
cd /etc/fdfs
cp tracker.conf.sample  tracker.conf
vim tracker.conf
The content to be modified is
#启用配置文件(默认启用)
disabled=false
#设置tracker的端口号,通常采用22122这个默认端口
port=22122
#设置tracker的数据文件和日志目录
base_path=/data/fastdfs/tracker
#设置http端口号,默认为8080
http.server_port=80
Start the service
#启动
/usr/bin/fdfs_trackerd /etc/fdfs/tracker.conf start

Check whether it is started
#查看启动端口
ss -ant | grep 22122
Check the startup log
#查看启动日志
tail -f /data/fastdfs/tracker/logs/trackerd.log

Add boot startup
vim /etc/rc.d/rc.local
Add startup command

If you find that it fails to start automatically after restarting, use the command
ll /etc/rc.d/rc.local
to check whether rc.local has executable permissions,If it does not have executable permissions, pass Command to authorize
chmod +x /etc/rc.d/rc.local
mkdir -p /data/fastdfs/storage
mkdir -p /data/fastdfs/storage/file
cd /etc/fdfs
cp storage.conf.sample  storage.conf
vim storage.conf
The content to be modified is
#启用配置文件(默认启用)
disabled=false
#组名,根据实际情况修改
group_name=group1
#设置storage的端口号,默认是23000,同一个组的storage端口号必须一致
port=23000
#设置storage数据文件和日志目录
base_path=/data/fastdfs/storage
#存储路径个数,需要和store_path个数匹配
store_path_count=1
#实际文件存储路径
store_path0=/data/fastdfs/storage/file
#tracker 服务器的 IP地址和端口号,如果是单机搭建,IP不要写127.0.0.1,否则启动不成功(此处的ip是我的CentOS虚拟机ip)
tracker_server=172.16.6.50:22122
#设置 http 端口号
http.server_port=8888
Start the service
#启动
/usr/bin/fdfs_storaged /etc/fdfs/storage.conf start
View the startup port
#查看启动端口
ss -ant | grep 23000
View the startup log
#查看启动日志
tail -f /data/fastdfs/storage/logs/storaged.log

[root@localhost /]# /usr/bin/fdfs_monitor /etc/fdfs/storage.conf
[2021-09-23 12:59:26] DEBUG - base_path=/opt/fastdfs_storage, connect_timeout=30, network_timeout=60, tracker_server_count=1, anti_steal_token=0, anti_steal_secret_key length=0, use_connection_pool=0, g_connection_pool_max_idle_time=3600s, use_storage_id=0, storage server id count: 0

server_count=1, server_index=0

tracker server is 172.16.8.11:22122

group count: 1

Group 1:
group name = group1
disk total space = 6818 MB
disk free space = 2169 MB
trunk free space = 0 MB
……
vim /etc/rc.d/rc.local
/usr/bin/fdfs_storaged /etc/fdfs/storage.conf start
[root@localhost ~]# ps -ef|grep fdfs
root     10335 17685  0 23:50 pts/3    00:00:00 grep --color=auto fdfs
root     13335     1  0 13:17 ?        00:00:07 /usr/bin/fdfs_storaged /etc/fdfs/storage.conf start
root     15779     1  0 12:59 ?        00:00:04 /usr/bin/fdfs_trackerd /etc/fdfs/tracker.conf
cp /etc/fdfs/client.conf.sample /etc/fdfs/client.conf
vim /etc/fdfs/client.conf
#tracker服务器文件路径
base_path=/data/fastdfs/tracker
#tracker服务器IP地址和端口号
tracker_server=172.16.7.50:22122
# tracker 服务器的 http 端口号,必须和tracker的设置对应起来
http.tracker_server_port=80
/usr/bin/fdfs_upload_file /etc/fdfs/client.conf /data/test.txt
tar xzvf redis-4.0.8.tar.gz
cd redis-4.0.8
make
cd src
make install PREFIX=/usr/local/redis
cd ../
mkdir /usr/local/redis/etc
mv redis.conf /usr/local/redis/etc
vim /usr/local/redis/etc/redis.conf
vim /etc/rc.d/rc.local
/usr/local/redis/bin/redis-server /usr/local/redis/etc/redis.conf
/usr/local/redis/bin/redis-server /usr/local/redis/etc/redis.conf
cp /usr/local/redis/bin/redis-server /usr/local/bin/
cp /usr/local/redis/bin/redis-cli /usr/local/bin/
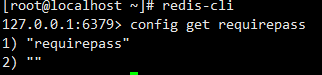
redis-cli
config get requirepass
config set requirepass *******
//****为你设置的密码
redis-cli -h 127.0.0.1 -p 6379 -a ****
#开放6379端口
firewall-cmd --zone=public --add-port=6379/tcp --permanent
#重启防火墙以使配置即时生效
systemctl restart firewalld
#查看系统所有开放的端口
firewall-cmd --zone=public --list-ports
#停止redis
pkill redis
#删除安装目录
rm -rf /usr/local/redis
#删除所有redis相关命令脚本
rm -rf /usr/bin/redis-*
#删除redis解压文件夹
rm -rf /root/download/redis-4.0.4
redis-cli shutdown
redis-server &
使用redis-cli客户端检测连接是否正常
$redis-cli
127.0.0.1:6379> keys *
(empty list or set)
127.0.0.1:6379> set key "hello world"
OK
127.0.0.1:6379> get key
"hello world"
Redis是key-value数据库,支持五种数据类型:string(字符串),hash(哈希),list(列表),set(集合)及zset(sorted set:有序集合)。
> set server:name "fido"  // 设置键值
OK
> get server:name  // 获取键值
"fido"
> setnx connections 10   // set if not exists
OK
> incr connections   // 原子性增加values值
(integer) 11
> incr connections
(integer) 12
> del connections  // 删除key
(integer) 1
> incr connections
(integer) 1
> rpush friends "Alice"   // 在末尾追加
(integer) 1
> rpush friends "Bob"
(integer) 2
> lpush friends "Sam"    // 插入到开头
(integer) 3
> lrange friends 0 -1     // 返回列表的子集,类似切片操作
1) "Sam"
2) "Alice"
3) "Bob"
> lrange friends 0 1
1) "Sam"
2) "Alice"
> lrange friends 1 2
1) "Alice"
2) "Bob"
> llen friends   // 返回列表长度
(integer) 3
> lpop friends   // 删除并返回列表第一个元素
"Sam"
> rpop friends   // 删除并返回列表最后一个元素
"Bob"
> lrange friends 0 -1
1) "Alice"
> del friends    // 删除key
(integer) 1     // 1表示成功,0表示失败
> sadd superpowers "flight"     // 添加元素
(integer) 1
> sadd superpowers "x-ray vision"
(integer) 1
> sadd superpowers "reflexes"
(integer) 1
> srem superpowers "reflexes"   // 删除元素1

> sismember superpowers "flight"   // 测试元素是否在集合中
(integer) 1
> sismember superpowers "reflexes"
(integer) 0
> smembers superpowers    // 返回集合中所有元素
1) "x-ray vision"
2) "flight"
> sadd birdpowers "pecking"
(integer) 1
> sadd birdpowers "flight"
(integer) 1
> sunion superpowers birdpowers    // 合并多个set,返回合并后的元素列表
1) "x-ray vision"
2) "flight"
3) "pecking"
> del superpowers   // 删除key
(integer) 1
> zadd hacker 1940 "Alan Kay"     // 给value指定一个编号,比如以年份1940作为编号
(integer) 1
> zadd hacker 1906 "Grace Hopper"
(integer) 1
> zadd hacker 1953 "Richard Stallman"
(integer) 1
> zadd hacker 1965 "Yukihiro Matsumoto"
(integer) 1
> zadd hacker 1916 "Claude Shannon"
(integer) 1
> zadd hacker 1969 "Linux Torvalds"
(integer) 1
> zadd hacker 1957 "Sophie Wilson"
(integer) 1
> zadd hacker 1912 "Alan Turing"
(integer) 1

> zrange hacker 2 4    // 切片返回有序集合中元素
1) "Claude Shannon"
2) "Alan Kay"
3) "Richard Stallman"

> del hacker    // 删除key
(integer) 1
> hset user:1000 name "John Smith"   // 给value指定一个field,比如name
(integer) 1
> hset user:1000 email "john.smith@example.com"
(integer) 1
> hset user:1000 password "s3cret"
(integer) 1
> hgetall user:1000   // 获得hash表中所有成员,包括field和value
1) "name"
2) "John Smith"
3) "email"
4) "john.smith@example.com"
5) "password"
6) "s3cret"

> hmset user:1001 name "Mary Jones" password "hidden" email
"mjones@example.com"   // 设置多个field和value
OK
> hget user:1001 name   // 根据field获取value
"Mary Jones"

> hset user:1000 visits 10    // field可以映射到数字值
(integer) 1
> hincrby user:1000 visits 1    // 原子性增加value的值,增加1
(integer) 11
> hincrby user:1000 visits 10    // 增加10
(integer) 21
> hdel user:1000 visits      // 删除field及其value
(integer) 1
> hincrby user:1000 visits 1
(integer) 1

> del user:1000     // 删除key
(integer) 1
> set resource:lock "Redis Demo"
OK
> expire resource:lock 120   // 设置生命周期为120s
(integer) 1
> ttl resource:lock   // 查看当前生命周期还剩多少时间
(integer) 109
> ttl resource:lock   // 120s后查看,返回-2表示已过期或不存在
(integer) -2

> set resource:lock "Redis Demo 2"
OK
> ttl resource:lock    // 返回-1表示永不过期
(integer) -1

改为upload_list8888,页面调用是失败的
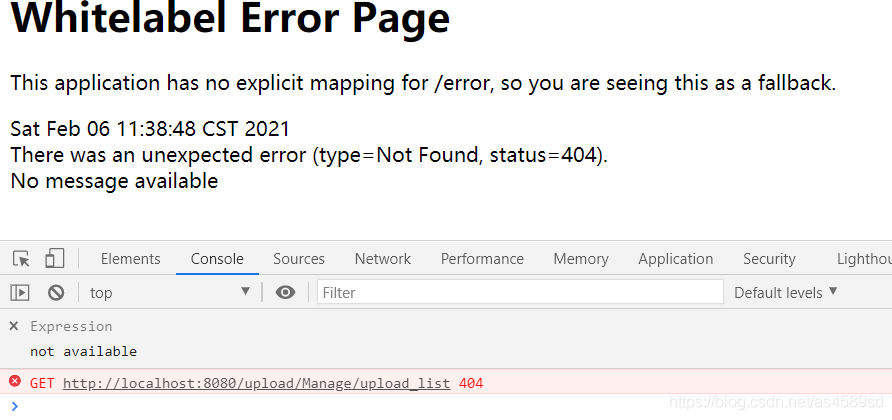
改回upload_list
打个比方,现在公司所有人都要填写一个表格,但是只有一支笔,这个时候就只能上个人用完了之后,下个人才可以使用,为了保证"笔"这个资源的可用性,只需要保证在接下来每个人的获取顺序就可以了,这就是 lock 的作用,当这支笔被别人用的时候,我就加 lock ,你来了那就进入队列排队等待获取资源(非公平方式那就另外说了),这支笔用完之后就释放 lock ,然后按照顺序给下个人使用。
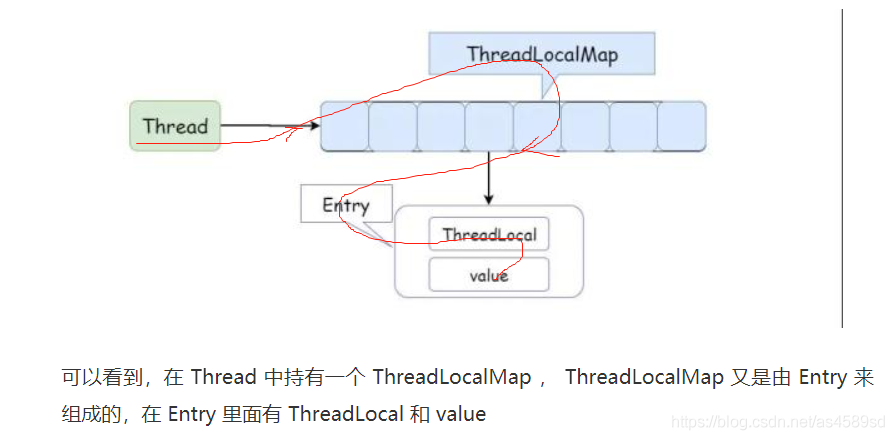
但是完全可以一个人一支笔对不对,这样的话,你填写你的表格,我填写我的表格,咱俩谁都不耽搁谁。这就是 ThreadLocal 在做的事情,因为每个 Thread 都有一个副本,就不存在资源竞争,所以也就不需要加锁,这不就是拿空间去换了时间嘛!
了解决redis线程池对象(笔),不能被多线程(多个人)共享访问的问题,通过 threadLocal.set() 方法,将redis线程池对象实例保存在每个线程,自己所拥有的 threadLocalMap中(生成多个副本)。
这样的话,每个线程都使用自己的redis线程池对象实例,彼此不会影响,从而达到了隔离的作用,这样就解决了redis线程池对象在被共享访问时带来的线程安全问题。
import cn.hutool.core.util.StrUtil;
import org.slf4j.Logger;
import org.slf4j.LoggerFactory;
import redis.clients.jedis.Jedis;
import redis.clients.jedis.JedisPool;
import redis.clients.jedis.JedisPoolConfig;
import java.util.List;
public class RedisUtil {
private RedisUtil() {
}
private static Logger _logger = LoggerFactory.getLogger(RedisUtil.class);
;
protected static final ThreadLocal<Jedis> threadLocalJedis = new ThreadLocal<Jedis>();
//Redis服务器IP
private static String ADDR_ARRAY = ReadProper.getResourceValue("spring.redis.host");
//Redis的端口号
private static int PORT = Integer.parseInt(ReadProper.getResourceValue("spring.redis.port"));
//访问密码
private static String AUTH = ReadProper.getResourceValue("spring.redis.password");
//可用连接实例的最大数目,默认值为8;
//如果赋值为-1,则表示不限制;如果pool已经分配了maxActive个jedis实例,则此时pool的状态为exhausted(耗尽)。
private static int MAX_ACTIVE = -1;
//控制一个pool最多有多少个状态为idle(空闲的)的jedis实例,默认值也是8。
private static int MAX_IDLE = 16;
//等待可用连接的最大时间,单位毫秒,默认值为-1,表示永不超时。如果超过等待时间,则直接抛出JedisConnectionException;
private static int MAX_WAIT = 1000 * 5;
//超时时间
private static int TIMEOUT = 1000 * 5;
//在borrow一个jedis实例时,是否提前进行validate操作;如果为true,则得到的jedis实例均是可用的;
private static boolean TEST_ON_BORROW = true;
private static JedisPool jedisPool ;
//默认的数据库为0
/**
* redis过期时间,以秒为单位
*/
public final static int EXRP_HOUR = 60 * 60; //一小时
public final static int EXRP_DAY = 60 * 60 * 24; //一天
public final static int EXRP_MONTH = 60 * 60 * 24 * 30; //一个月
/**
* 初始化Redis连接池,注意一定要在使用前初始化一次,一般在项目启动时初始化就行了
*/
public static JedisPool initialPool() {
JedisPool jp=null;
try {
JedisPoolConfig config = new JedisPoolConfig();
config.setMaxTotal(MAX_ACTIVE);
config.setMaxIdle(MAX_IDLE);
config.setMaxWaitMillis(MAX_WAIT);
config.setTestOnBorrow(TEST_ON_BORROW);
config.setTestOnCreate(true);
config.setTestWhileIdle(true);
config.setTestOnReturn(true);
config.setNumTestsPerEvictionRun(-1);
jp = new JedisPool(config, ADDR_ARRAY, PORT, TIMEOUT, AUTH);
jedisPool=jp;
threadLocalJedis.set(getJedis());
} catch (Exception e) {
e.printStackTrace();
_logger.error("redis服务器异常",e);
}
return jp;
}
public static void close(Jedis jedis) {
if (threadLocalJedis.get() == null && jedis != null){
jedis.close();
}
}
// /**
// * 在多线程环境同步初始化
// */
// private static synchronized void poolInit() {
// if (jedisPool == null) {
// initialPool();
// }
// }
/**
* 获取Jedis实例,一定先初始化
*
* @return Jedis
*/
public static Jedis getJedis() {
boolean success = false;
Jedis jedis = null;
// if (jedisPool == null) {
// poolInit();
// }
int i=0;
while (!success) {
i++;
try {
if (jedisPool != null) {
jedis=threadLocalJedis.get();
if (jedis==null){
jedis = jedisPool.getResource();
}else {
if(! jedis.isConnected()&&!jedis.getClient().isBroken()){
threadLocalJedis.set(null);
jedis = jedisPool.getResource();
}
//System.out.println(Thread.currentThread().getName()+":第"+i+"次获取成功#@利用了本地缓存redis");
return jedis;
}
}else {
throw new RuntimeException("redis连接池初始化失败");
}
} catch (Exception e) {
System.out.println(Thread.currentThread().getName()+":第"+i+"次获取失败!!!");
success = false;
e.printStackTrace();
_logger.error("redis服务器异常",e);
}
if (jedis!=null){
success=true;
}
if (i>=10&&i<20){
try {
Thread.sleep(1000);
} catch (InterruptedException e) {
e.printStackTrace();
}
}
if (i>=20&&i<30){
try {
Thread.sleep(2000);
} catch (InterruptedException e) {
e.printStackTrace();
}
}
if (i>=30&&i<40){
try {
Thread.sleep(3000);
} catch (InterruptedException e) {
e.printStackTrace();
}
}
if (i>=40){
System.out.println("redis彻底连不上了~~~~(>_<)~~~~");
return null;
}
}
if (threadLocalJedis.get()==null){threadLocalJedis.set(jedis);}
//System.out.println(Thread.currentThread().getName()+":第"+i+"次获取成功@");
return jedis;
}
/**
* 设置 String
*
* @param key
* @param value
*/
public static void setString(String key, String value) {
Jedis jo = null;
try {
value = StrUtil.isBlank(value) ? "" : value;
jo = getJedis();
jo.set(key, value);
} catch (Exception e) {
threadLocalJedis.set(null);
_logger.error("redis服务器异常",e);
throw new RuntimeException("redis服务器异常");
} finally {
if (jo != null) {
close(jo);
}
}
}
/**
* 设置 过期时间
*
* @param key
* @param seconds 以秒为单位
* @param value
*/
public static void setString(String key, int seconds, String value) {
Jedis jo = null;
try {
value = StrUtil.isBlank(value) ? "" : value;
jo = getJedis();
jo.setex(key, seconds, value);
} catch (Exception e) {
threadLocalJedis.set(null);
e.printStackTrace();
_logger.error("redis服务器异常",e);
throw new RuntimeException("redis服务器异常");
} finally {
if (jo != null) {
close(jo);
}
}
}
/**
* 获取String值
*
* @param key
* @return value
*/
public static String getString(String key) {
Jedis jo = null;
try {
jo = getJedis();
if (jo == null || !jo.exists(key)) {
return null;
}
return jo.get(key);
} catch (Exception e) {
threadLocalJedis.set(null);
e.printStackTrace();
_logger.error("redis服务器异常",e);
throw new RuntimeException("redis操作错误");
} finally {
if (jo != null) {
close(jo);
}
}
}
public static long incrBy(String key, long integer) {
Jedis jo = null;
try {
jo = getJedis();
return jo.incrBy(key, integer);
} catch (Exception e) {
threadLocalJedis.set(null);
e.printStackTrace();
_logger.error("redis服务器异常",e);
throw new RuntimeException("redis操作错误");
} finally {
if (jo != null) {
close(jo);
}
}
}
public static long decrBy(String key, long integer) {
Jedis jo = null;
try {
jo = getJedis();
return jo.decrBy(key, integer);
} catch (Exception e) {
threadLocalJedis.set(null);
e.printStackTrace();
_logger.error("redis服务器异常",e);
throw new RuntimeException("redis操作错误");
} finally {
if (jo != null) {
close(jo);
}
}
}
//删除多个key
public static long delKeys(String [] keys){
Jedis jo = null;
try {
jo = getJedis();
return jo.del(keys);
} catch (Exception e) {
threadLocalJedis.set(null);
e.printStackTrace();
_logger.error("redis服务器异常",e);
throw new RuntimeException("redis操作错误");
} finally {
if (jo != null) {
close(jo);
}
}
}
//删除单个key
public static long delKey(String key){
Jedis jo = null;
try {
jo = getJedis();
return jo.del(key);
} catch (Exception e) {
threadLocalJedis.set(null);
e.printStackTrace();
_logger.error("redis服务器异常",e);
throw new RuntimeException("redis操作错误");
} finally {
if (jo != null) {
close(jo);
}
}
}
//添加到队列尾
public static long rpush(String key,String node){
Jedis jo = null;
try {
jo = getJedis();
return jo.rpush(key,node);
} catch (Exception e) {
threadLocalJedis.set(null);
e.printStackTrace();
_logger.error("redis服务器异常",e);
throw new RuntimeException("redis操作错误");
} finally {
if (jo != null) {
close(jo);
}
}
}
//删除list元素
public static long delListNode(String key,int count,String value){
Jedis jo = null;
try {
jo = getJedis();
return jo.lrem(key,count,value);
} catch (Exception e) {
threadLocalJedis.set(null);
e.printStackTrace();
_logger.error("redis服务器异常",e);
throw new RuntimeException("redis操作错误");
} finally {
if (jo != null) {
close(jo);
}
}
}
//获取所有list
public static List getListAll(String key){
Jedis jo = null;
List list=null;
try {
jo = getJedis();
list= jo.lrange(key,0,-1);
} catch (Exception e) {
threadLocalJedis.set(null);
e.printStackTrace();
_logger.error("redis服务器异常",e);
throw new RuntimeException("redis操作错误");
} finally {
if (jo != null) {
close(jo);
}
}
return list;
}
//清理缓存redis
public static void cleanLoacl(Jedis jo){
threadLocalJedis.set(null);
close(jo);
}
static {
initialPool();
}
}webuploader:是一个以HTML5为主, Flash为辅的文件上传组件,采用大文件分片/并发上传的方式,极大地提高了文件上传的效率,同时兼容多种浏览器版本;
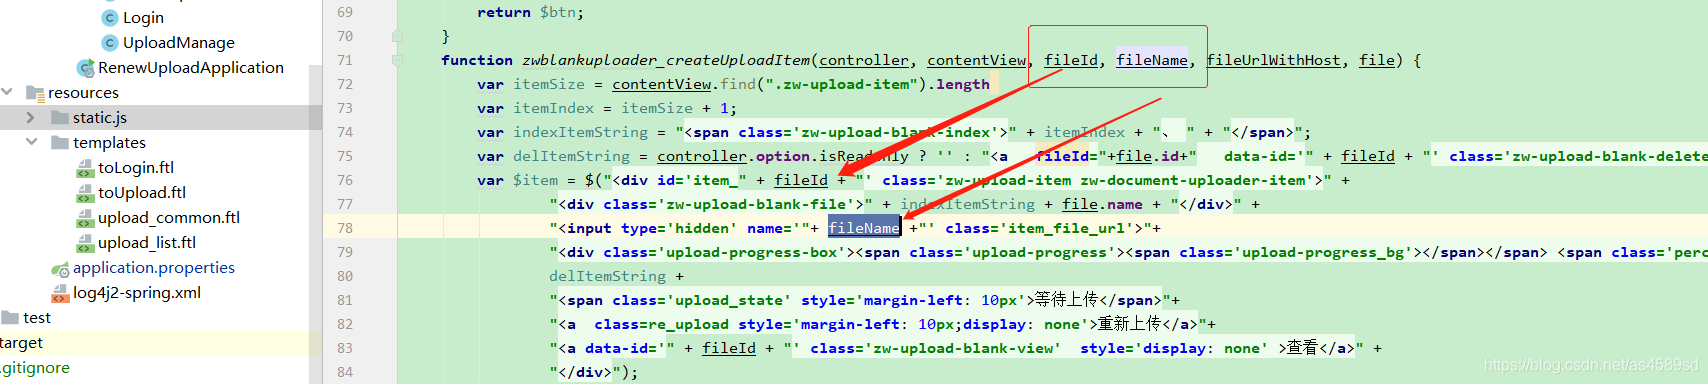
引入百度Webuploader组件,需要注意标签的id/nama属性,这些将在后面的JavaScript中使用到进行文件切分、验证。
以上js组件,将完成文件上传、MD5验证、删除、切片、上传进度条显示、暂停、继续上传及上传成功/失败时候的回调。
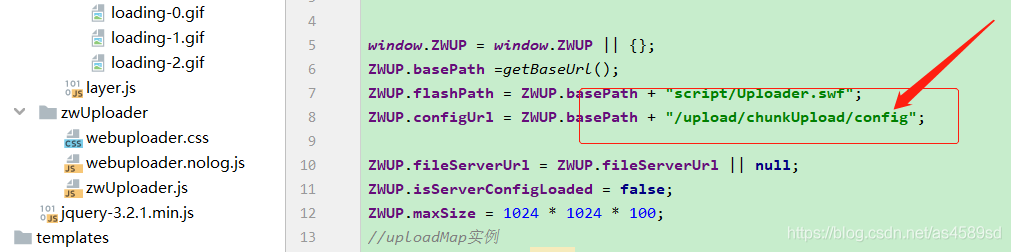
前端,给后端提供封装的chunk,及request
后端,主要是判断文件是否有分片,如果没有,则直接存放到目的目录;
如果存在分片,则创建临时目录,存放分片信息;
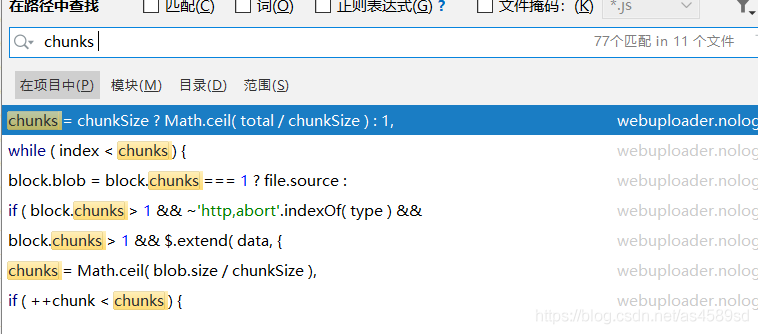
之后判断当前分片所属的文件的所有分片是否已经传输完毕,如果当前分片数==所属文件总分片数,则开始合并文件并转移完整文件到目的目录,并且删除临时目录
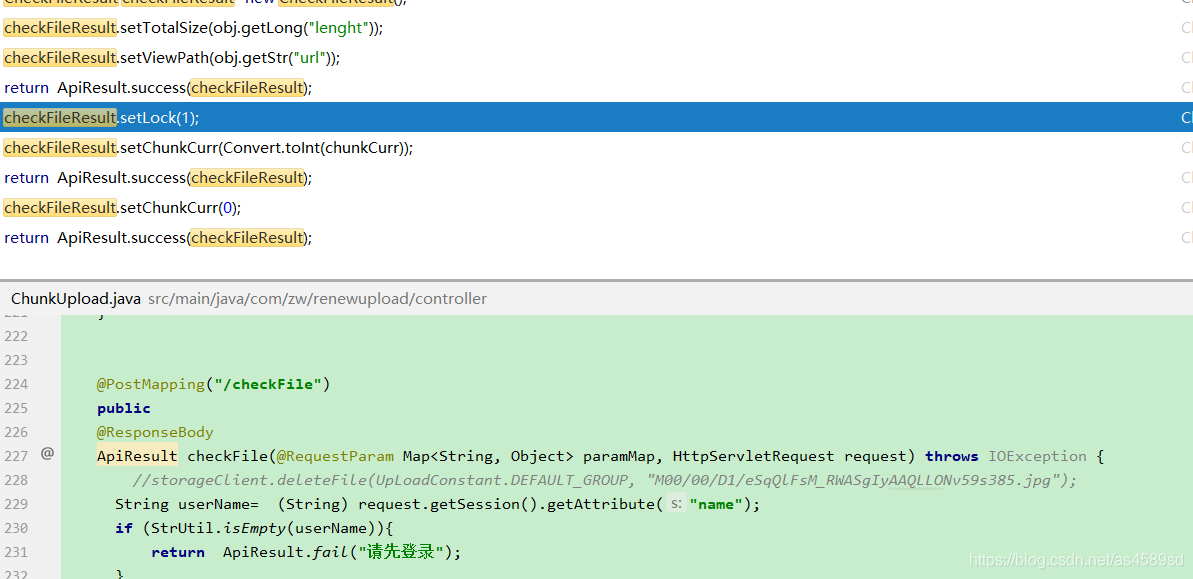
检测完文件,以后,开始上传操作
//上传操作
path = appendFileStorageClient.uploadAppenderFile(UpLoadConstant.DEFAULT_GROUP, file.getInputStream(),file.getSize(), FileUtil.extName((String) paramMap.get("name")));
//更新操作
appendFileStorageClient.modifyFile(UpLoadConstant.DEFAULT_GROUP, noGroupPath, file.getInputStream(),file.getSize(),historyUpload);可参考hutool资料http://www.mianshigee.com/tutorial/hutool/26e24c7a37d93249.md
<dependency>
    <groupId>cn.hutool</groupId>
    <artifactId>hutool-all</artifactId>
    <version>5.0.6</version>
</dependency>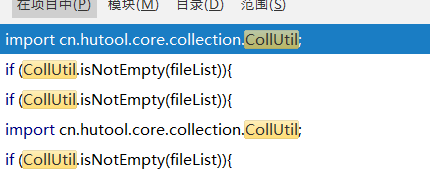
if (CollUtil.isNotEmpty(fileList)){
            for (String e:fileList){
                JSONObject jsonObject= JSONUtil.parseObj(e);
                jsonObjects.add(jsonObject);

            }
        }
import cn.hutool.core.io.FileUtil;
FileUtil.extName((String) paramMap.get("name")));The above is the detailed content of How to build fastdfs service and stand-alone redis service. For more information, please follow other related articles on the PHP Chinese website!
 Commonly used database software
 What are the in-memory databases?
 Which one has faster reading speed, mongodb or redis?
 How to use redis as a cache server
 How redis solves data consistency
 How do mysql and redis ensure double-write consistency?
 What data does redis cache generally store?
 What are the 8 data types of redis


![[Web front-end] Node.js quick start](https://img.php.cn/upload/course/000/000/067/662b5d34ba7c0227.png)


