


Control flow This part of the code mainly involves the following bytecode instructions. All the following bytecode instructions will have a parameter:
JUMP_FORWARD, the complete instruction will add this parameter to the position of the currently executing bytecode instruction, and then jump to the corresponding result to continue execution.
If the top element of the stack is true, the instruction to change the bytecode execution position to the received parameter value is "POP_JUMP_IF_TRUE". Pop the top element from the stack.
POP_JUMP_IF_FALSE, this instruction is the same as POP_JUMP_IF_TRUE, the only difference is to determine whether the top element of the stack is equal to true.
JUMP_IF_TRUE_OR_POP, if the top element of the stack is equal to true, the bytecode execution position is set to the value corresponding to the parameter, and there is no need to pop the top element of the stack. If the top element of the stack is false, the element must be popped.
JUMP_IF_FALSE_OR_POP is the same as JUMP_IF_TRUE_OR_POP but requires the top element of the stack to be equal to false.
JUMP_ABSOLUTE directly sets the execution position of the bytecode to the value of the parameter.
In general, these jump instructions allow the Python interpreter to change the execution flow according to specific conditions when executing bytecode, and implement basic language structures such as loops and conditional statements. .
Now we use an example to deeply understand the execution process of the various instructions above.
import dis


def test_control01():
    a = 1

    if a > 1:
        print("a > 1")
    elif a < 1:
        print("a < 1")
    else:
        print("a == 1")

if __name__ == '__main__':
dis.dis(test_control01)The output result of the above program is as follows:
6 0 LOAD_CONST 1 (1)
2 STORE_FAST
4 LOAD_FAST 3 22
9 12 LOAD_GLOBAL 0 (print)
14 LOAD_CONST 2 (' a > 1')
16 CALL_FUNCTION 1
18 POP_TOP
20 JUMP_FORWARD 26 (to 48)
10 >> 22 LOAD_FAST 0 (a)
24 LOAD_CONST 1 (1)
26 Compare_op 0 (& LT;) ## 28 POP_JUMP_IF_FALSE 40
11 30 LOAD_GLOBAL 0 (Print)
32 load_const 3 ('a & lt; 1')#34 CALL_FUNCTION 1
36 POP_TOP
38 JUMP_FORWARD 8 (to 48)
13 >> 40 LOAD_GLOBAL
# 44 CALL_FUNCTION 1
46 POP_TOP
48 LOAD_CONST 0 (None)
RETURN_VALUE
Let’s simulate the above bytecode execution process now. Use counter to indicate the execution position of the current bytecode:
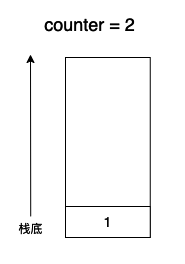
Before the bytecode starts executing, the status of the stack space and counter is as follows:Now execute the first bytecode LOAD_CONST. After execution, counter = 2. Because this bytecode occupies one byte and the parameter stack is one byte, the position of the bytecode executed next time is in the bytecode. Three lower positions, the corresponding subscript is 2, so counter = 2.
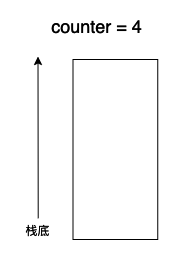
Now execute the second bytecode STORE_FAST, let a point to 1, the same STORE_FAST opcode and operand each occupy one byte, so this word is executed There is no data in the stack space after the section code, counter = 4.
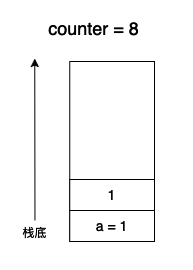
Next, LOAD_FAST loads the object pointed to by a, which is 1, into the stack. At this time, counter = 6, and LOAD_CONST loads the constant 1 into the stack space. This When counter = 8, after executing these two instructions, the stack space changes as shown below:
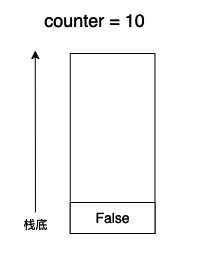
The next instruction is COMPARE_OP, this instruction has a The parameter represents the symbol of comparison. Here it is comparing a > 1, and the comparison result will be pushed into the stack. The comparison result is false, because COMPARE_OP will first pop up the two inputs of the stack space, so after executing this The values of the stack space and counter after the instruction are as follows:
The following instruction is POP_JUMP_IF_FALSE. According to the meaning of the previous bytecode, this bytecode will pop the false on the top of the stack. , and will jump, and program the value of counter directly to the value of the parameter. Here his parameter is 22, so counter = 22. After executing this instruction, the result is as follows:
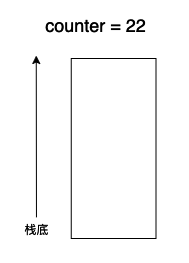
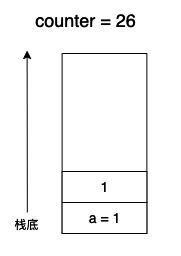
Because it has jumped to 22, the next instruction to be executed is LOAD_FAST, which loads the variable a into the stack space. LOAD_CONST loads the constant 1 into the stack space. After these two executions, the changes The situation is as follows:
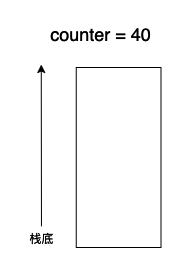
Execute POP_JUMP_IF_FALSE this time, and the result this time is also false, so continue to execute POP_JUMP_IF_FALSE, this time the parameter is 40, directly set the value of counter to 40 .
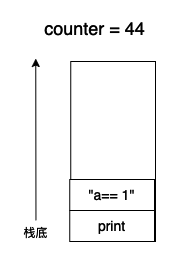
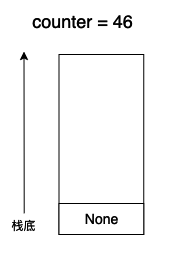
Next, LOAD_GLOBAL loads a global variable print function counter and becomes 42, LOAD_CONST loads the string "a == 1" into the stack space, counter = 44, and the status is As follows:
CALL_FUNCTION This bytecode has one parameter, indicating the number of parameters for calling the function. Here it is 1, because the print function has only one parameter and then outputs a string. "a== 1", but what needs to be noted here is that the print function will return None, so the status after executing CALL_FUNCTION is as follows:
At this point, the above function is almost executed. That’s it. The next few bytecodes are very simple, so I won’t describe them again.
The above is the detailed content of How to implement the control flow of Python virtual machine bytecode. For more information, please follow other related articles on the PHP Chinese website!


![[Web front-end] Node.js quick start](https://img.php.cn/upload/course/000/000/067/662b5d34ba7c0227.png)


