
After the project is developed, the front-end and back-end applications will be packaged and then deployed to the server for running. Before using Spring Boot, Java web applications are generally packaged into war packages and then combined with Tomcat to complete deployment. For Spring Boot, the official recommendation is to package the Spring Boot application into a fat jar (the default packaging method of Spring Boot), that is, the project's dependent jar package will also be included in the jar package of the Spring Boot project. This fat jar will build Tomcat Come in, so there is no need to configure Tomcat separately when deploying. Just upload the jar package without pre-installing any server, and deploying SpringBoot applications becomes very simple.
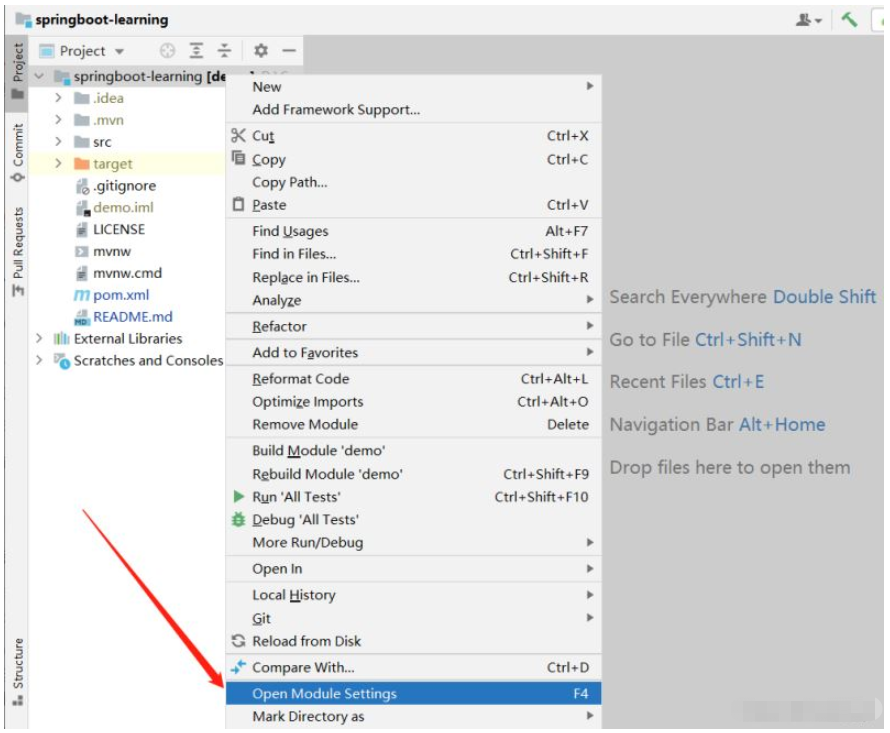
1. Open the project, right-click the project and select Open Module SettingsEnterproject Structure, as shown below:
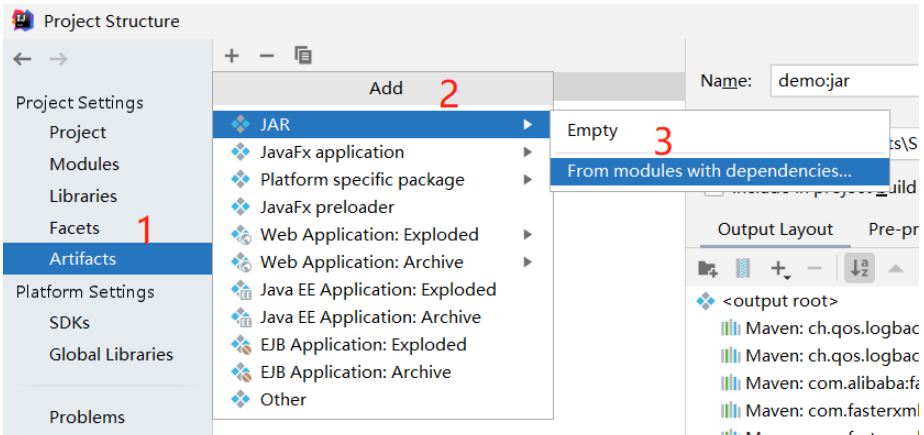
Artifacts and click the plus sign in the middle (Project Settings->Artifacts-> ;JAR->From modules with dependencies), as shown in the figure below:
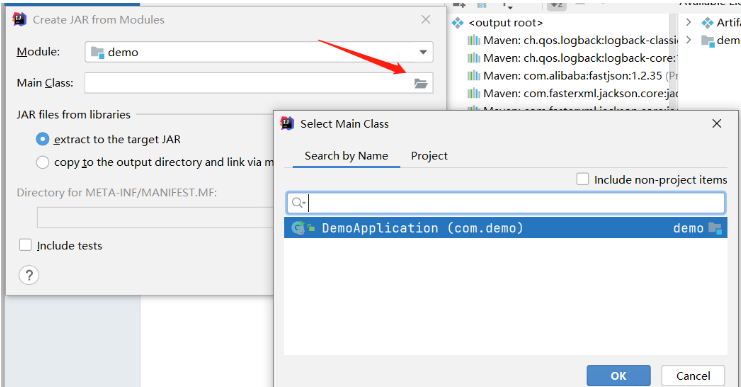
Create JAR from Modules and select ‘Main Class&rsquo ;, and then click OK
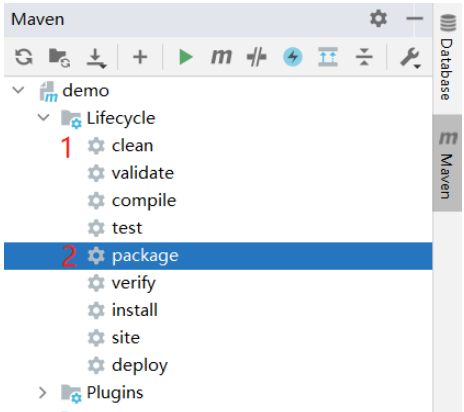
LIfecycle, first click clean , and then click package to generate the target folder, which contains the jar file named after the project name and version number, and the packaging is completed.
<project>
    <build>
        <plugins>
            <plugin>
                <groupId>org.springframework.boot</groupId>
                <artifactId>spring-boot-maven-plugin</artifactId>
            </plugin>
        </plugins>
    </build>
</project>$ mvn clean package
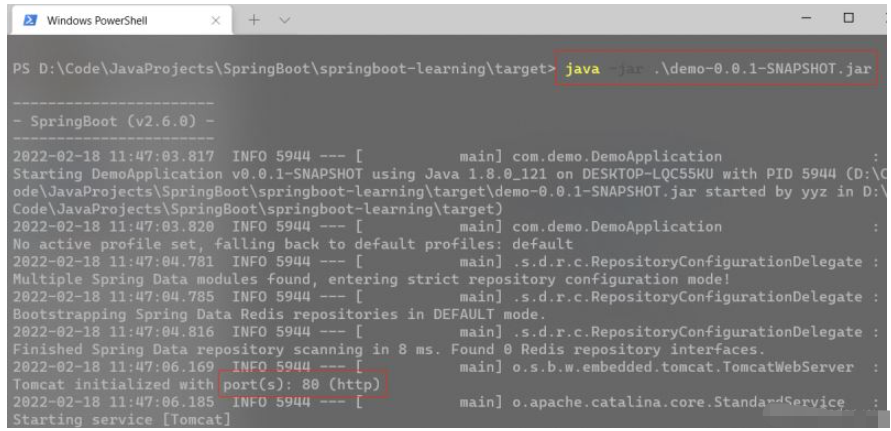
java -jar command to run the jar, and the project will start
java -jar demoa-0.0.1-SNAPSHOT.jar
.original. This is the jar package created by the Maven standard packaging plug-in. It only contains our own The Class does not contain dependencies, and the suffix .jar is the jar containing dependencies created by the SpringBoot packaging plug-in, which can be run directly.
The above is the detailed content of How to package springboot project into jar package. For more information, please follow other related articles on the PHP Chinese website!


