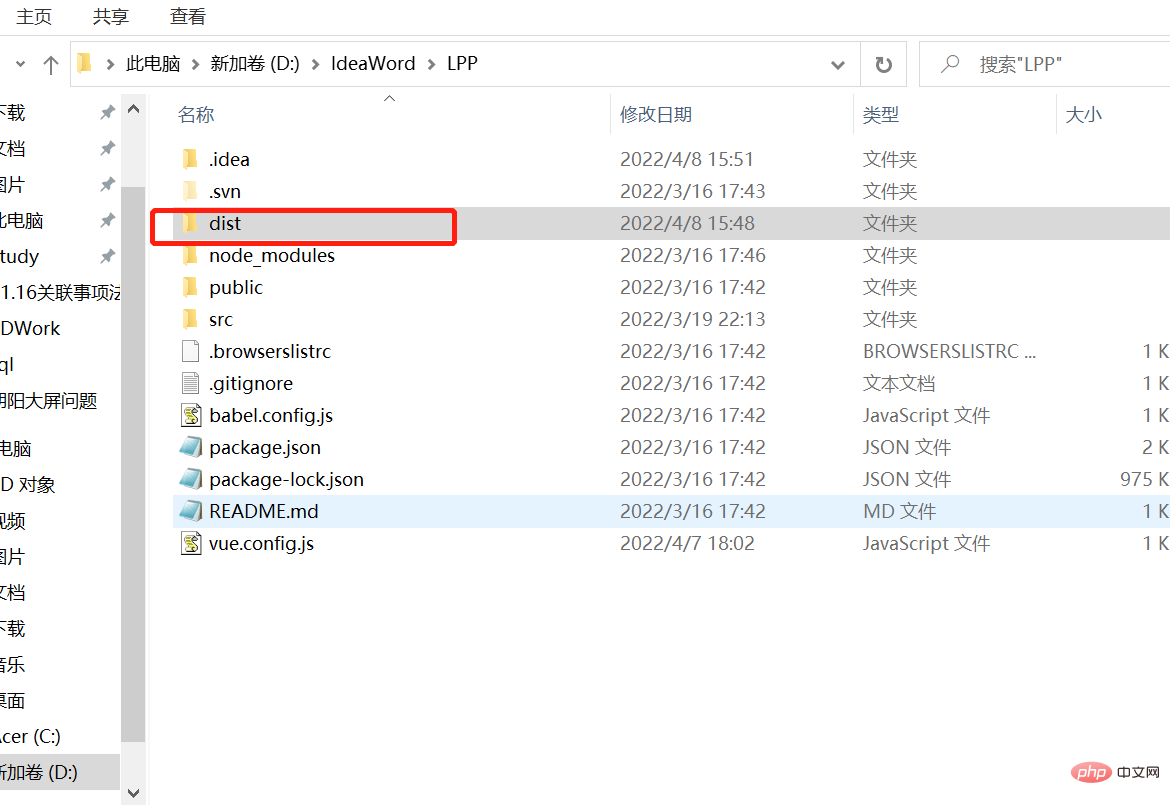
When we often use front-end and back-end separation projects, we will need to package the front-end vue and then deploy it.
vue projects can actually be packaged directly through the following statement:
npm run build
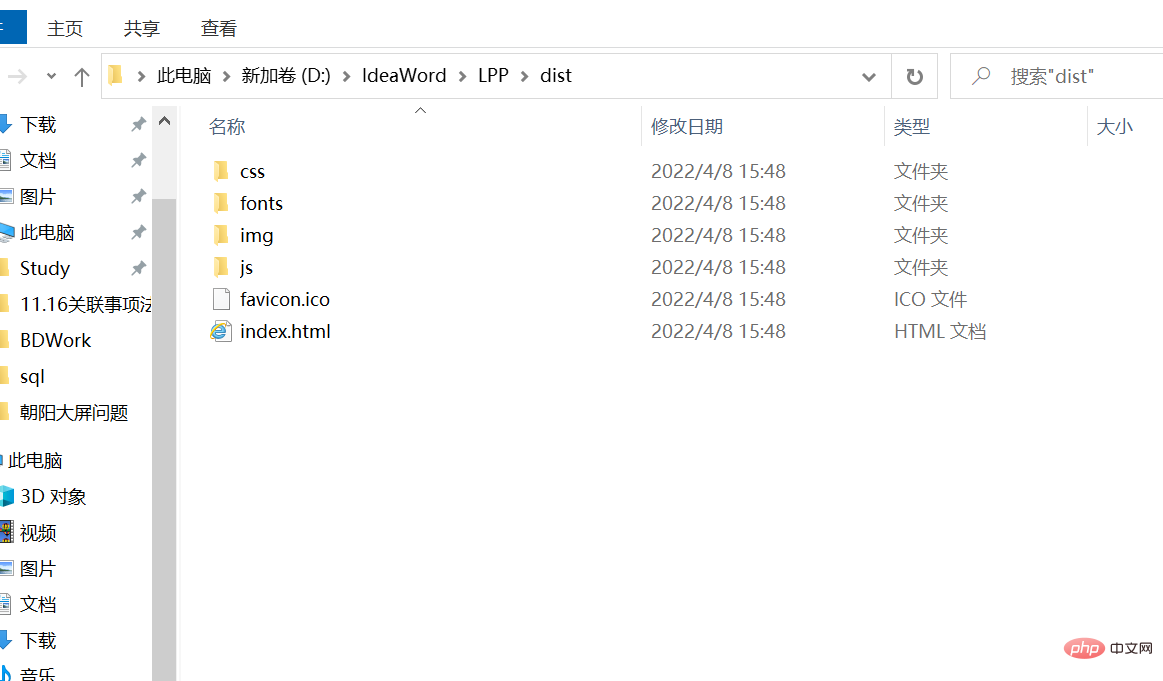
The default packaging situation is as follows:


When we need to modify the packaging name and static resource location, we need to configure it accordingly:
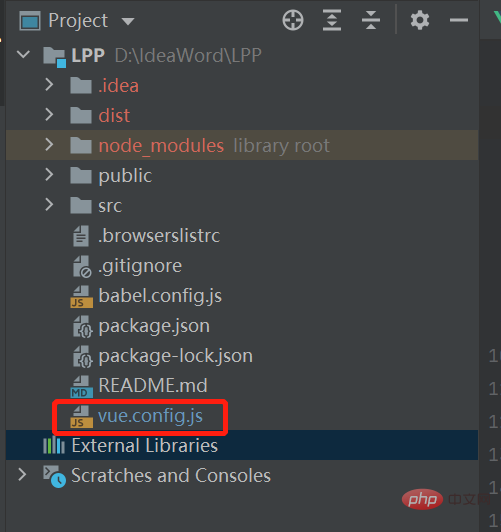
1. First create vue.config in the project root directory .js file

The configuration content is as follows (with cross-domain problem resolution included):
module.exports = {
    //打包
    publicPath: './',
    outputDir: 'test', //打包输出目录
    assetsDir: './static', //放置生成的静态资源
    filenameHashing: true, // 生成的静态资源在它们的文件名中包含了 hash 以便更好的控制缓存
    lintOnSave: false, //设置是否在开发环境下每次保存代码时都启用 eslint验证
    productionSourceMap: false,// 打包时不生成.map文件

    // 解决跨域配置
    devServer: {                //记住,别写错了devServer//设置本地默认端口  选填
        port: 8080,
        proxy: {                 //设置代理,必须填
            '/api': {              //设置拦截器  拦截器格式   斜杠+拦截器名字,名字可以自己定
                target: 'http://localhost:9090',     //代理的目标地址(后端设置的端口号)
                changeOrigin: true,              //是否设置同源,输入是的
                pathRewrite: {                   //路径重写
                    '/api': ''                     //选择忽略拦截器里面的单词
                }
                /*也就是在前端使用/api可以直接替换为(http://localhost:9090)*/
            }
        }
    },
}2. View routing (router/index.js) Whether to use history, if so, change it to hash. Or just uncheck mode because hash is used by default.
const router = new VueRouter({
  /*mode: 'history',*/
  mode: 'hash',
  routes:[]
})

export default routerThen use npm run build again to package, and the test folder will appear, and the static files will be placed in static.
The packaging has ended.
3. Find the path of the packaged file
Double-click the packaged index.html file, and you will see the homepage.
First you need to install nignx, which is undoubtedly not introduced here. (Or specific installation steps will be placed in the nginx section later)
Just configure it directly in nginx.conf:
server {
    listen   8021;
    server_name  localhost;

    location /test{
        alias    /home/hyq/vue_file;
        index  index.shtml index.html index.htm;
}The specific meaning of the configuration:
#user  nobody;
worker_processes  1;

#error_log  logs/error.log;
#error_log  logs/error.log  notice;
#error_log  logs/error.log  info;

#pid        logs/nginx.pid;


events {
    worker_connections  1024;
}

http {
    include       mime.types;
    default_type  application/octet-stream;

    #log_format  main  '$remote_addr - $remote_user [$time_local] "$request" '
    #                  '$status $body_bytes_sent "$http_referer" '
    #                  '"$http_user_agent" "$http_x_forwarded_for"';

    #access_log  logs/access.log  main;

    sendfile        on;
    #tcp_nopush     on;

    #keepalive_timeout  0;
    keepalive_timeout  65;

    #gzip  on;

    ssi on;
    ssi_silent_errors on;
    ssi_types text/shtml;

    #定义的服务器列表
    upstream cms {
        #这里代表代理的项目端口为127.0.0.1:8111端口(weight等配置自行查询)
        server 127.0.0.1:8111 weight=5 max_fails=3 fail_timeout=20s;
    }
    server {
        listen       8096;              #nginx使用8096
        server_name  localhost;         #服务名称

        location /menhu/cms {
            proxy_pass http://cms;
            #请求转向cms 定义的服务器列表。也就是访问localhost:8096/menhu/cms 会转向到上方服务器列          #表中的127.0.0.1:8111
        }

        location /qgxzzfzhgljdpt {
            root   D:\BDWorkParce3\LPT_MENHU\wwwroot_release;   #根目录
            index  index.shtml index.html index.htm;            #设置默认页
            #访问localhost:8096/qgxzzfzhgljdpt 会打开        D:\BDWorkParce3\LPT_MENHU\wwwroot_release\qgxzzfzhgljdpt下级中的index.shtml/index.html/index.htm默认页
        }
        location ^~ /template {
            return 404;
        }
        location = /c/ {
            return 404;
        }
        location = /css/ {
            return 404;
        }
        location = /images/ {
            return 404;
        }
        location = /include/ {
            return 404;
        }
        location = /js/ {
            return 404;
        }
        location = /style/ {
            return 404;
        }
        location = /upload/ {
            return 404;
        }
        location = /html/ {
            return 404;
        }
        location = /root/ {
            return 404;
        }
        location ~ .*.(svn|Git|git) {
            return 404;
        }

        error_page   500 502 503 504  /50x.html;
        location = /50x.html {
            root   html;
        }
    }

}
########### 每个指令必须有分号结束。#################
#user administrator administrators;  #配置用户或者组,默认为nobody nobody。
#worker_processes 2;  #允许生成的进程数,默认为1
#pid /nginx/pid/nginx.pid;   #指定nginx进程运行文件存放地址
error_log log/error.log debug;  #制定日志路径,级别。这个设置可以放入全局块,http块,server块,级别以此为:debug|info|notice|warn|error|crit|alert|emerg
events {
    accept_mutex on;   #设置网路连接序列化,防止惊群现象发生,默认为on
    multi_accept on;  #设置一个进程是否同时接受多个网络连接,默认为off
    #use epoll;      #事件驱动模型,select|poll|kqueue|epoll|resig|/dev/poll|eventport
    worker_connections  1024;    #最大连接数,默认为512
}
http {
    include       mime.types;   #文件扩展名与文件类型映射表
    default_type  application/octet-stream; #默认文件类型,默认为text/plain
    #access_log off; #取消服务日志
    log_format myFormat '$remote_addr–$remote_user [$time_local] $request $status $body_bytes_sent $http_referer $http_user_agent $http_x_forwarded_for'; #自定义格式
    access_log log/access.log myFormat;  #combined为日志格式的默认值
    sendfile on;   #允许sendfile方式传输文件,默认为off,可以在http块,server块,location块。
    sendfile_max_chunk 100k;  #每个进程每次调用传输数量不能大于设定的值,默认为0,即不设上限。
    keepalive_timeout 65;  #连接超时时间,默认为75s,可以在http,server,location块。

    upstream mysvr {
      server 127.0.0.1:7878;
      server 192.168.10.121:3333 backup;  #热备
    }
    error_page 404 https://www.baidu.com; #错误页
    server {
        keepalive_requests 120; #单连接请求上限次数。
        listen       4545;   #监听端口
        server_name  127.0.0.1;   #监听地址
        location  ~*^.+$ {       #请求的url过滤,正则匹配,~为区分大小写,~*为不区分大小写。
           #root path;  #根目录
           #index vv.txt;  #设置默认页
           proxy_pass  http://mysvr;  #请求转向mysvr 定义的服务器列表
           deny 127.0.0.1;  #拒绝的ip
           allow 172.18.5.54; #允许的ip
        }
    }
}Then start or Just restart nginx.
Visit: server address: 8021/test.
The above is the detailed content of How to package Vue project and deploy nginx server. For more information, please follow other related articles on the PHP Chinese website!


