Simply put,MyBatis is an excellent persistence layer framework used to simplify JDBC development. MyBatis itself is an open source project of Apache. It was originally called iBatis. In 2010, the project was moved to Google Code and renamed MyBatista. In 2013 the project was moved to GitHub.
How do you understand the persistence layer in the concept? It refers to the layer of code that saves data to the database. In the massive code, in order to ensure that each piece of code has a single responsibility, the code that operates on the same database is calledpersistence layer. At the same time, in the JavaEE three-tier architecture,Presentation layeris responsible for page display,Business layeris responsible for logic processing, and the persistence layer is responsible for storing data in the database.
What is a framework? A framework refers to asemi-finished software. It is a set of reusable, universal, software basic code models. At the same time, based on the framework Developing on top of it saves a lot of costs, and is more standardized, versatile and highly scalable.
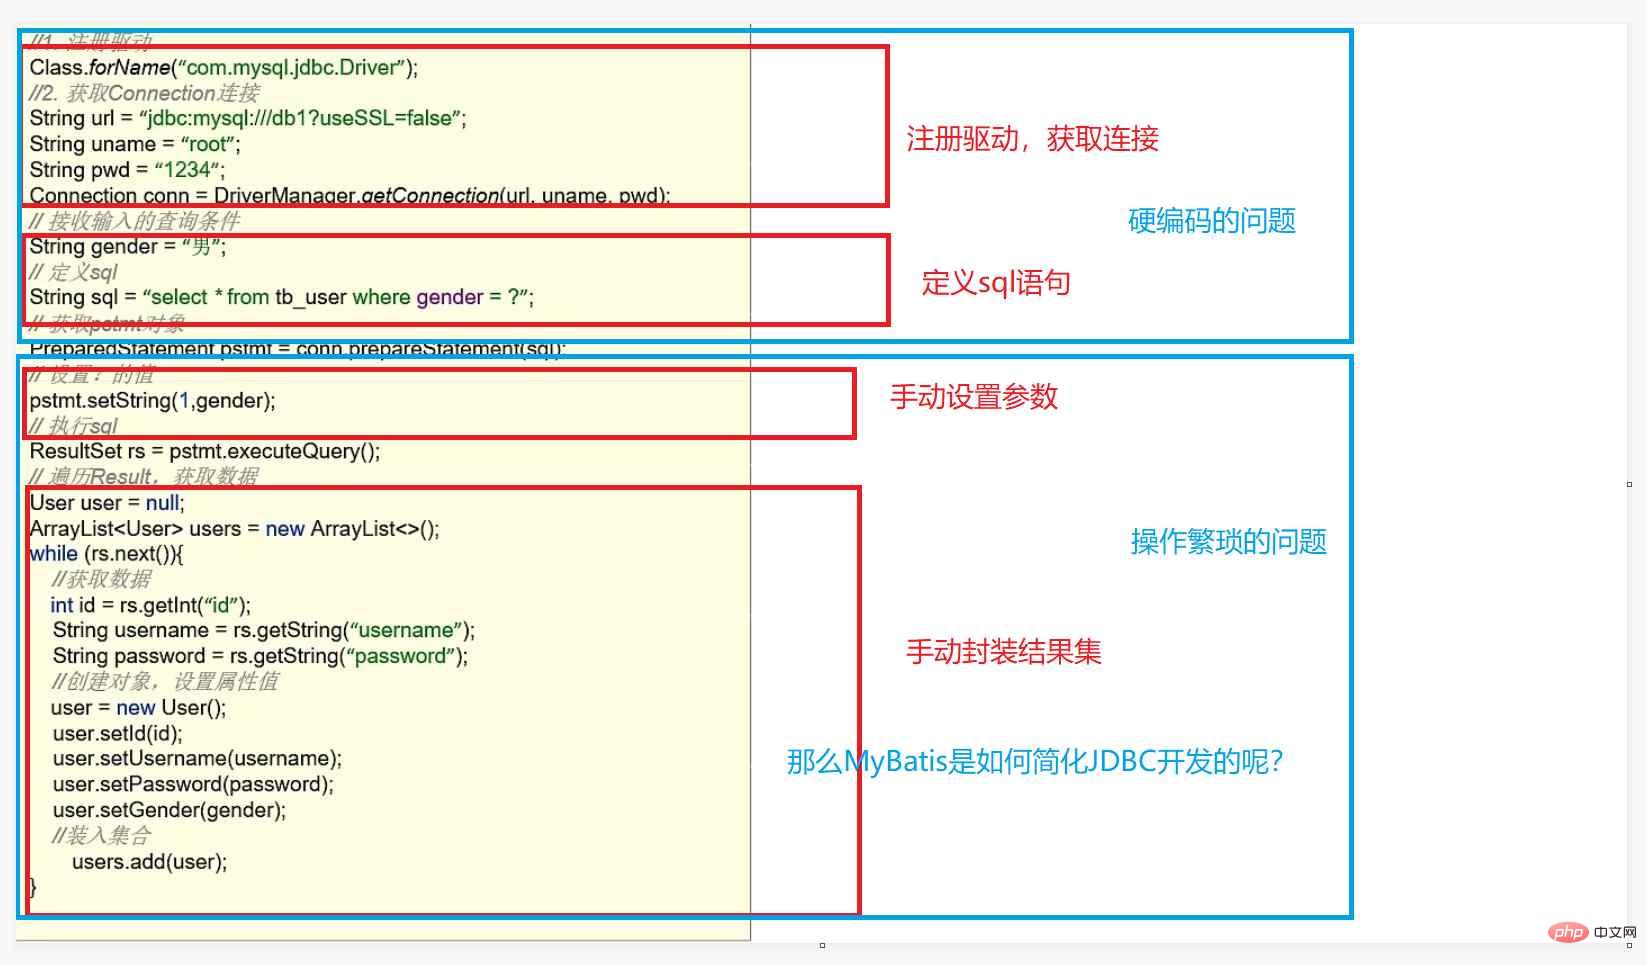
Since we use MyBatis to simplify JDBC development, what are the shortcomings of JDBC?
First, when registering the driver and obtaining the link, if the string information changes, such as the password, it needs to be modified manually. Secondly, when defining sql statements, using strings also makes the code less maintainable.
When we manually set parameters and manually set the result set, there is a problem of cumbersome operation.
The following code used by JDBC is shown:

Since there is hard coding in JDBC development, the operation Cumbersome shortcomings, so how to solve these problems? First, we write the string into a separate configuration file to solve the problem of JDBC hard coding. Secondly, we can use a method to automatically complete the tedious JDBC operation code. Therefore, we use MyBatis to simplify JDBC development.MyBatis eliminates almost all JDBC code and the work of setting parameters and obtaining result sets.
For example: write parameter information in the configuration file and read it directly when used in the future to solve the problem of hard coding
There are many choices for the persistence layer framework on the market. However, MyBatis has a large usage share in the domestic market.
We get started with MyBatis by quickly querying all the data in the user table through practical operations, that is, querying the data in the user table and putting it in the user object , and complete the operation by putting each other into the set respectively. Complete the operation through the following steps:
Create user table, add data
Create module, import coordinates
Write the MyBatis core configuration file and replace the connection information to solve the hard-coding problem
Write the SQL mapping file to uniformly manage the sql statements and solve the coding problem
Writing code
Use the following steps when writing code:
Define POJO class
Load the core configuration file and obtain the sqlSessionFactory object
Get the sqlSession object and execute the sql statement
Release resources
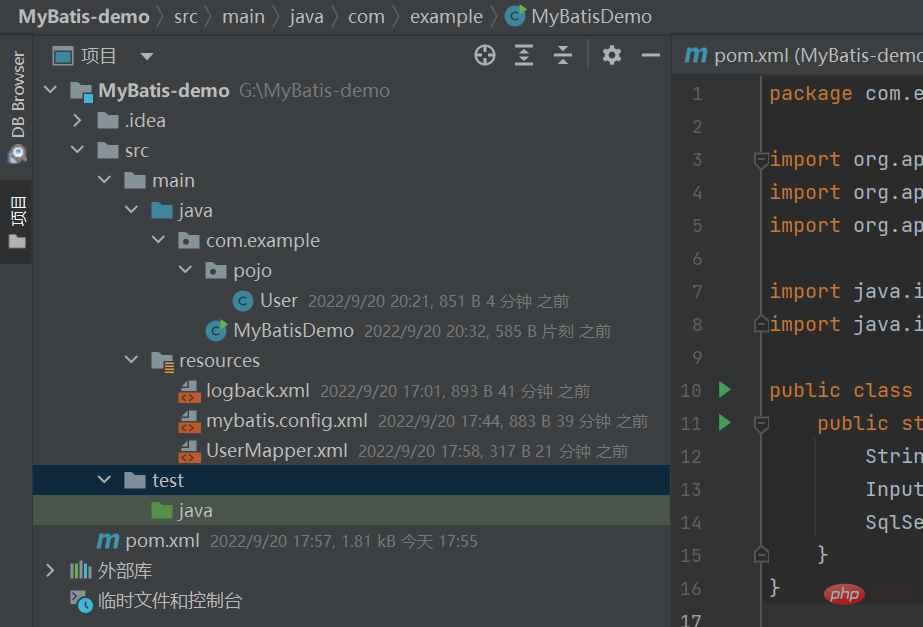
Overall project structure display:

The following demonstration uses a detailed demonstration to quickly get started with MyBatis:
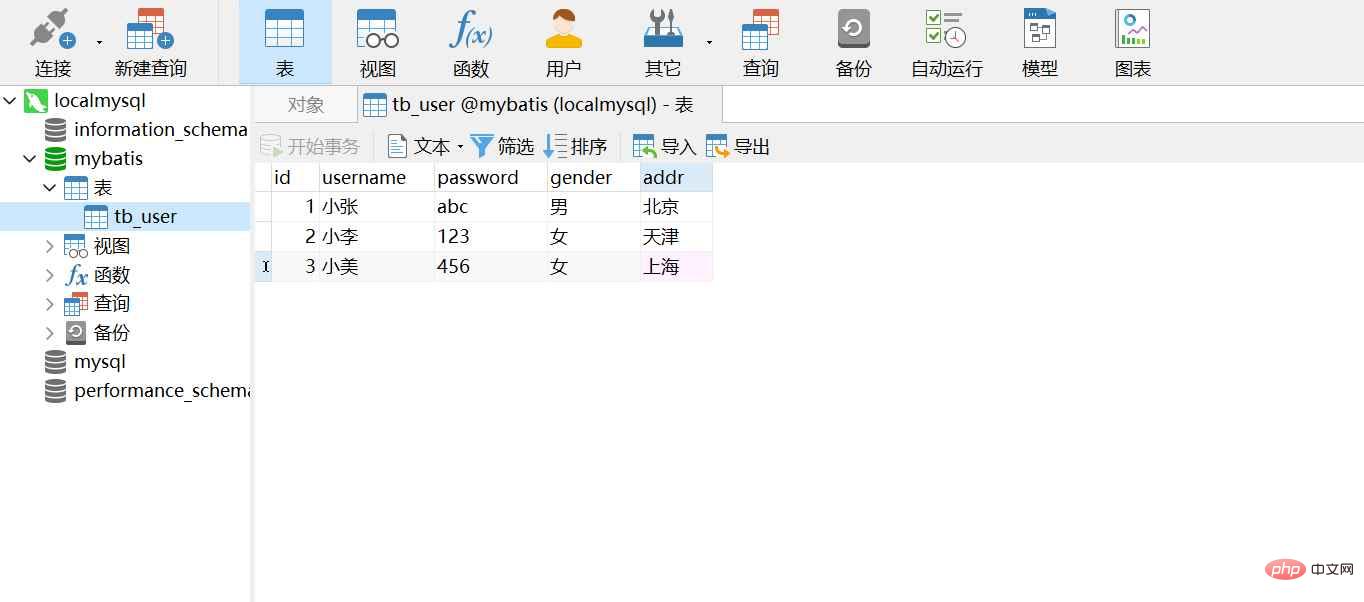
Create the user table and add data:
create database mybatis; use mybatis; drop table if exists tb_user; create table tb_user( id int primary key auto_increment, username varchar(20), password varchar(20), gender char(1), addr varchar(30) ); INSERT INTO tb_user VALUES (1, '小张', 'abc', '男', '北京'); INSERT INTO tb_user VALUES (2, '小李', '123', '女', '天津'); INSERT INTO tb_user VALUES (3, '小美', '456', '女', '上海');

The MySQL database is used here, and navicat is used as the database visualization tool.
Create the module in idea and import the coordinates:
Click New Project in idea, select Maven for the build system, and enter the project name (MyBatis-demo is used here), Set the group ID and artifact ID and click Create. Next, import the dependencies and place the following dependency code in the pom.xml file:
org.mybatis mybatis x.x.x
Next, import the mysql dependencies, junit coordinates and logback coordinates, and paste the logback.xml configuration file into resources:
junit junit 4.13 test org.slf4j slf4j-api 1.7.20 ch.qos.logback logback-classic 1.2.3 ch.qos.logback logback-core 1.2.3
Write the MyBatis core configuration file:
Create a new configuration file mybatis.config.xml in MyBatis-demo/src/main/resources.
Write the SQL mapping file:
Add the sql mapping file UserMapper.xml in MyBatis-demo/src/main/resources.
Modify the core configuration file of MyBatis to load the sql mapping file.
After completing the above operations, you can start coding. First, define the POJO class:
package com.example.pojo; public class User { private Integer id; private String username; private String password; private String gender; private String addr; public Integer getId() { return id; } public String getUsername() { return username; } public String getPassword() { return password; } public String getGender() { return gender; } public String getAddr() { return addr; } @Override public String toString() { return "User{" + "id=" + id + ", username='" + username + '\'' + ", gender='" + gender + '\'' + ", addr='" + addr + '\'' + '}'; } }
Load the core configuration file and obtain the sqlSessionFactory object:
First you need to create a MyBatisDemo.java file, add a main method, and write code.
public class MyBatisDemo { public static void main(String[] args) throws IOException { //加载MyBatis核心配置文件 String resource = "mybatis.config.xml"; InputStream inputStream = Resources.getResourceAsStream(resource); SqlSessionFactory sqlSessionFactory = new SqlSessionFactoryBuilder().build(inputStream); } }
获取sqlSession对象,执行sql语句:
//获取SqlSession对象,用它来执行sql SqlSession sqlSession=sqlSessionFactory.openSession(); //执行sql Listusers = sqlSession.selectList("test.selectALL"); System.out.println(users); //释放资源 sqlSession.close();
到这里我们就完成了整个项目的构建,接下来我们运行程序,可以看到,我们成功的查询到tb_user中的数据!

The above is the detailed content of Analyze the quick start example of MyBatis in Java. For more information, please follow other related articles on the PHP Chinese website!


