
Content controls provided by Microsoft Word help automatically create documents and organize content in a structured format. Content controls are entities that can be inserted and customized to create templates, forms, and structured documents. These content controls can contain drop-down lists, formatted text, dates, pictures, or check boxes. They provide flexibility in placing content within the document, and permissions can be set to restrict them from being edited or deleted by the user.
Rich text content control is such a content control, which can be composed of formatted text or Made up of other entities such as pictures, tables, and other content controls. If you want to know how to insert and modify rich text content controls in MS Word on Windows PC, read this article.
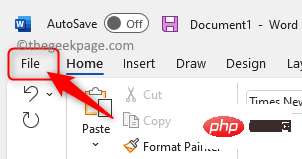
Add Developer Tab to Ribbon Menu in WordBefore you can add and modify content controls in MS Word, you need to add Developer tab using the steps mentioned below Tabs are added to the ribbon. Steps 1. ClickFile in the top ribbon menu.
##Then, select the
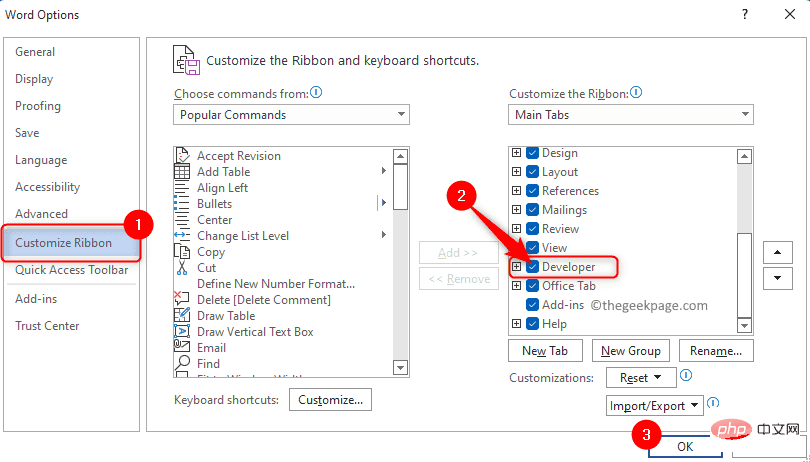
option Optionscard to open the Word Options window.
 Step 2. With the
window open, go to the Customize Ribbon tab in the left pane. On the right, in the box below
CustomizeRibbon, find the Developer tab in the list of tabs that appears .
Check the box next toDeveloper to enable the Developer tab. Finally, click
OKto save the changes.
 Step 3. Close the Word Options window.
When you return to Word, you will see the Developer tab enabled in the Ribbon menu.

Steps 1. Click in the document where you want to add the control.
Then, select the Developer tab in the ribbon menu.
Next, click the Rich Text Content Control box in the Controls group to add a rich text content control.

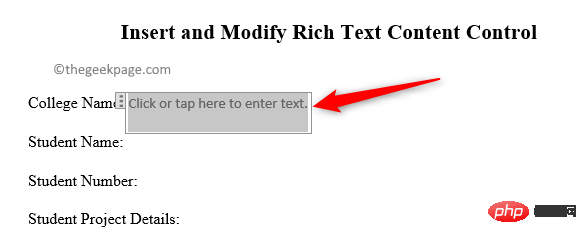
This will insert a new field with a bounding box.
Step 2. To modify the design of the content control, click the Design Mode button in the Controls group to open the design model.
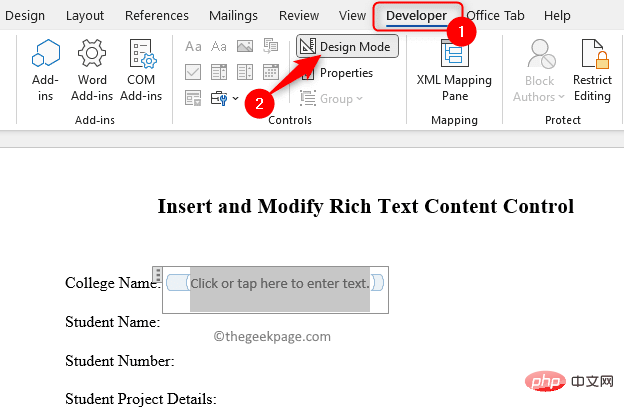
The bounding box will change and you can now change the text within it to whatever you want.
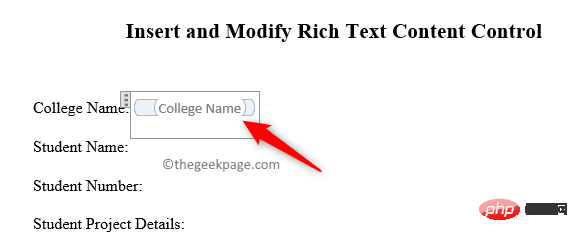
Next, click the Design Mode button again to turn off Design Mode.
Step 3. After selecting the rich text content control, click the "Properties" button to open the "Content Control Properties" window.
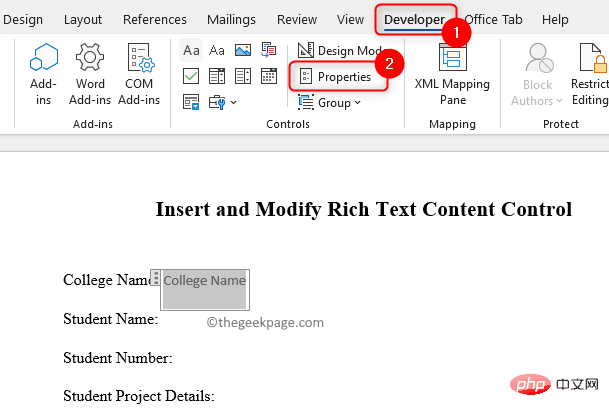
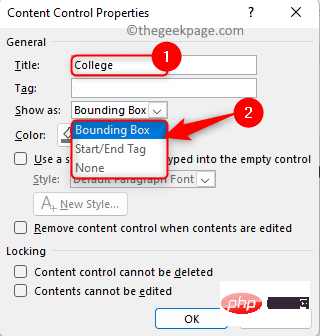
You can now give a title in the text box next to the title.
Using the drop-down list next to Show as, you can select Bounding Box, Start/End Tag, or None to control the appearance of content controls in the document.
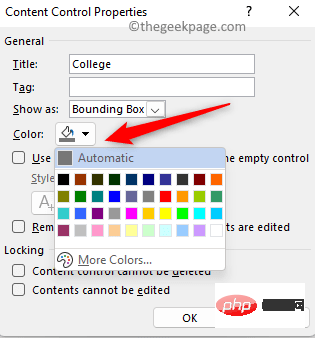
You can change the color to any color of your choice or keep it auto.
CheckUse styles to format text entered into empty controlsSelect in the drop-down box next to A style.
The Lock section provides control options for content to prevent them from being deleted or edited.
If you want the user to modify the content control but not delete it, check the box next to Cannot delete the content control.
When you have finished changing properties, click "OK" to save these changes.
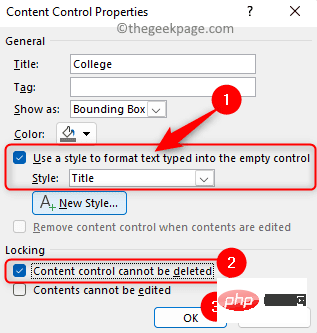
If you want to lock delete and edit permissions, you need to check Content Control cannot be deleted and Contents cannot be The two boxes next to editing.

If you want to allow deletion and editing, do not check these boxes.

The above is the detailed content of How to add or edit a formatted text control in Microsoft Word. For more information, please follow other related articles on the PHP Chinese website!


