


If you have administrative abilities, you will be able to access most of the data on your C drive, change system settings, and perform various other impossible operations.
However, there are some operations that even an administrator cannot fully perform, so today we will show you how to take ownership of a folder in Windows 11.
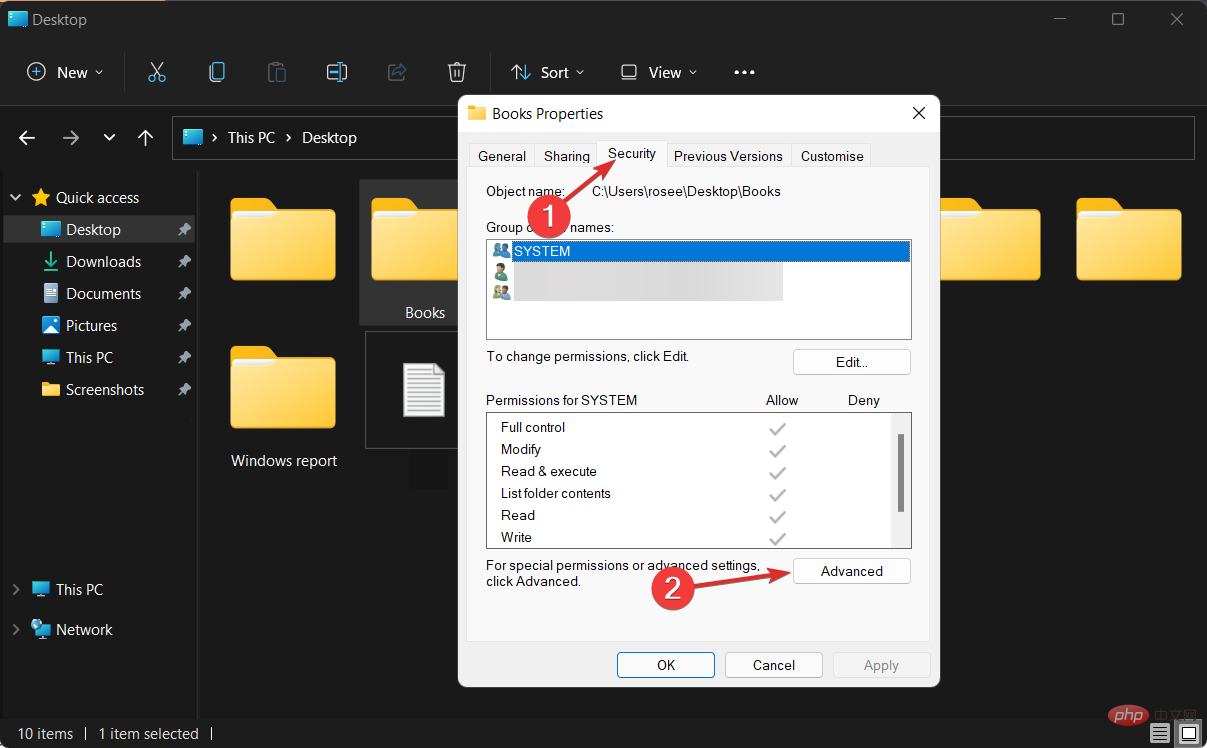
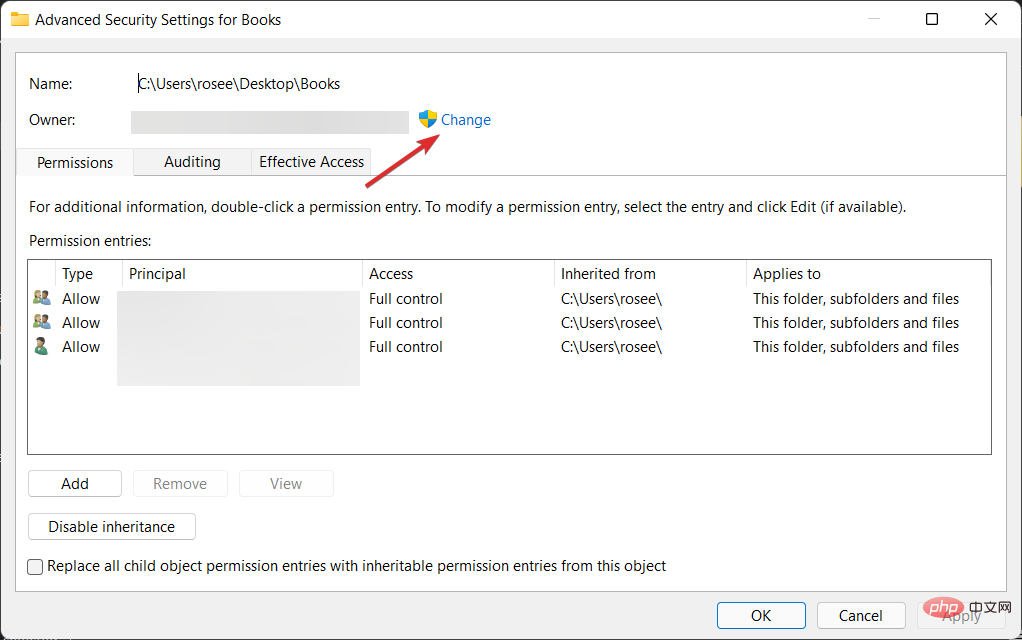
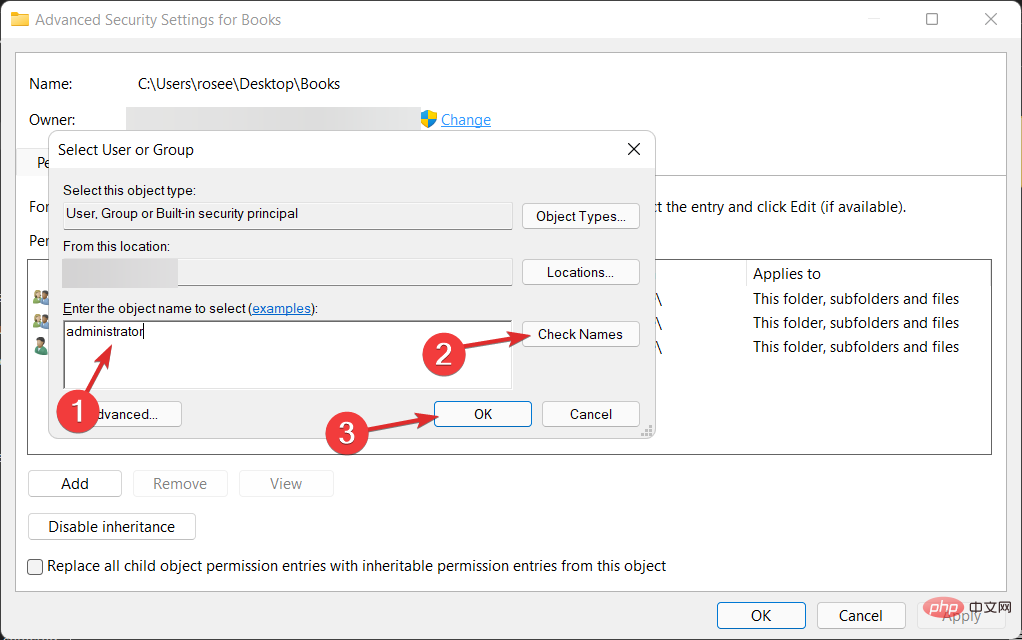
If you wish to access the WindowsApps folder, take control of a hard drive belonging to another computer, or delete a shared file that has been corrupted by improper permissions, simply having an administrator account is not enough.
The same principles apply if you want to take ownership of a folder on Windows 10, so having the right method can make a big difference.
This is because these tweaks are associated with Microsoft's Trusted Installer account, so you need to transfer ownership of these files from the Trusted Installer to your Administrator account.
After we see what types of Microsoft accounts exist, we will show you how to take ownership of a folder in Windows 11. Follow us!
Most of us are familiar with the terms administrator profile and regular user profile when it comes to our personal computers. Administrators are compared to God, while users are compared to the masses.
On the other hand, what about domain administrator accounts, domain user accounts, or local groups? There are many other types of profiles that provide varying amounts of access to PC, server, and network configurations and settings.
To maintain network security and ensure everyone has access to the areas they need to perform their duties, it is critical to understand the specific capabilities of each device.
No standard user account should be granted administrator access to your network. Users who use it as part of their regular user account can inadvertently cause a lot of damage, for example, if they become infected with a virus that deletes data on their computer.
A user's permissions are managed by a Windows Active Directory domain on a Windows network, which is typically created when they first connect to the network and contains all of their accounts.
If users require specific permissions, they should be provided with login information from an account with the appropriate level of access to the system.
You can provide high-level access to different parts of your Windows network by creating security groups on your network. These groups should be reviewed regularly to ensure that no ordinary users are included as members, and only administrators do so.
In addition to regular user accounts, there is another type of user account that has special access to specific areas of the network - service accounts.
This term refers to a user account used by software (usually on a server) to perform automated actions, such as backing up data or managing your antivirus management.
<strong>cd C:\Program Files</strong>
<strong>takeown /f foldername /r /d y icacls foldername /grant administrators:F /t</strong>
<strong>takeown /f filename icacls filename /grant administrators:F</strong>

The above is the detailed content of How to take ownership of a folder in Windows 11. For more information, please follow other related articles on the PHP Chinese website!
 Computer is infected and cannot be turned on
 How to prevent the computer from automatically installing software
 Summary of commonly used computer shortcut keys
 Computer freeze screen stuck
 How to measure internet speed on computer
 How to set the computer to automatically connect to WiFi
 Computer 404 error page
 How to set up computer virtual memory


![[Web front-end] Node.js quick start](https://img.php.cn/upload/course/000/000/067/662b5d34ba7c0227.png)


