
Sometimes when you create a Word document that requires data to be filled in (including a date) and share it with others to fill in, you may want to make sure that the date format is strictly followed to maintain the uniformity of the document. However, even if you explicitly write that you want Following this specific date format, people are people and rarely follow the rules. In this case, it would be nice if you could force the date to be entered in a specific format you want, using a date picker, don't you think?
So, keep reading, that’s exactly what we’re going to talk about today.
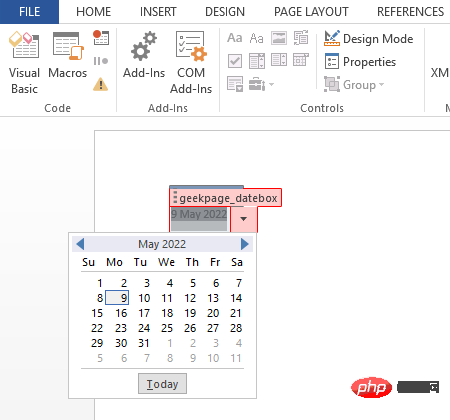
Step 1: First, we need to enable it in your Microsoft Word "Developers" tab.If you have already enabled this tab,you can skip directly to step 4. Otherwise click theFile tab at the top.
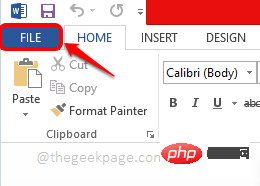
Step 2: On the left side of the window, click the "Options" tile for the next step.
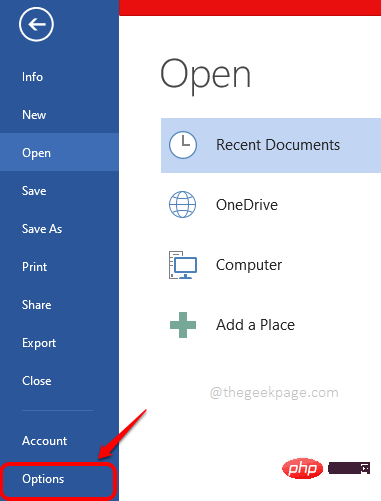
Step 3: In theWord options window,click the ## on the left #Custom Ribbon. Nowon the right,check thecheckboxcorresponding to the option namedDeveloper. Click the "OK" button when finished.
This will enable theDeveloper tab in Microsoft Word.
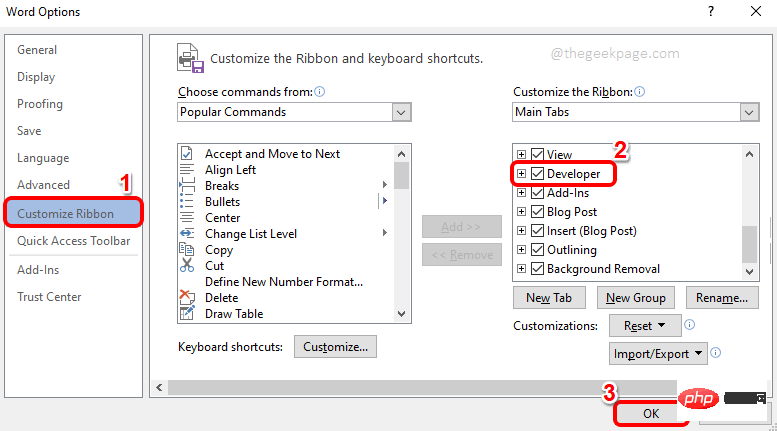
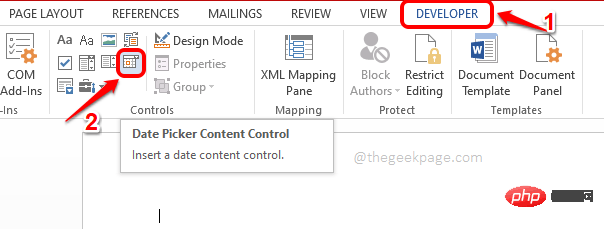
Step 4: Once theDeveloperstab is enabled, click on it and thenDatepickerContentControlicon, as shown in the screenshot below.
Step 5: You will now see that the date picker has been successfully inserted into your Word document. Now let's customize it. To do this, click on the Design Mode icon under the Developer tab itself.
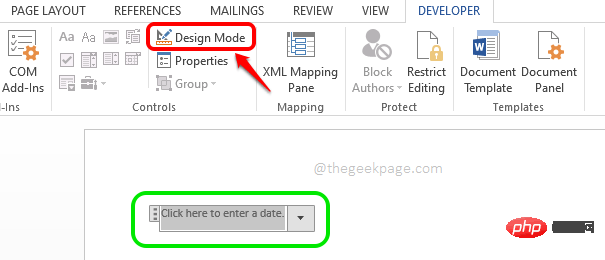 Step 6
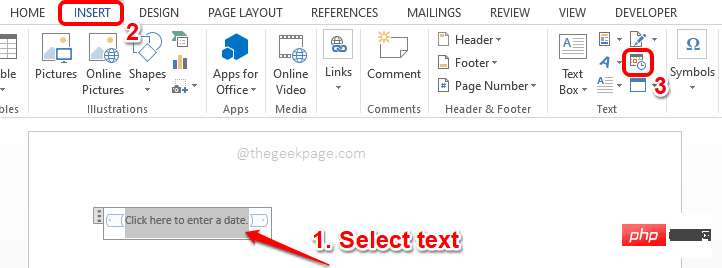
on the date picket.Then click theInsert tab at the top.Finally, click theInsert Date and Timeicon.
 Step 7
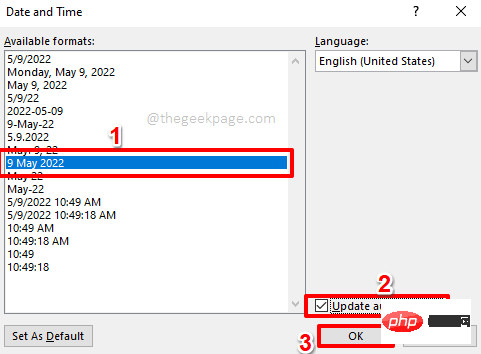
Date and Timewindow opens, select the format of your choicefrom the available formats Dateformat.Then select the checkbox corresponding to the Automatically update
option. After that, click the "OK" button.
 Step 8
Design Mode button again.This is locatedunder the Developer tab,as described in step 5.
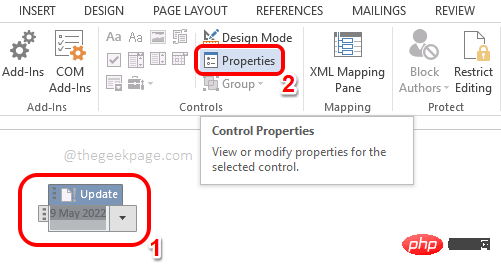
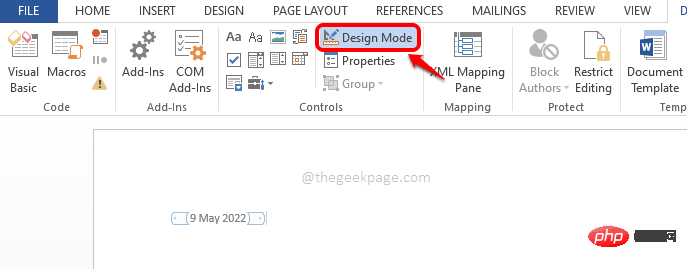 Step 9
Date Pickeragain and then click on theProperties button at the top.
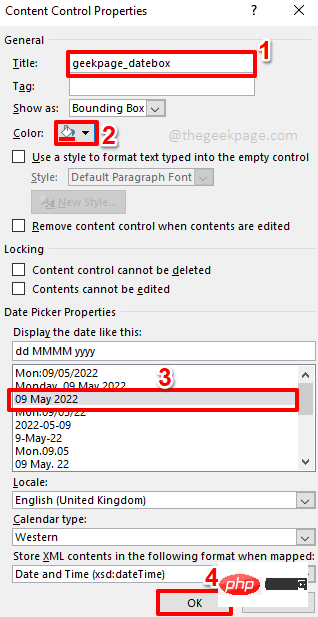
 Step 10
Content Control Propertieswindow, you can specify a title for the Date Picker. You can also choose your favorite color.You can also choose the date format.
In this window you can also customize many other options. For reference, please see the screenshot below. After all is completed, click theOK
button.
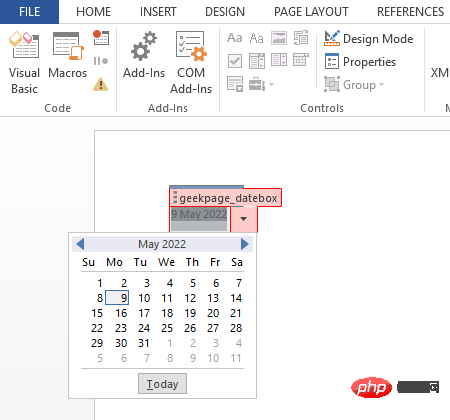
 Step 11
By default, the date picker will display the current date. You can later select any date from the date picker just click on it.
The above is the detailed content of How to insert a date picker in Microsoft Word. For more information, please follow other related articles on the PHP Chinese website!
 Five major components of a von Neumann computer
 How to pay with WeChat on Douyin
 How to modify the text on the picture
 How to run code with vscode
 html file opens blank
 The difference between python and pycharm
 The role of int() function in python
 Solution to the problem that the input is not supported when the computer starts up


