
The OneDrive app on Windows systems allows you to store files on the cloud up to 5 GB. There is another feature in the OneDrive app that allows users to choose an option whether to keep files on system space or make them available online without taking up your system storage. This feature is called Files on Demand. In this article, we explore this feature further and explain the various options on how to make files available on demand in OneDrive on your Windows 11 PC.
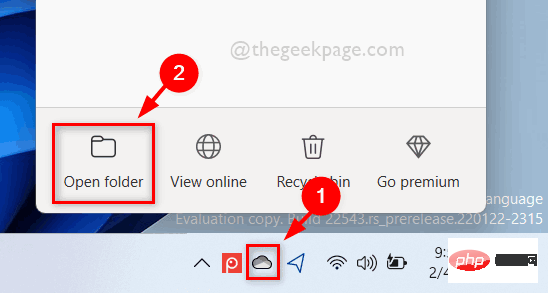
Step 1: Go to thetaskbarrightmost corner and clickOneDriveapplication icon once.
Step 2: Then, select theOpen Folder option at the bottom of the OneDrive app as shown below.
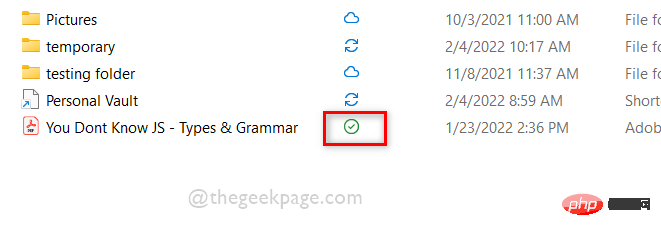
# Step 3: In the OneDrive folder, the files with a status ofin a green circle with a green check mark are actuallyLocally Available. This means that the file is available locally and you don't need to download the file to use it.
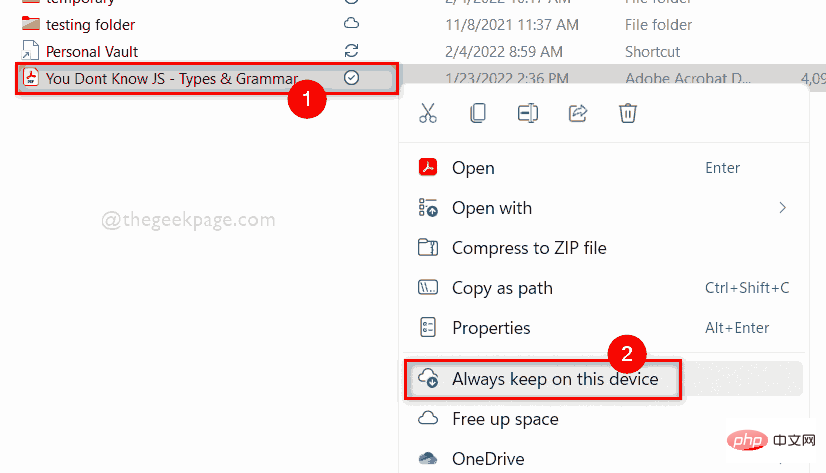
Always keep on this devicefrom the context menu as shown below.
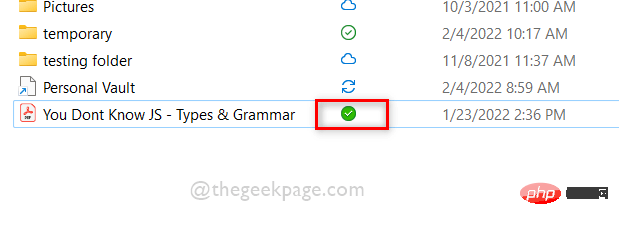
Always Available(green circle with white check mark) on your device, this will take up storage space on your hard drive as shown below.
NOTE: This means you can also access this file on your system while offline.
Free Spacefrom the context menu as shown below.
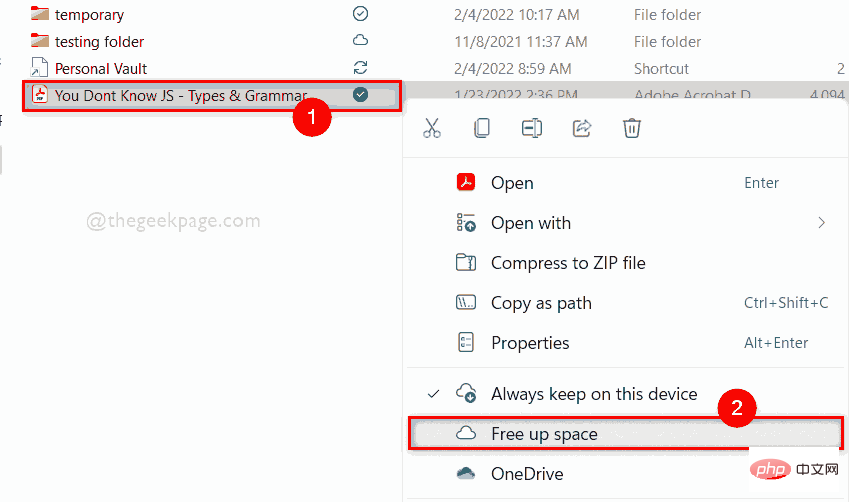
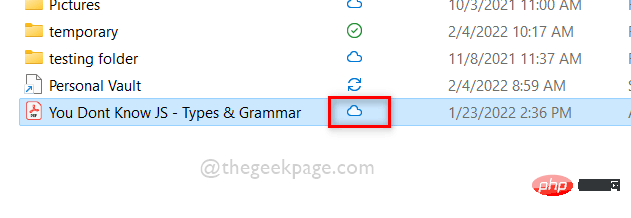
Note:You will now need to access this file online. This means you need to download the file before you can access it.
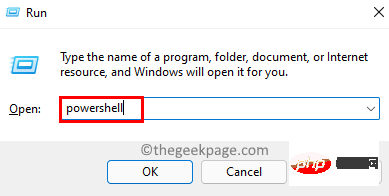
Windows Rkeys simultaneously on your keyboard to openRunDialog box.
Step 2: Then, typepowershell in the run box and press theEnterkey to open thePowerShellapplication.
Enterkey.
Note: Please replaceC:\Users\%username%\OneDrive\You Dont Know JS – Types & Grammar.pdfwith yourfile path.
attrib "C:\Users\%username%\OneDrive\You Dont Know JS - Types & Grammar.pdf"
Uis shown in the output, it means that the file isOnline Only.

Pis written in the output, it means that the file isalways available on your device.

does notwrite anything, it means the file isavailable locally.
 Step 7: Now to change the file status, execute the following explained command as shown below.
: Please replaceC:\Users\%username%\OneDrive\You Dont Know JS – Types & Grammar.pdfwith yourfile path.To set the file status to online only:
attrib +u "C:\Users\ %username% \OneDrive\You Dont Know JS - Types & Grammar.pdf"
To make the file status always available:
attrib +p "C:\Users\ %username% \OneDrive\You Dont Know JS - Types & Grammar.pdf"
To set the file status to locally available:
attrib -p "C:\Users\ %username% \OneDrive\You Dont Know JS - Types & Grammar.pdf"
Step 8: The output shown below is used to change the status of the file to
Online Only. You can execute the other commands above to change the status of the file to whatever you want.
Step 9: Close the PowerShell application after viewing and setting the file status.
This is how you can view and change the status of files in your OneDrive folder using the PowerShell application on your system.
The above is the detailed content of How to use OneDrive files on demand in Windows 11. For more information, please follow other related articles on the PHP Chinese website!
 What are the virtual currencies that may surge in 2024?
 Baidu SEO keyword ranking optimization method
 What is the reason why the computer screen is black but the computer is on?
 Wireless network card cannot connect
 Software for making Sudoku solvers
 Introduction to laravel middleware
 How to call external js in html
 How to eliminate html code


