Home > Operation and Maintenance > Docker > Completely master the use of Docker learning containers

Completely master the use of Docker learning containers

WBOYWBOYWBOYWBOYWBOYWBOYWBOYWBOYWBOYWBOYWBOYWBOYWB
Release: 2022-01-17 18:46:34
forward
2357 people have browsed it

This article brings you about the use of containers in docker, I hope it will be helpful to you.

Completely master the use of Docker learning containers

Run a container

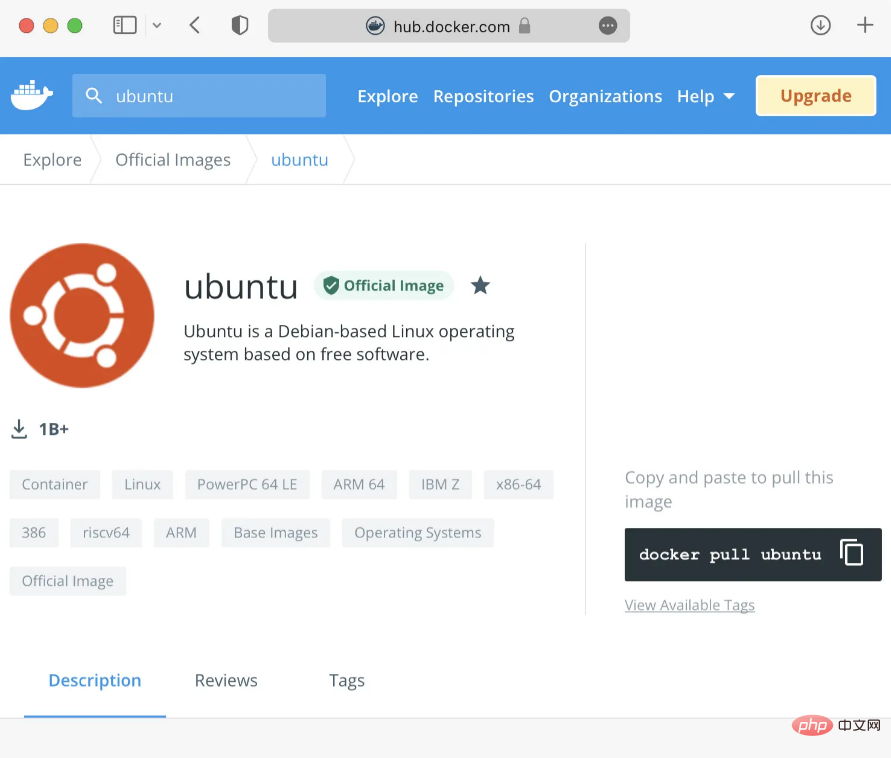
If you want to find an existing image, you can do it in the public Search on Docker Hub and you can find its introduction and usage here, just like finding an open source project on GitHub.

Completely master the use of Docker learning containers

If you are using Docker Hub for the first time, you can register an account first, enter ubuntu in the top search box, and the first result found is official ubuntu image, click it to see the page above.

This page has some basic information and usage introduction of the image. The docker pull ubuntu command on the right is used to pull the image locally. As mentioned in the previous article, when we instantiate a container, if Docker cannot find the specified image locally, it will automatically pull it, so we can run it directly locally:

docker run -i -t ubuntu /bin/bash
Copy after login

This command has some more parameters than the last example. Let’s explain them below:

  • -i can ensure that STDIN is turned on in the container

  • -t A pseudo-TTY terminal

  • ubuntu is the name of the image, which is equivalent to hello-world

  • /bin in the previous example. /bash is the command to be executed in the container after startup

The -i and -t parameters allow us to interact with the container after it is running. When the container is created, Docker will execute the /bin/bash command in the container. Therefore, after the container is run, our terminal will be attached to the container:

Completely master the use of Docker learning containers

At this time, You can open a terminal and enter the docker ps command to view the started containers. The results are as follows:

CONTAINER ID   IMAGE     COMMAND       CREATED       STATUS       PORTS     NAMES
402c5d3468d7   ubuntu    "/bin/bash"   4 hours ago   Up 4 hours             reverent_wu
Copy after login

This shows the container's ID, image, last executed command, creation time, status, and name. . The name reverent_wu here is automatically generated by Docker. If you need to specify a name when creating the container, you can use --name to name the container.

Go deep inside the container

#In the current state, we can execute any command supported by the ubuntu system in the terminal attached to the container. For example, enter the hostname command and find that the hostname of the container is its container ID.

Next, you can take a look at the /etc/hosts file:

root@402c5d3468d7:/# cat /etc/hosts
127.0.0.1        localhost
::1        localhost ip6-localhost ip6-loopback
fe00::0        ip6-localnet
ff00::0        ip6-mcastprefix
ff02::1        ip6-allnodes
ff02::2        ip6-allrouters
172.17.0.2        402c5d3468d7
Copy after login

You can also try to view the process in the container yourself, or even use apt-get to install the software package.

Finally, you can enter the exit command to launch the container and return to the host's command prompt. Note that when you execute docker ps at this time, you will find that the ubuntu container you just created is no longer in the list of containers.

CONTAINER ID   IMAGE     COMMAND   CREATED   STATUS    PORTS     NAMES
Copy after login

When we exit, the container stops running. However, the container has not been deleted. You can use the docker ps -a command to view all created containers, whether the container is started or not:

CONTAINER ID   IMAGE     COMMAND       CREATED       STATUS                     PORTS     NAMES
402c5d3468d7   ubuntu    "/bin/bash"   4 hours ago   Exited (0) 2 minutes ago             reverent_wu
Copy after login

At this time, its status changes to Exited (0) 2 minutes ago , indicating that it was launched 2 minutes ago, and the exit status code is 0, indicating a normal exit.

We can restart this container through the following command:

docker start 402c5d3468d7
Copy after login

In this command, docker start is followed by the ID of the container, or the name of the container can also be used. After the execution is successful, you can see that the container is in the starting state through the docker ps command. After the container is restarted through the docker start command, the parameters specified by the docker run command will be used, that is, after startup, /bin/bash will be run to start a shell. , but we have not entered the command line of the container. You can enter again through the docker attach command:

docker attach 402c5d3468d7
Copy after login

At this time, you can continue to execute commands in the container.

If a container is no longer used, you can use the docker rm command to delete it.

docker rm 402c5d3468d7
Copy after login

Provide continuous services

More often, we use containers to run applications and services and want it to persist in the background To provide services, you need to run the container in detached mode (or daemon mode). Just add a -d parameter after docker run to let the container run in the background.

Next, we run a container again through the following command:

docker run --name detached_mode -d ubuntu /bin/sh -c "while true; do echo Docker YYDS; sleep 1; done"
Copy after login

This time, we clearly call the container detached_mode, pass -d to let it run in detached mode, and execute A script that prints a line of Docker YYDS every 1 second.

Because it runs in separate mode, we cannot see the printed content on the command line after startup. But you can see the container running through the docker ps command.

If you want it to stop running, you can use the docker stop command.

docker stop detached_mode
Copy after login

You can also start it again through the docker start command, or you can restart the running container through docker restart.

The running status of the container

在 detached_mode 容器运行的时候,可以通过 docker logs 命令获取容器的日志。也可以增加 -f 来持续监控日志,类似于 tail -f 命令。

docker logs -f detached_mode
Copy after login

此时就可以看到一直有 Docker YYDS 被打印。

除了监控容器的日志,也可以使用 docker top 命令,查看容器内的进程。

docker top detached_mode
Copy after login

Completely master the use of Docker learning containers

使用 docker stats 命令,可以查看容器的CPU、内存、网络I/O、存储I/O的性能和指标。

Completely master the use of Docker learning containers

另外,docker exec 命令可以在容器内部运行进程。

docker exec detached_mode cat /etc/hosts
Copy after login

以上命令可以让我们直接查看容器中的 hosts 文件的内容,如果需要运行一个后台进程,在指令后面增加 -d 参数就可以了。

容器的详细信息

使用 docker inspect 命令可以查看容器的详细信息,其结果是一个 JSON 结构,包含的信息非常丰富。可以通过 -f 或者 --format 来选定想要查看的部分。

docker inspect --format '{{ .NetworkSettings.IPAddress }}' detached_mode
Copy after login

执行以上的命令,只会在命令行展示容器的 IP 地址。

推荐学习:《docker视频教程

The above is the detailed content of Completely master the use of Docker learning containers. For more information, please follow other related articles on the PHP Chinese website!

Related labels:
source:juejin.im
Statement of this Website
The content of this article is voluntarily contributed by netizens, and the copyright belongs to the original author. This site does not assume corresponding legal responsibility. If you find any content suspected of plagiarism or infringement, please contact admin@php.cn
Popular Tutorials
More>
Latest Downloads
More>
Web Effects
Website Source Code
Website Materials
Front End Template