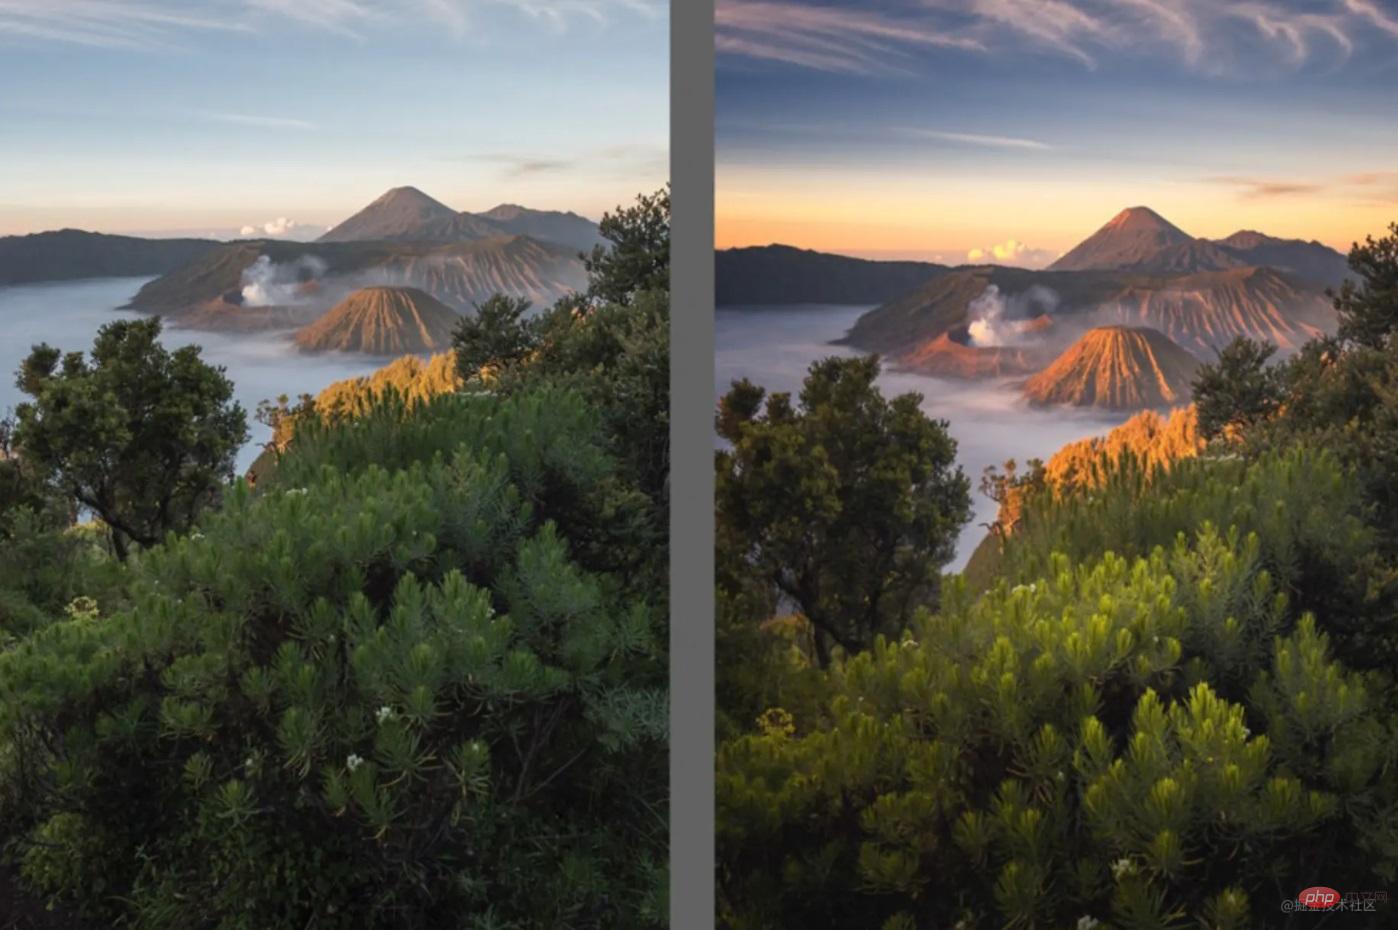
Using CSS filter skillfully can make the website more cool. This article will share with you some tips on using CSS filters. I hope it will be helpful to you!

Let’s start the content of this article!
When we process pictures, one of the functions we often use is filters, which can make an image present various visual effects.

In CSS, there is also a filter attribute that allows us to use CSS code to specify various filter effects for elements, such as blur, grayscale, lightness, and color shift. Move and wait.
The basic use of CSS filter is very simple. The CSS standard contains some functions that have achieved predefined effects (blur, brightness, contrast, etc. below). We can achieve what we want by specifying the values of these functions. Effect:
/* 使用单个滤镜 (如果传入的参数是百分数,那么也可以传入对应的小数:40% --> 0.4)*/
filter: blur(5px);
filter: brightness(40%);
filter: contrast(200%);
filter: drop-shadow(16px 16px 20px blue);
filter: grayscale(50%);
filter: hue-rotate(90deg);
filter: invert(75%);
filter: opacity(25%);
filter: saturate(30%);
filter: sepia(60%);

/* 使用多个滤镜 */
filter: contrast(175%) brightness(3%);

/* 不使用任何滤镜 */
filter: none;
Official demo: MDN
drop-shadowAdd shadow to irregular shapes; use blur to achieve background blur, frosted glass effect, etc.
CSS filter to achieve some animation effects to make website interaction more cool, and at the same time deepen our understanding of CSS filter. Let’s get started!
CSS N coding skills, so I won’t repeat them here. Friends in need can go there Check it out.)
brightness in the filter is used to adjust the brightness of the image. The default value is 1; when it is less than 1, the image becomes dark; when it is 0, it displays a completely black image; when it is greater than 1, the image displays Brighter than the original image.
background image and the transparency of the text.
<div class="container">
  <div class="pic"></div>
  <div class="text">
    <p>如果生活中有什么使你感到快乐,那就去做吧</p>
    <br>
    <p>不要管别人说什么</p>
  </div>
</div>.pic{
height: 100%;
width: 100%;
position: absolute;
background: url('./images/movie.webp') no-repeat;
background-size: cover;
animation: fade-away 2.5s linear forwards; //forwards当动画完成后,保持最后一帧的状态
}
.text{
position: absolute;
line-height: 55px;
color: #fff;
font-size: 36px;
text-align: center;
left: 50%;
top: 50%;
transform: translate(-50%,-50%);
opacity: 0;
animation: show 2s cubic-bezier(.74,-0.1,.86,.83) forwards;
}
@keyframes fade-away { //背景图的明暗度动画
30%{
filter: brightness(1);
}
100%{
filter: brightness(0);
}
}
@keyframes show{ //文字的透明度动画
20%{
opacity: 0;
}
100%{
opacity: 1;
}
}hover reaches a certain When a card is on, the background of other cards is blurred, allowing the user to focus on the current card.
html Structure:
<ul class="cards">
    <li class="card">
      <p class="title">Flower</p>
      <p class="content">The flowers mingle to form a blaze of color.</p>
    </li>
    <li class="card">
      <p class="title">Sunset</p>
      <p class="content">The sunset glow tinted the sky red.</p>
    </li>
    <li class="card">
      <p class="title">Plain</p>
      <p class="content">The winds came from the north, across the plains, funnelling down the valley. </p>
    </li>
</ul>.card element On the pseudo-class, when the element is not the focus, a filter is added to the pseudo-class of the element.
.card:before{
    z-index: -1;
    content: '';
    position: absolute;
    top: 0;
    left: 0;
    bottom: 0;
    right: 0;
    border-radius: 20px;
    filter: blur(0px) opacity(1);
    transition: filter 200ms linear, transform 200ms linear;
}
/*
     这里不能将滤镜直接加在.card元素,而是将背景和滤镜都加在伪类上。
     因为,父元素加了滤镜,它的子元素都会一起由该滤镜改变。
     如果滤镜直接加在.card元素上,会导致上面的文字也变模糊。
*///通过css选择器选出非hover的.card元素,给其伪类添加模糊、透明度和明暗度的滤镜
.cards:hover > .card:not(:hover):before{
filter: blur(5px) opacity(0.8) brightness(0.8);
}//对于hover的元素,其伪类增强饱和度,尺寸放大
.card:hover:before{
filter: saturate(1.2);
transform: scale(1.05);
}sepia filter to convert the image tone to dark brown, and then fine-tune it by reducing the saturation saturate and hue rotation hue-rotate , simulate the effect of old photos.
.pic{
    border: 3px solid #fff;
    box-shadow: 0 10px 50px #5f2f1182;
    filter: sepia(30%) saturate(40%) hue-rotate(5deg);
    transition: transform 1s;
}
.pic:hover{
    filter: none;
    transform: scale(1.2) translateX(10px);
    z-index: 1;
}filter: grayscale(100%) to the html element.
grayscale(amount)The function will change the grayscale of the input image. The value of amount defines the ratio of grayscale conversion. If the value is 100%, the image will be completely converted to grayscale, and if the value is 0%, the image will remain unchanged. If no value is set, the default value is 0.
blur and contrast.
<div class="container">
  <div class="circle circle-1"></div>
  <div class="circle circle-2"></div>
</div>
.container{
  margin: 50px auto;
  height: 140px;
  width: 400px;
  background: #fff;   //给融合元素的父元素设置背景色
  display: flex;
  align-items: center;
  justify-content: center;
  filter: contrast(30);    //给融合元素的父元素设置contrast
}
.circle{
  border-radius: 50%;
  position: absolute;
  filter: blur(10px);    //给融合元素设置blur
}
.circle-1{
  height: 90px;
  width: 90px;
  background: #03a9f4;
  transform: translate(-50px);
  animation: 2s moving linear infinite alternate-reverse;
}
.circle-2{
  height: 60px;
  width: 60px;
  background: #0000ff;
  transform: translate(50px);
  animation: 2s moving linear infinite alternate;
}
 @keyframes moving {    //两个元素的移动
  0%{
    transform: translate(50px)
  }
  100%{
    transform: translate(-50px)
  }
}Technical points to achieve the fusion effect:
contrastFilter Applies to the parent element (.container) of the fusion element, and the parent element must set background.
blurThe filter is applied to the blend element (.circle).
blurSet the blur level of the image, contrastSet the contrast of the image. When the two are combined like above, they create a magical fusion effect, and you can use this writing like a formula.
html和css如下所示,这个动画主要通过控制子元素.circle的尺寸和位移来实现,但是由于父元素和子元素都满足 “融合公式” ,所以当子元素相交时,就出现了融合的效果。
<div class="container">
  <div class="circle"></div>
  <div class="circle"></div>
  <div class="circle"></div>
  <div class="circle"></div>
  <div class="circle"></div>
</div>
.container {
  margin: 10px auto;
  height: 140px;
  width: 300px;
  background: #fff;       //父元素设置背景色
  display: flex;
  align-items: center;
  filter: contrast(30);   //父元素设置contrast
}
.circle {
  height: 50px;
  width: 60px;
  background: #1aa7ff;
  border-radius: 50%;
  position: absolute;
  filter: blur(20px);    //子元素设置blur
  transform: scale(0.1);
  transform-origin: left top;
}
.circle{
  animation: move 4s cubic-bezier(.44,.79,.83,.96) infinite;
}
.circle:nth-child(2) {
  animation-delay: .4s;
}
.circle:nth-child(3) {
  animation-delay: .8s;
}
.circle:nth-child(4) {
  animation-delay: 1.2s;
}
.circle:nth-child(5) {
  animation-delay: 1.6s;
}
@keyframes move{     //子元素的位移和尺寸动画
  0%{
    transform: translateX(10px) scale(0.3);
  }
  45%{
    transform: translateX(135px) scale(0.8);
  }
  85%{
    transform: translateX(270px) scale(0.1);
  }
}主要通过不断改变letter-spacing和blur的值,使文字从融合到分开:
<div class="container">
  <span class="text">fantastic</span>
</div>
.container{
  margin-top: 50px;
  text-align: center;
  background-color: #000;
  filter: contrast(30);
}
.text{
  font-size: 100px;
  font-family: 'Gill Sans', 'Gill Sans MT', Calibri, 'Trebuchet MS', sans-serif;
  letter-spacing: -40px;
  color: #fff;
  animation: move-letter 4s linear forwards;  //forwards当动画完成后,保持最后一帧的状态
}
@keyframes move-letter{
  0% {
    opacity: 0;
    letter-spacing: -40px;
    filter: blur(10px);
  }
  25% {
    opacity: 1;
  }
  50% {
    filter: blur(5px);
  }
  100% {
    letter-spacing: 20px;
    filter: blur(2px);
  }
}filter还可以通过 URL 链接到 SVG 滤镜元素,SVG滤镜元素MDN 。
下面的水波纹效果就是基于 SVG 的feTurbulence滤镜实现的,原理参考了 说说SVG的feTurbulence滤镜和SVG feTurbulence滤镜深入介绍,有兴趣的朋友可以深入阅读。
feTurbulence滤镜借助Perlin噪声算法模拟自然界真实事物那样的随机样式。它接收下面5个属性:
baseFrequency表示噪声的基本频率参数,频率越高,噪声越密集。numOctaves就表示倍频的数量,倍频的数量越多,噪声看起来越自然。seed属性表示feTurbulence滤镜效果中伪随机数生成的起始值,不同数量的seed不会改变噪声的频率和密度,改变的是噪声的形状和位置。stitchTiles定义了Perlin噪声在边框处的行为表现。type属性值有fractalNoise和turbulence,模拟随机样式使用turbulence。
在这个例子,两个img标签使用同一张图片,将第二个img标签使用scaleY(-1)实现垂直方向的镜像翻转,模拟倒影。
并且,对倒影图片使用feTurbulence滤镜,通过动画不断改变feTurbulence滤镜的baseFrequency值实现水纹波动的效果。
<div class="container">
  <img  src="images/moon.jpg" alt="Tips for using CSS filters to make your website more cool, worth collecting!" >
  <img  src="images/moon.jpg" class="reflect" alt="Tips for using CSS filters to make your website more cool, worth collecting!" >
</div>

<!--定义svg滤镜,这里使用的是feTurbulence滤镜-->
<svg width="0" height="0">
    <filter id="displacement-wave-filter">

      <!--baseFrequency设置0.01 0.09两个值,代表x轴和y轴的噪声频率-->
      <feTurbulence baseFrequency="0.01 0.09">

        <!--这是svg动画的定义方式,通过动画不断改变baseFrequency的值,从而形成波动效果-->
        <animate attributeName="baseFrequency"
        dur="20s" keyTimes="0;0.5;1" values="0.01 0.09;0.02 0.13;0.01 0.09"
        repeatCount="indefinite" ></animate>

      </feTurbulence>
      <feDisplacementMap in="SourceGraphic" scale="10" />
    </filter>
</svg>.container{
height: 520px;
width: 400px;
display: flex;
clip-path: inset(10px);
flex-direction: column;
}
img{
height: 50%;
width: 100%;
}
.reflect {
transform: translateY(-2px) scaleY(-1);
//对模拟倒影的元素应用svg filter
//url中对应的是上面svg filter的id
filter: url(#displacement-wave-filter);
}在上面的水波动画中改变的是baseFrequency值,我们也通过改变seed的值,实现文字的抖动效果。
<div>
  <p class="shaky">Such a joyful night!</p>
</div>
<svg width="0" height="0">
    <filter id="displacement-text-filter">

      <!--定义feTurbulence滤镜-->
      <feTurbulence baseFrequency="0.02" seed="0">

       <!--这是svg动画的定义方式,通过动画不断改变seed的值,形成抖动效果-->
        <animate attributeName="seed"
        dur="1s" keyTimes="0;0.5;1" values="1;2;3"
        repeatCount="indefinite" ></animate>
      </feTurbulence>
      <feDisplacementMap in="SourceGraphic" scale="10" />
    </filter>
</svg>.shaky{
font-size: 60px;
filter: url(#displacement-text-filter); //url中对应的是上面svg filter的id
}原文地址:https://juejin.cn/post/7002829486806794276
作者:Alaso
更多编程相关知识,请访问:编程视频!!
The above is the detailed content of Tips for using CSS filters to make your website more cool, worth collecting!. For more information, please follow other related articles on the PHP Chinese website!