
The screen recording function is under the [Insert] tab, click the [Insert] menu, and you can see the [Screen Recording] button on the far right of the ribbon.

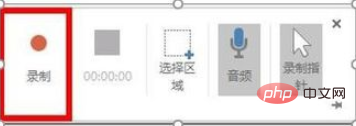
Click [Screen Recording], a small frame with a recording button will pop up, click [Select Area] in the middle, and use a red dotted circle to define a screen recording area on the screen Area, only operations occurring within the red box are recorded, and operations outside this area cannot be recorded.

(Learning recommendation: java quick start)
Click the red dot [Record] on the far left of the small frame to prepare for recording.

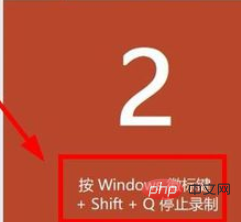
After clicking the red button, a countdown of 3, 2, and 1 will appear immediately, and recording will start when the countdown ends.

In the red box when counting down 3, 2, 1, we are prompted to use the Windows shift Q key combination to end the recording. We must remember it. Press these three key combinations to end.

#The video recorded after the end is in the area you just selected. Like this, there is an operation button at the bottom of the video. Click to play.

After the video recording is completed, the [Video Tools] tab will appear at the top. Under the [Playback] tab, you can trim the video and edit the video. Further edit, set playback mode, insert subtitles, etc.

Under the [Video Tools--Format] tab, you can also adjust the color and contrast of the video, select the video style, add borders to the video, add video effects, etc.

The above is the detailed content of How to use screen recording function in ppt. For more information, please follow other related articles on the PHP Chinese website!


