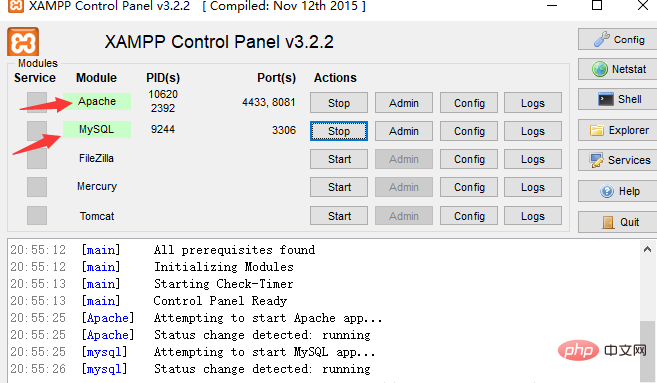
1. First of all, of course, you need to open the environment. First, find the folder where XAMPP is installed, click to open the "xampp-control" file, click start ""Open" Apache" and "MySQL" ”

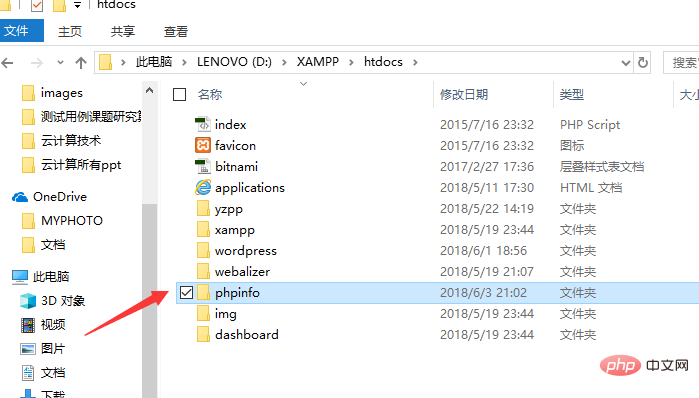
2. In the installation path of XAMPP, create a new project phpinfo (that is, a folder) under the htdocs folder

3. Open the Hbuilder software, select "File" - "Open Directory"

4. Install the plug-in that supports PHP on HBuilder, click "Tools" - "Plug-in Installation" - choose to install the "Aptana php" plug-in (I have installed it here)
After completion, follow the prompts to restart the HBuilder software
5. Configure the HBuilder external server (the key point of this article)
First switch to the "View while changing mode" in the upper right corner ”, then click the small triangle and select “Set up web server”
Select “External Server” – “New
Fill in the name and URL address (http://localhost:8081), where 8081 is the port I modified when installing XAMPP, which can be filled in according to your actual situation.
Go back to "web server" - select the PHP class file as the external server you just created
In this way, the external server is basically configured
6. Create a new php file for testing
Create a new PHP file in the phpinfo just now,
Write the code

Open "Run" - "Run Configuration"
Find "PHP Page Web" on the left, right-click and select "New"

The above is the detailed content of How to run and set up hbuilderx's php. For more information, please follow other related articles on the PHP Chinese website!