I said before that I would compile a tutorial on event broadcasting. Today I finally have time to write this article. This tutorial is based on Laravel Pusher Vue, using event broadcasting as the core technology, so that you can Quickly build a real-time chat room application. Without further ado, let’s take a look at the specific content.
Application initialization
Installation configuration
First of all, install a new chat room application through Composer:
composer create-project laravel/laravel chatroom --prefer-dist
Because you need to use to event broadcast, so you need to cancel the comment in front of the broadcast service provider in config/app.php:

Modify the BROADCAST_DRIVER configuration item in .env to pusher:
BROADCAST_DRIVER=pusher
Although Laravel supports Pusher out of the box, we still need to install the corresponding PHP SDK:
composer require pusher/pusher-php-server
Set Pusher credential information
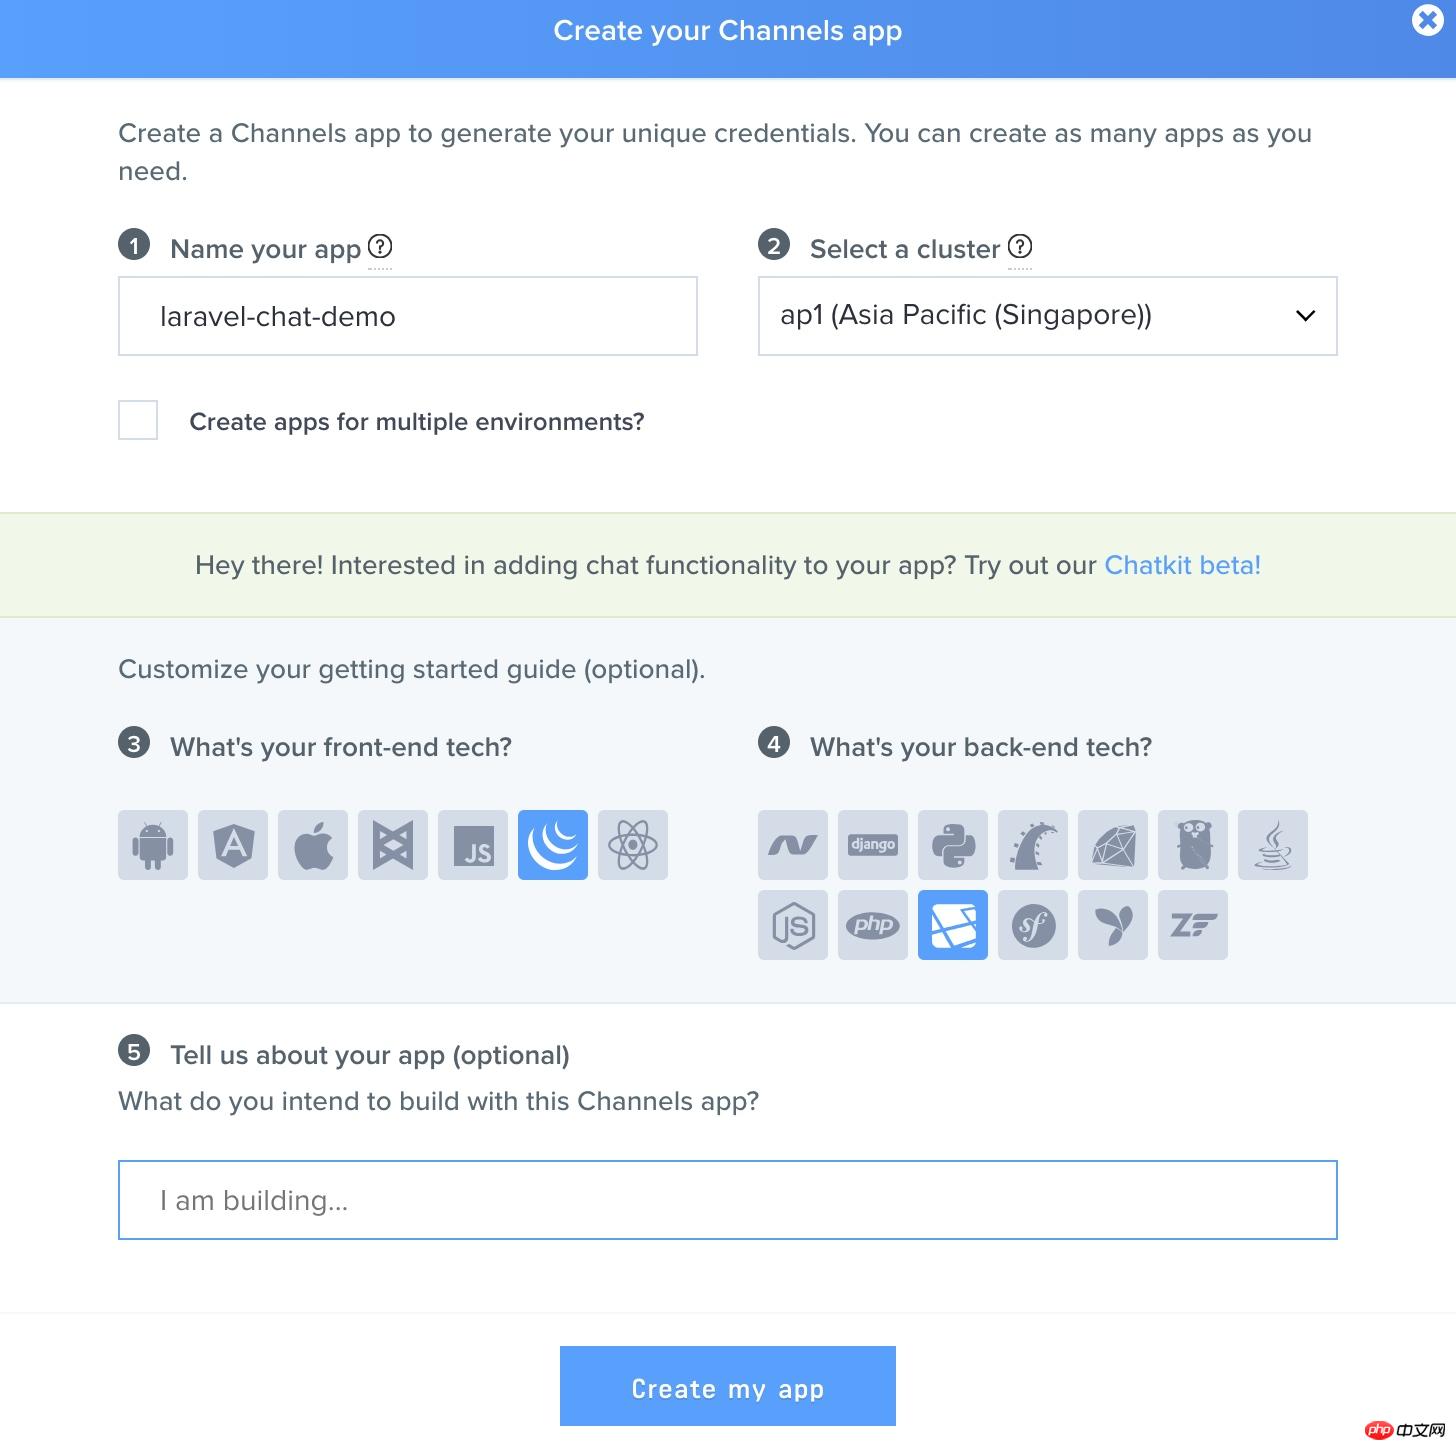
Access Pusher Official website, register and log in to the user backend, create a new Channels App:

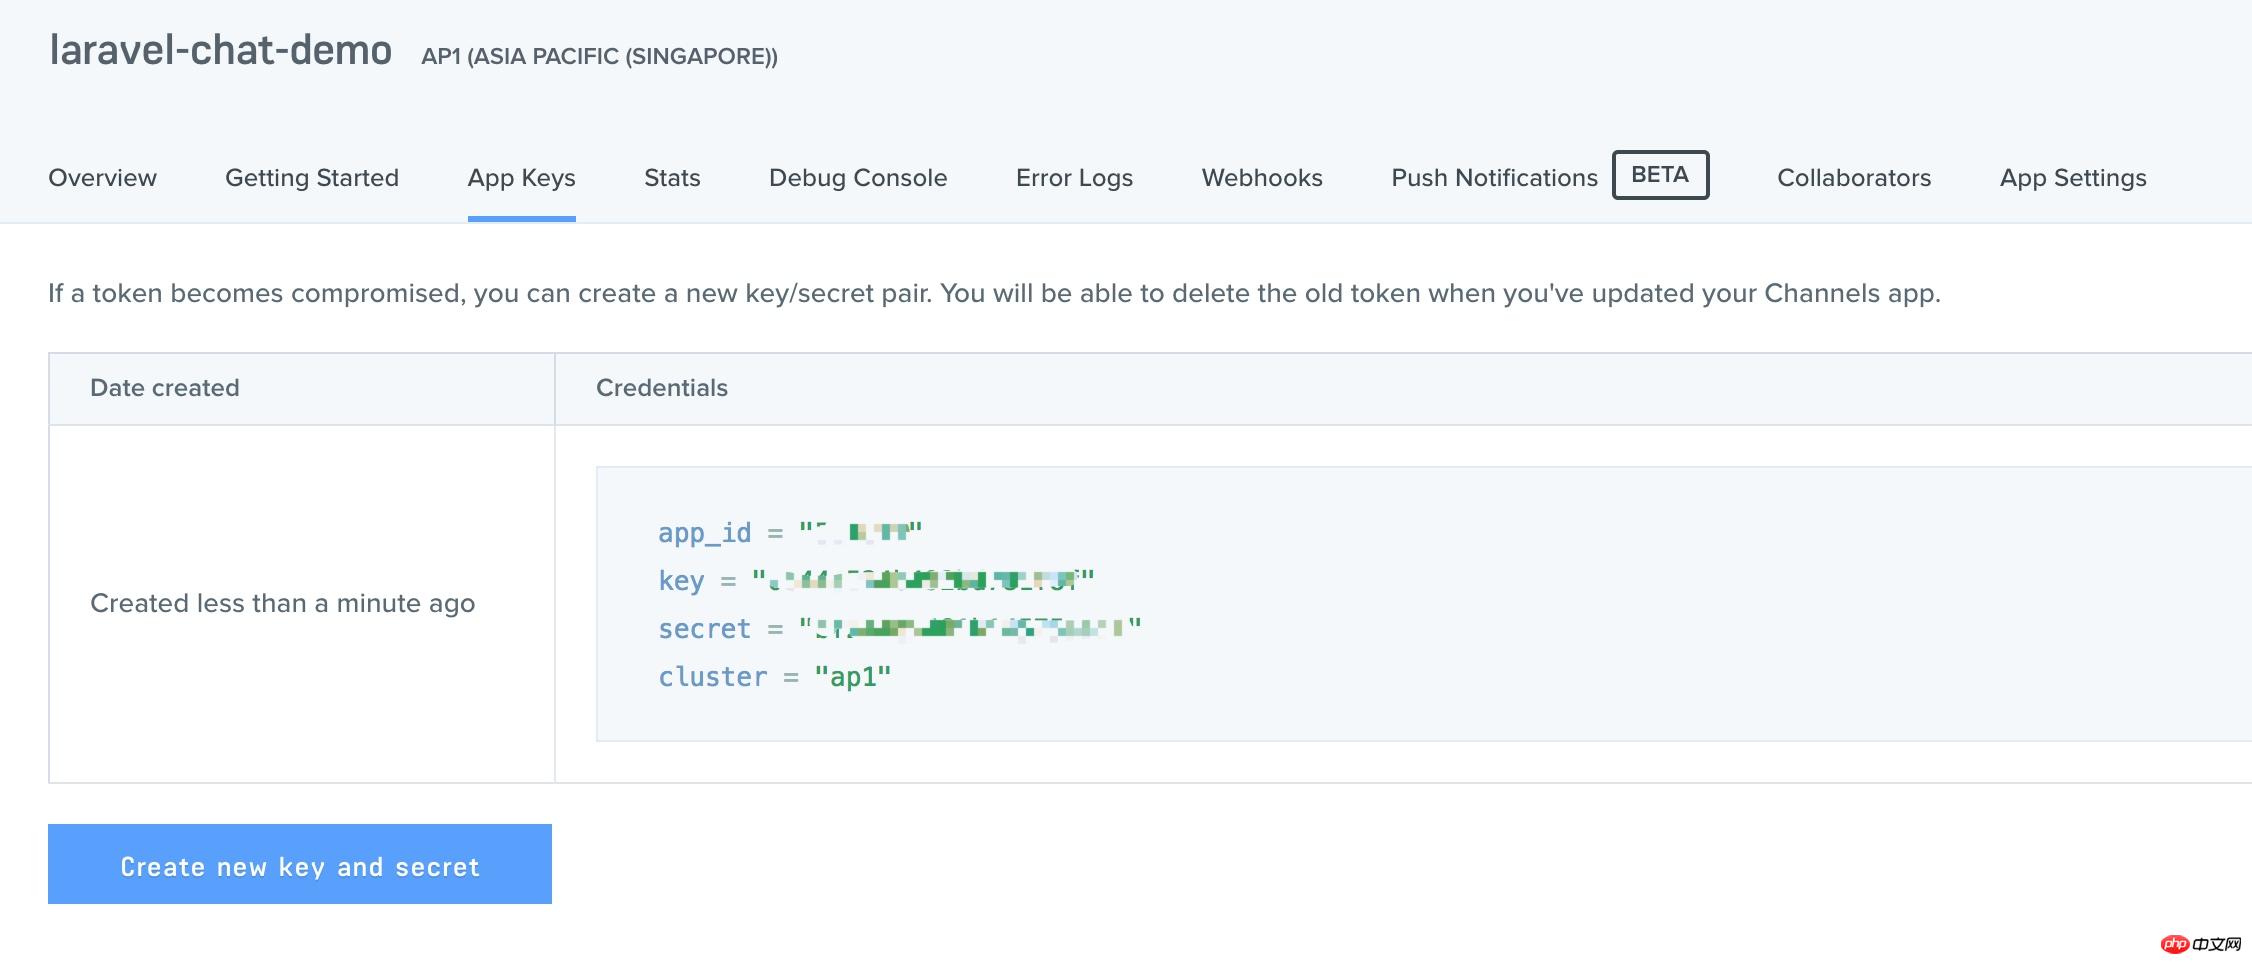
After the creation is completed, you can get App Keys related information on the jump page:

Fill the corresponding fields into the corresponding configuration items in .env in the root directory of the chat room application.
Front-end resource initialization
We use Laravel Mix to compile front-end CSS and JavaScript:
npm install
In addition, Laravel also provides the JavaScript library Laravel Echo to subscribe and listen for events:
npm install --save laravel-echo pusher-js
After the installation is complete, you also need to tell Laravel Echo to use Pusher. Laravel has provided us with this implementation in resources/assets/js/bootstrap.js, but it is commented out by default. You only need to cancel this comment. That’s it:
import Echo from 'laravel-echo'
window.Pusher = require('pusher-js');
window.Echo = new Echo({
    broadcaster: 'pusher',
    key: process.env.MIX_PUSHER_APP_KEY,
    cluster: process.env.MIX_PUSHER_APP_CLUSTER,
    encrypted: true
});User authentication scaffolding code
We set that only logged-in users can enter the chat room to chat. In order to simplify the process, we use Laravel’s default user authentication function:
php artisan make:auth
The above command will generate the routing, view, controller and other codes necessary for the user authentication system. Before the function takes effect, you need to run the database migration command to generate the corresponding data table, edit the database-related configuration items in .env to ensure that the database can be connected correctly, and then run the following command:
php artisan migrate
At this point, application initialization preparations Completed, let’s start writing business code.
Business code implementation
Message model
First, create a model class and its corresponding database migration file for the message sent:
php artisan make:model Message -m
Add the following line of code to the newly generated app/Message model class to facilitate batch assignment:
/**
 * Fields that are mass assignable
 *
 * @var array
 */
protected $fillable = ['message'];
Then write the up method of the newly generated messages corresponding to the migration file in the databases/migrations directory:
Schema::create('messages', function (Blueprint $table) {
    $table->increments('id');
    $table->integer('user_id')->unsigned();
    $table->text('message');
    $table->timestamps();
});Finally execute the migration command to generate the data table messages:
php artisan migrate
The relationship between users and messages
Obviously, there is a one-to-many relationship between users and messages. Add a new association method in the User model class:
/**
 * A user can have many messages
 *
 * @return \Illuminate\Database\Eloquent\Relations\HasMany
 */
public function messages()
{
    return $this->hasMany(Message::class);
}Next, define the relative relationship in the Message model class:
/**
 * A message belong to a user
 *
 * @return \Illuminate\Database\Eloquent\Relations\BelongsTo
 */
public function user()
{
    return $this->belongsTo(User::class);
}Controller code
Create control The controller ChatsController implements specific business logic:
php artisan make:controller ChatsController
Write the newly generated controller class app/Http/Controllers/ChatsController. The code is as follows:
<?php
namespace App\Http\Controllers;
use Auth;
use App\Message;
use Illuminate\Http\Request;
use Illuminate\Http\Response;
class ChatsController extends Controller
{
public function __construct()
{
$this->middleware('auth'); // 登录用户才能访问
}
/**
* Show chats
*
* @return \Illuminate\Http\Response
*/
public function index()
{
return view('chat');
}
/**
* Fetch all messages
*
* @return Message
*/
public function fetchMessages()
{
return Message::with('user')->get();
}
/**
* Persist message to database
*
* @param Request $request
* @return Response
*/
public function sendMessage(Request $request)
{
$user = Auth::user();
$message = $user->messages()->create([
'message' => $request->input('message')
]);
return ['status' => 'Message Sent!'];
}
}The controller provides three business methods. The index uses For displaying the chat room view, fetchMessages is used to get all messages and sendMessage is used to send messages.
Register application routing
Correspondingly, we register three routes in routes/web.php:
Route::get('/', 'ChatsController@index');
Route::get('messages', 'ChatsController@fetchMessages');
Route::post('messages', 'ChatsController@sendMessage');
Remove the /home route from the registered route, accordingly , you need to adjust the $redirectTo attribute in app/Http/Controllers/Auth/LoginController.php and app/Http/Controllers/Auth/RegisterController.php:
protected $redirectTo = '/';
Chat room view
For the chat room view code, we made slight adjustments based on the Bootsnipp chat room code snippet. First create resources/views/chat.blade.php:
@extends('layouts.app')
@section('content')
    <div class="container">
        <div class="row">
            <div class="col-md-8 col-md-offset-2">
                <div class="panel panel-default">
                    <div class="panel-heading">聊天室</div>
                    <div class="panel-body">
                        <chat-messages :messages="messages"></chat-messages>
                    </div>
                    <div class="panel-footer">
                        <chat-form
                                v-on:messagesent="addMessage"
                                :user="{{ Auth::user() }}"
                        ></chat-form>
                    </div>
                </div>
            </div>
        </div>
    </div>
@endsectionThis view is used to display the main page of the chat room. Notice that we use some Vue components in the view, the chat-messages component is used to display all chat messages, and the chat-form component is used to send messages. The code for these components will be given later.
Before writing the Vue component, we add some style code for the chat view in the resources/views/layouts/app.blade.php template (before adding it to the
tag):<style>
.chat {
list-style: none;
margin: 0;
padding: 0;
}
.chat li {
margin-bottom: 10px;
padding-bottom: 5px;
border-bottom: 1px dotted #B3A9A9;
}
.chat li .chat-body p {
margin: 0;
color: #777777;
}
.panel-body {
overflow-y: scroll;
height: 350px;
}
::-webkit-scrollbar-track {
-webkit-box-shadow: inset 0 0 6px rgba(0,0,0,0.3);
background-color: #F5F5F5;
}
::-webkit-scrollbar {
width: 12px;
background-color: #F5F5F5;
}
::-webkit-scrollbar-thumb {
-webkit-box-shadow: inset 0 0 6px rgba(0,0,0,.3);
background-color: #555;
}
</style>Next create the ChatMessages.vue component in resources/assets/js/components:
<template>
<ul class="chat">
<li class="left clearfix" v-for="message in messages">
<div class="chat-body clearfix">
<div class="header">
<strong class="primary-font">
{{ message.user.name }}
</strong>
</div>
<p>
{{ message.message }}
</p>
</div>
</li>
</ul>
</template>
<script>
export default {
props: ['messages']
};
</script>Then create the ChatForm.vue component in the same directory:
<template>
<div class="input-group">
<input id="btn-input" type="text" name="message" class="form-control input-sm" placeholder="在这里输入要发送的消息..." v-model="newMessage" @keyup.enter="sendMessage">
<span class="input-group-btn">
<button class="btn btn-primary btn-sm" id="btn-chat" @click="sendMessage">
发送
</button>
</span>
</div>
</template>
<script>
export default {
props: ['user'],
data() {
return {
newMessage: ''
}
},
methods: {
sendMessage() {
this.$emit('messagesent', {
user: this.user,
message: this.newMessage
});
this.newMessage = ''
}
}
}
</script>Finally we need to add this Two components are registered to the Vue root instance located in resources/assets/js/app.js:
require('./bootstrap');
window.Vue = require('vue');
Vue.component('chat-messages', require('./components/ChatMessages.vue'));
Vue.component('chat-form', require('./components/ChatForm.vue'));
const app = new Vue({
    el: '#app',
    data: {
        messages: []
    },
    created() {
        this.fetchMessages();
    },
    methods: {
        fetchMessages() {
            axios.get('/messages').then(response => {
                this.messages = response.data;
            });
        },
        addMessage(message) {
            this.messages.push(message);
            axios.post('/messages', message).then(response => {
                console.log(response.data);
            });
        }
    }
});Broadcast message sending event
In order to have real-time interaction in the chat room, broadcasting is required Certain events, in this example, we will trigger the MessageSent event when the user sends a message:
php artisan make:event MessageSent
Write the app/Events/MessageSent event class code as follows:
<?php
namespace App\Events;
use App\Message;
use App\User;
use Illuminate\Broadcasting\Channel;
use Illuminate\Queue\SerializesModels;
use Illuminate\Broadcasting\PrivateChannel;
use Illuminate\Broadcasting\PresenceChannel;
use Illuminate\Foundation\Events\Dispatchable;
use Illuminate\Broadcasting\InteractsWithSockets;
use Illuminate\Contracts\Broadcasting\ShouldBroadcast;
class MessageSent implements ShouldBroadcast
{
use Dispatchable, InteractsWithSockets, SerializesModels;
/**
* User that sent the message
*
* @var User
*/
public $user;
/**
* Message details
*
* @var Message
*/
public $message;
/**
* Create a new event instance.
* @param User $user
* @param Message $message
* @return void
*/
public function __construct(User $user, Message $message)
{
$this->user = $user;
$this->message = $message;
}
/**
* Get the channels the event should broadcast on.
*
* @return \Illuminate\Broadcasting\Channel|array
*/
public function broadcastOn()
{
return new PrivateChannel('chat');
}
}由于只有登录用户才能访问我们的应用,所以我们定义了一个私有的频道 chat,只有登录用户才能连接上它。
接下来,我们需要修改 ChatsController 的 sendMessage() 来广播 MessageSent 事件:
public function sendMessage(Request $request)
{
    $user = Auth::user();
    $message = $user->messages()->create([
        'message' => $request->input('message')
    ]);
    broadcast(new MessageSent($user, $message))->toOthers();
    return ['status' => 'Message Sent!'];
}然后在 routes/channels.php 中授权当前登录用户可以监听该私有频道:
Broadcast::channel('chat', function ($user) {
    return Auth::check();
});现在,当一条消息发送后,MessageSent 事件就会被广播到 Pusher,使用 toOthers() 是为了将消息发送者从广播接收者中排除。
监听消息发送事件
MessageSent 事件在服务端被广播后,需要在客户端监听这个事件以便将最新发送消息更新到聊天室消息流中,我们可以通过在 resources/assets/js/app.js 中定义的 created() 方法中添加如下代码片段来实现这一功能:
created() {
    this.fetchMessages();
    Echo.private('chat')
        .listen('MessageSent', (e) => {
            this.messages.push({
                message: e.message.message,
                user: e.user
            });
        });
},我们通过 Laravel Echo 连接到 chat 频道监听 MessageSent 广播事件,如果有新消息则将其推送到当前聊天室消息流中显示。
在正式测试聊天室应用之前,还需要运行以下命令通过 Laravel Mix 来编译前面编写的 JavaScript 代码:
npm run dev
使用示例
完成上述所有业务代码编写工作后,接下来就是见证工作成果的时候了,在项目根目录下运行如下命令启动应用:
php artisan serve
然后在浏览器通过 http://127.0.0.1:8000/ 访问应用,由于系统需要登录后才能访问,所以首先会跳转到登录页面,我们需要先注册一个新用户,注册成功后页面即跳转到聊天室页面,我们发送一条测试消息。
为了测试多个用户聊天的效果,打开另一个浏览器或者在当前浏览器新开一个隐身窗口,还是重复上面的访问注册步骤(注册名不同),注册成功后跳转到聊天室页面,看到的效果和上面一样,我们再发条消息试试。
可以看到两个窗口消息是同步的,所以已经达到我们预期的实时聊天效果,实现了通过事件广播构建实时聊天室的功能。
以上就是本篇文章的全部内容了,更多laravel内容请关注laravel框架入门教程。
相关文章推荐:
laravel框架中TokenMismatchException的异常处理内容
Laravel 5.1框架中的ACL用户授权和权限检查功能的实现
相关课程推荐:
The above is the detailed content of Real-time chat room: implemented through event broadcast based on Laravel+Pusher+Vue. For more information, please follow other related articles on the PHP Chinese website!


