
Directory
Configure redis master-slave replication
Use the ping command to check whether it is started
As follows, return PONG to indicate that all three redis services have been started Startup completed
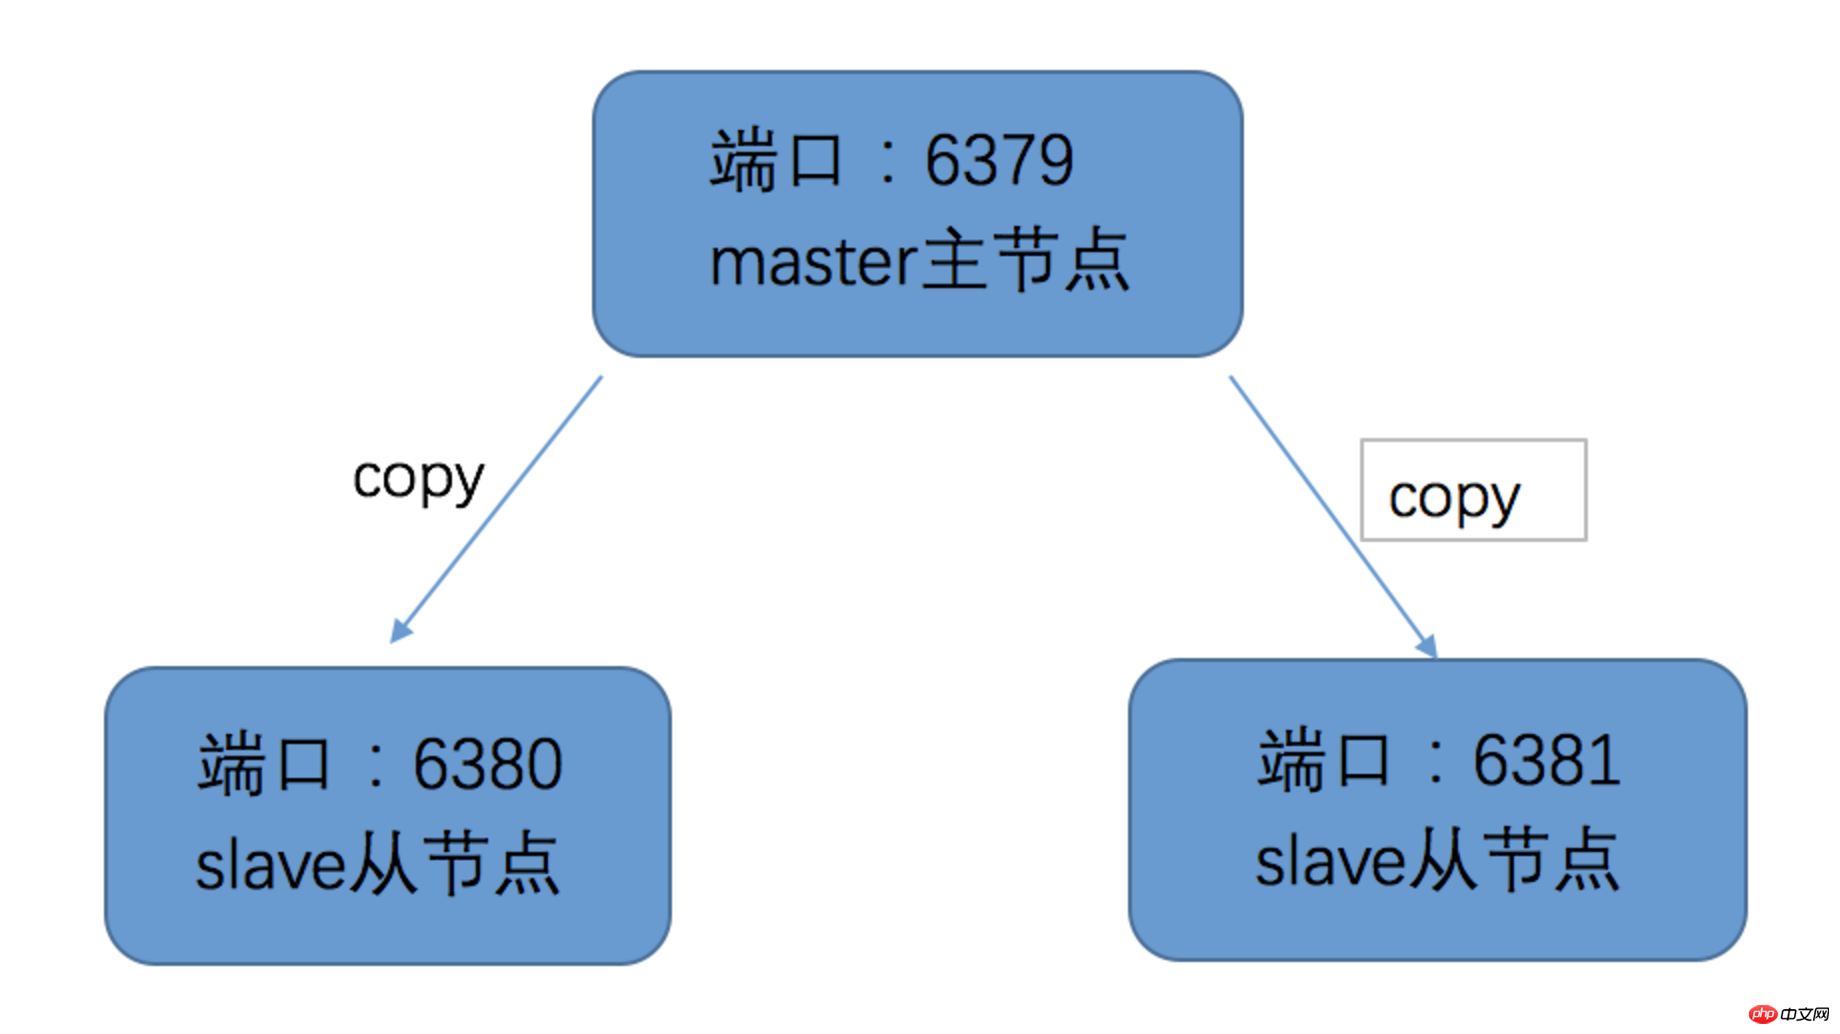
One master node:
 Two slave nodes:

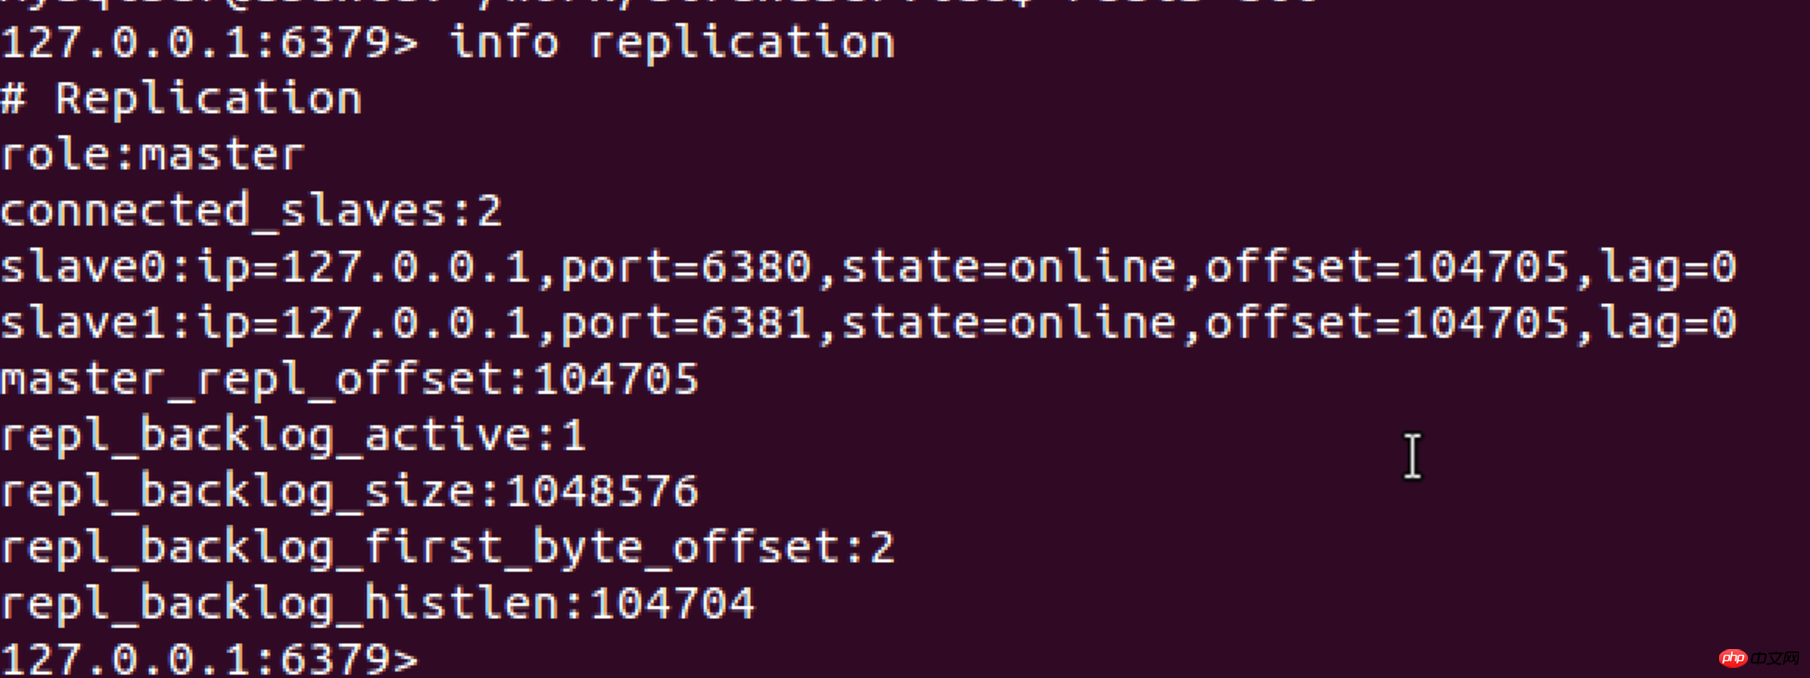
 View the link information on the master node
查看6379的连接信息 命令:info replication 可以发现6379的角色是master,有两个从节点,也就是端口为6380,6381的从节点(redis)
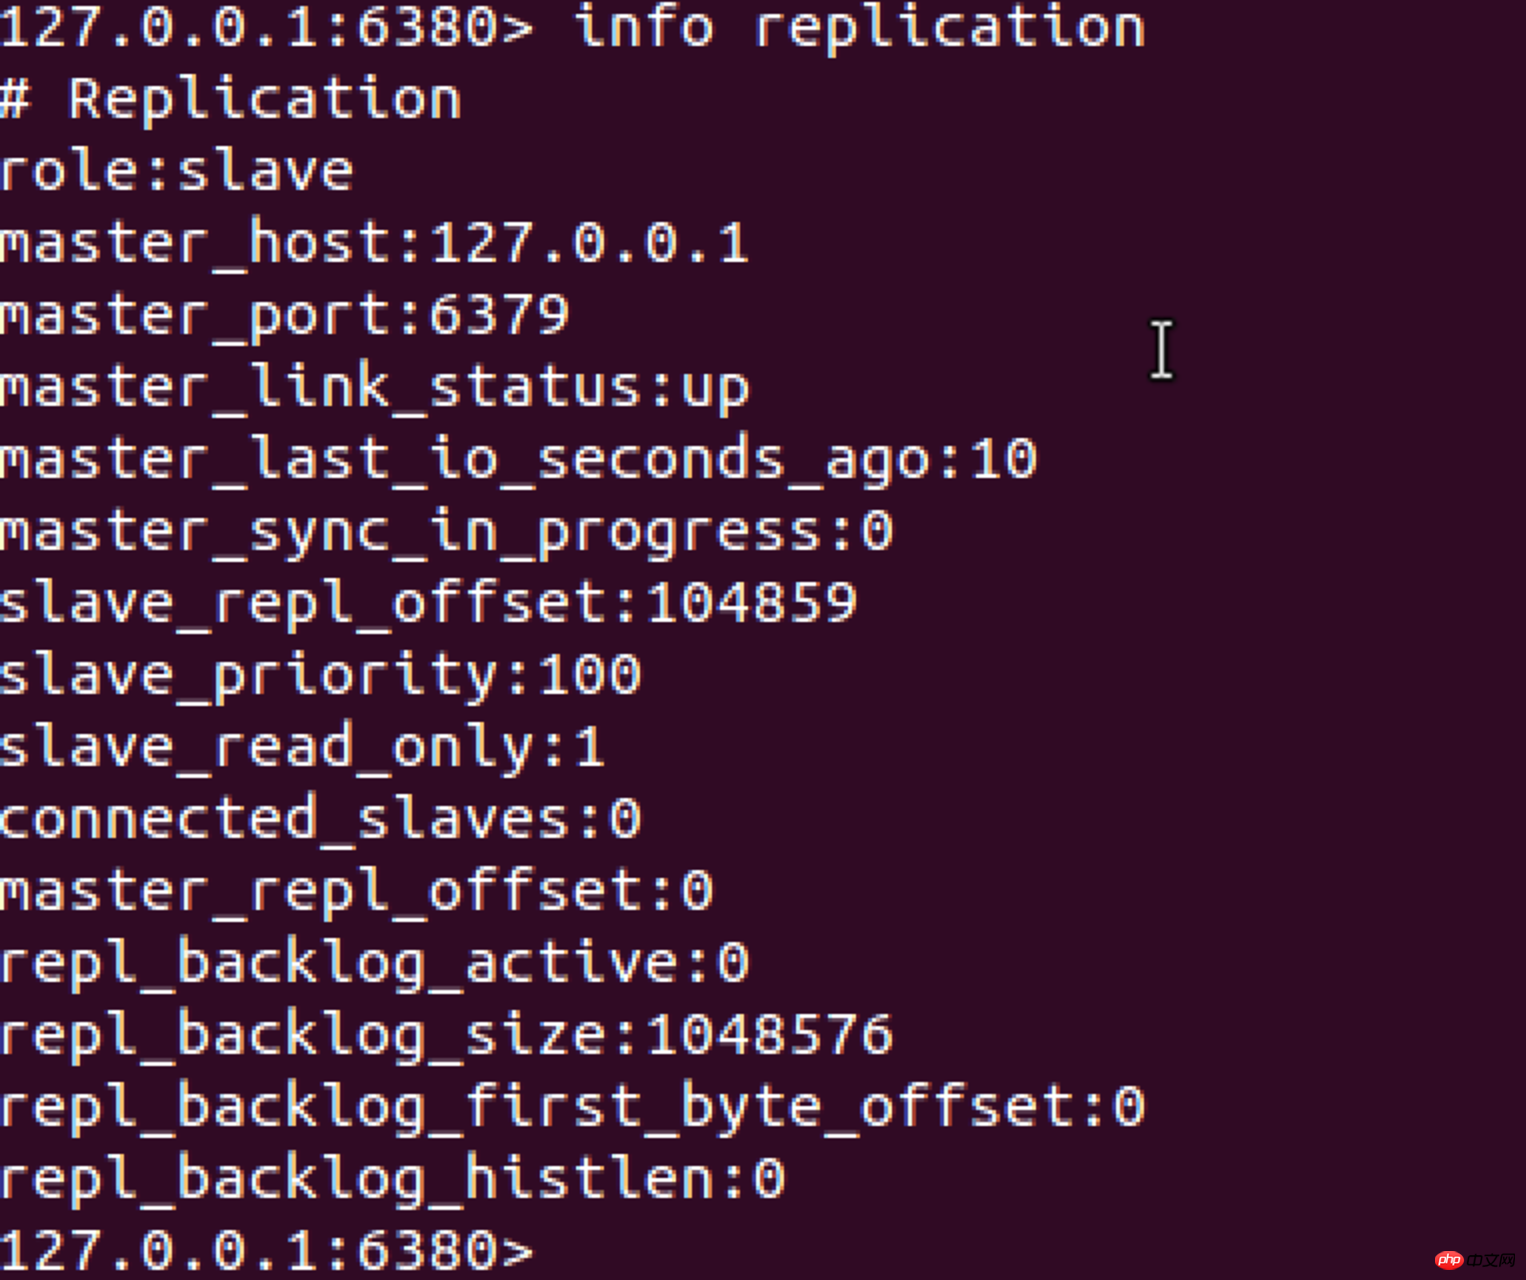
同样在6380 从节点中,该节点的角色是slave(从节点),与主节点的连接状态为up(master_link_status),通过这个命令可以方便的查看各个节点的连接状态等信息。
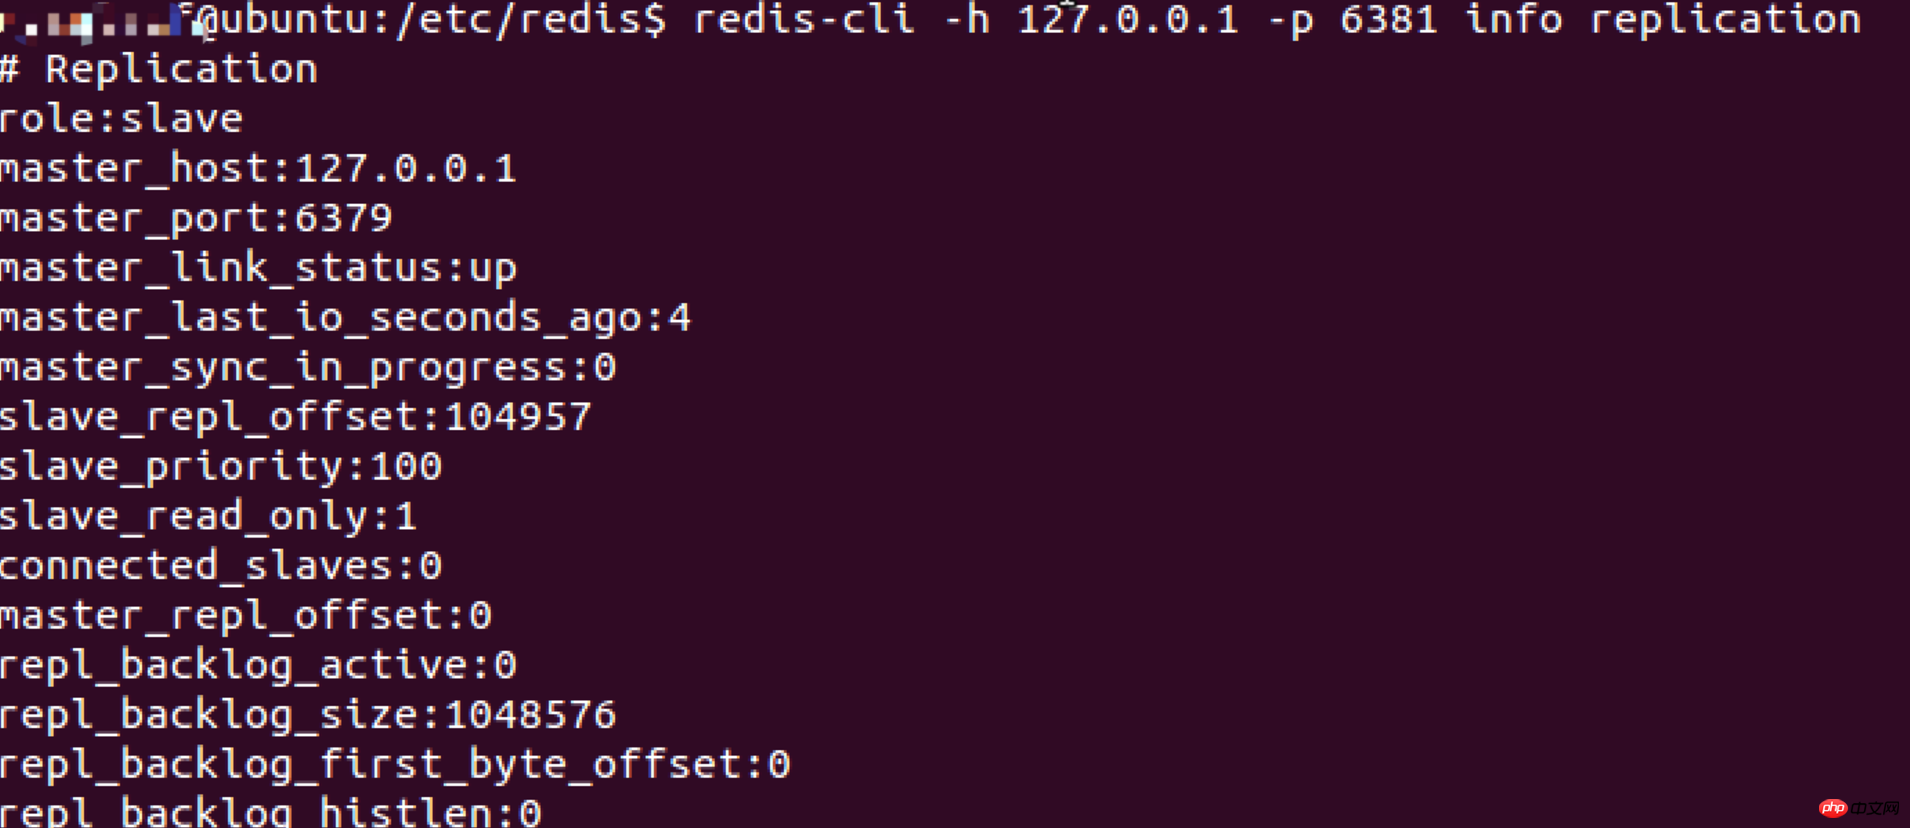
除了用info replication命令外,如下命令也可以快速查看链接信息 redis-cli -h 127.0.0.1 -p 6381 info replication 看个人喜好用哪个命令。
 Start deploying the sentinel node
Deploy sentinel
进入安装redis的目录下的配置目录,我的本地是/etc/redis
我这边就直接使用原本的sentinel.conf配置,来作为第一个sentinel节点。我们可以进入sentinel.conf配置看下里面到底有啥配置信息: sentinel monitor mymaster 127.0.0.1 6379 2 //监控的主节点IP和端口,其中mymaster是该节点的别名,2表示判断主节点失败至少需要两个节点同意 sentinel down-after-milliseconds mymaster 30000 //通过ping命令,各个sentinel节点向redis节点是否可达,超过30000毫秒,就判定不可达 sentinel failover-timeout mymaster 180000 //故障转移超时时间为180000毫秒 如果还有其它的配置,可以自己在探索下
 Start sentinel
启动命令: sudo redis-sentinel sentinel.conf --sentinel
查看sentinel启动情况 redis-cli -h 127.0.0.1 -p 26379 INFO Sentinel 可以看出与查看redis启动的情况命令类似,截图中可以看到此时sentinel监控redis节点是端口为6379的服务,6379有两个从节点,状态为OK,别名是mymaster
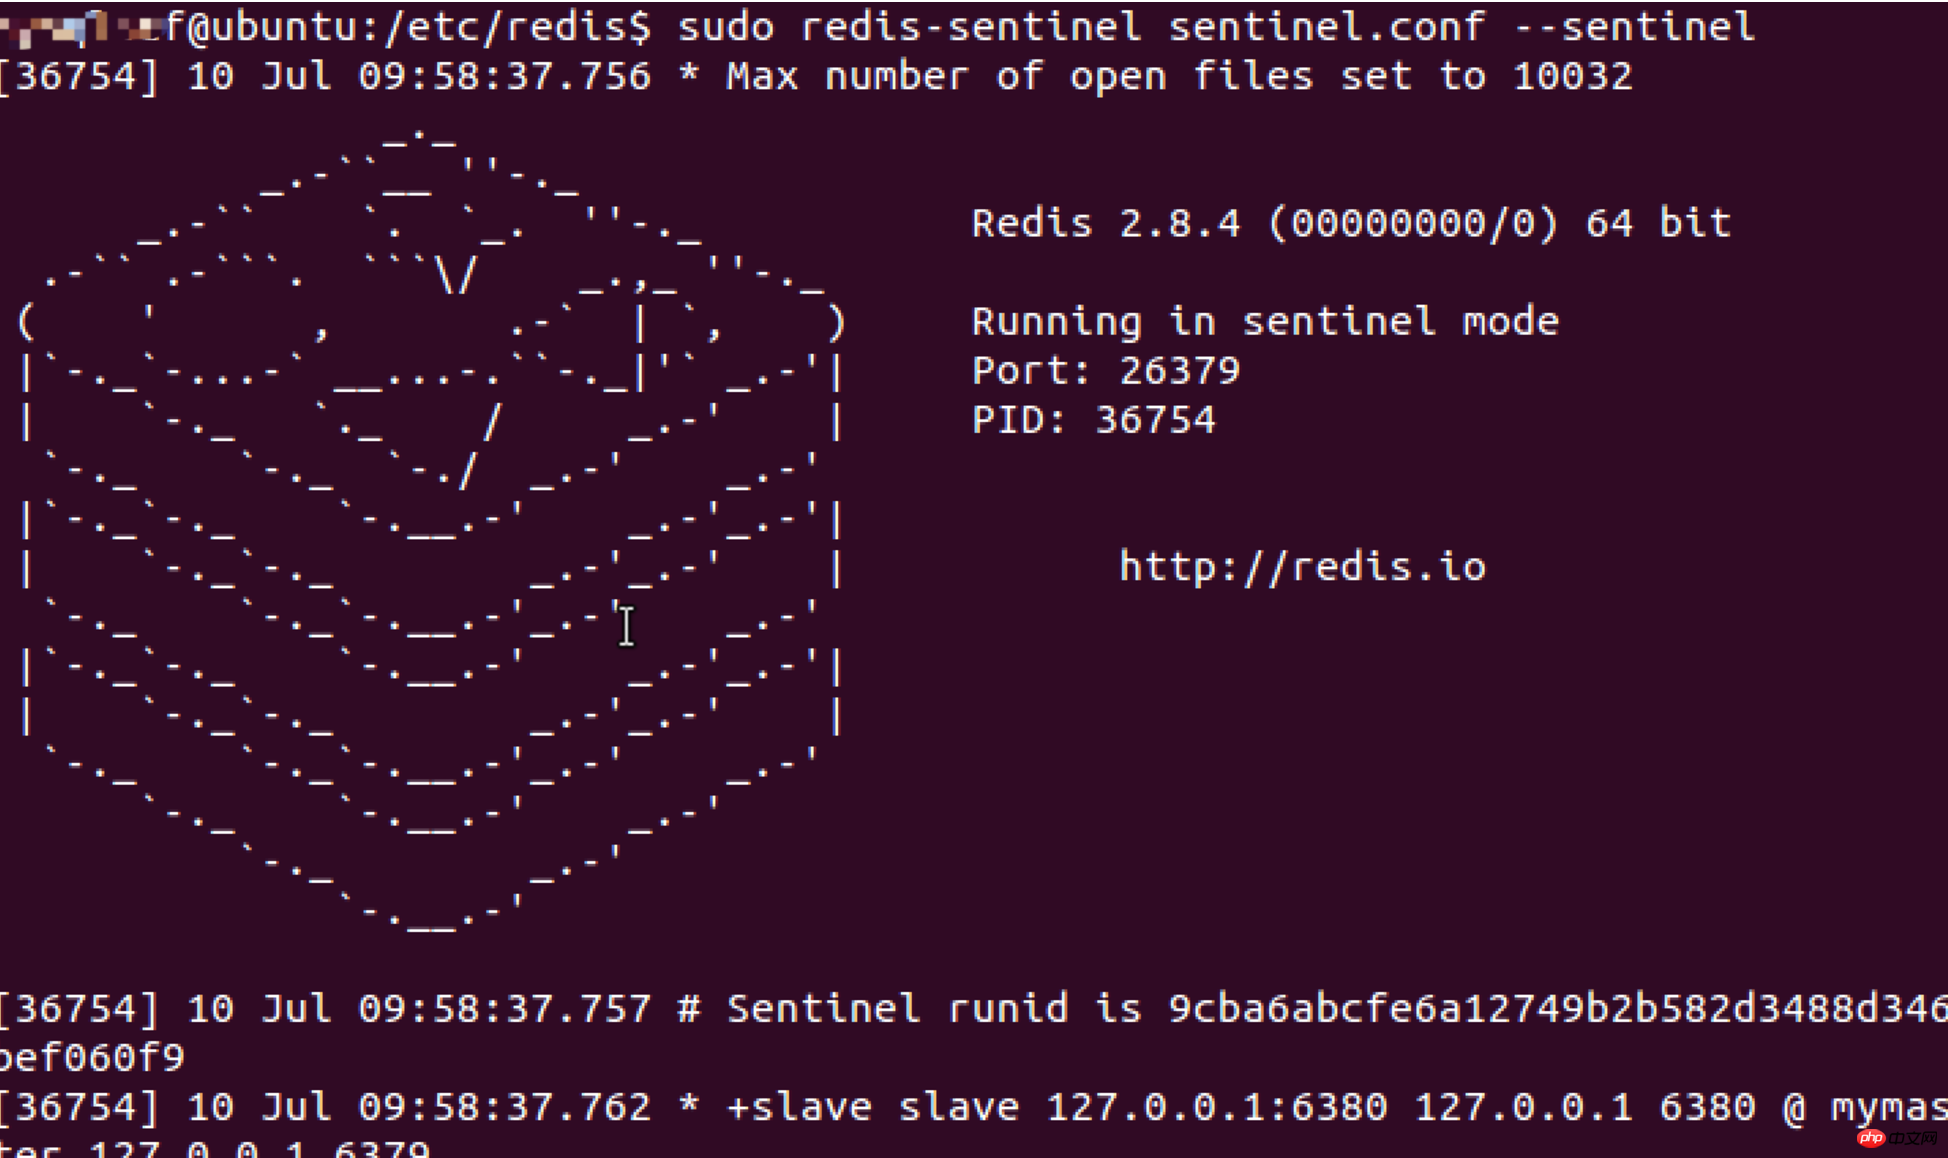
继续再配置两个sentinel节点, sudo cp sentinel.conf sentinel2.conf sudo cp sentinel.conf sentinel3.conf 修改两个配置的端口为26380, 26381,其它配置可以不用修改 修改完后,分别启动 sudo redis-sentinel sentinel2.conf --sentinel sudo redis-sentinel sentinel3.conf --sentinel

启动后再次查看sentinel.conf的配置,可以发现配置中多了两个从节点的信息,截图如下:

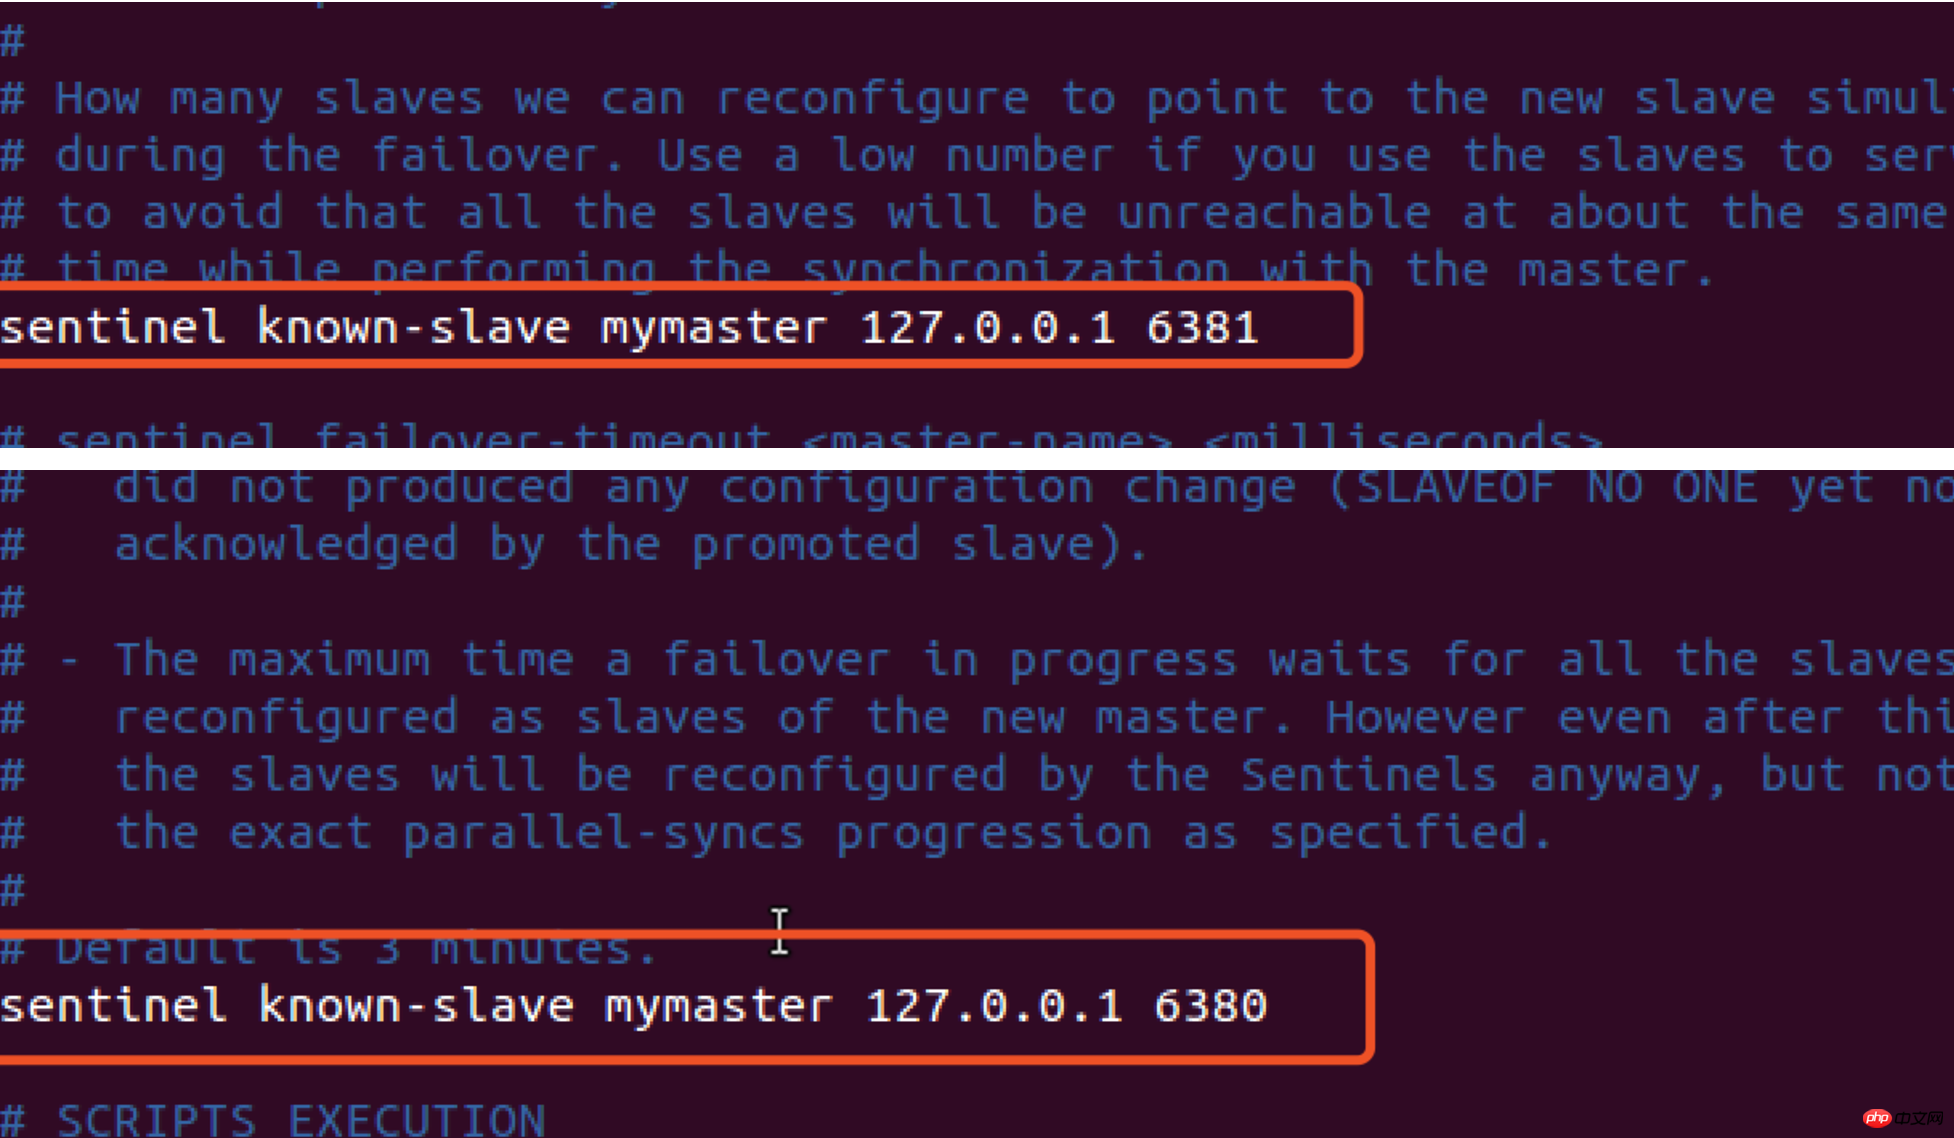
##Demo failover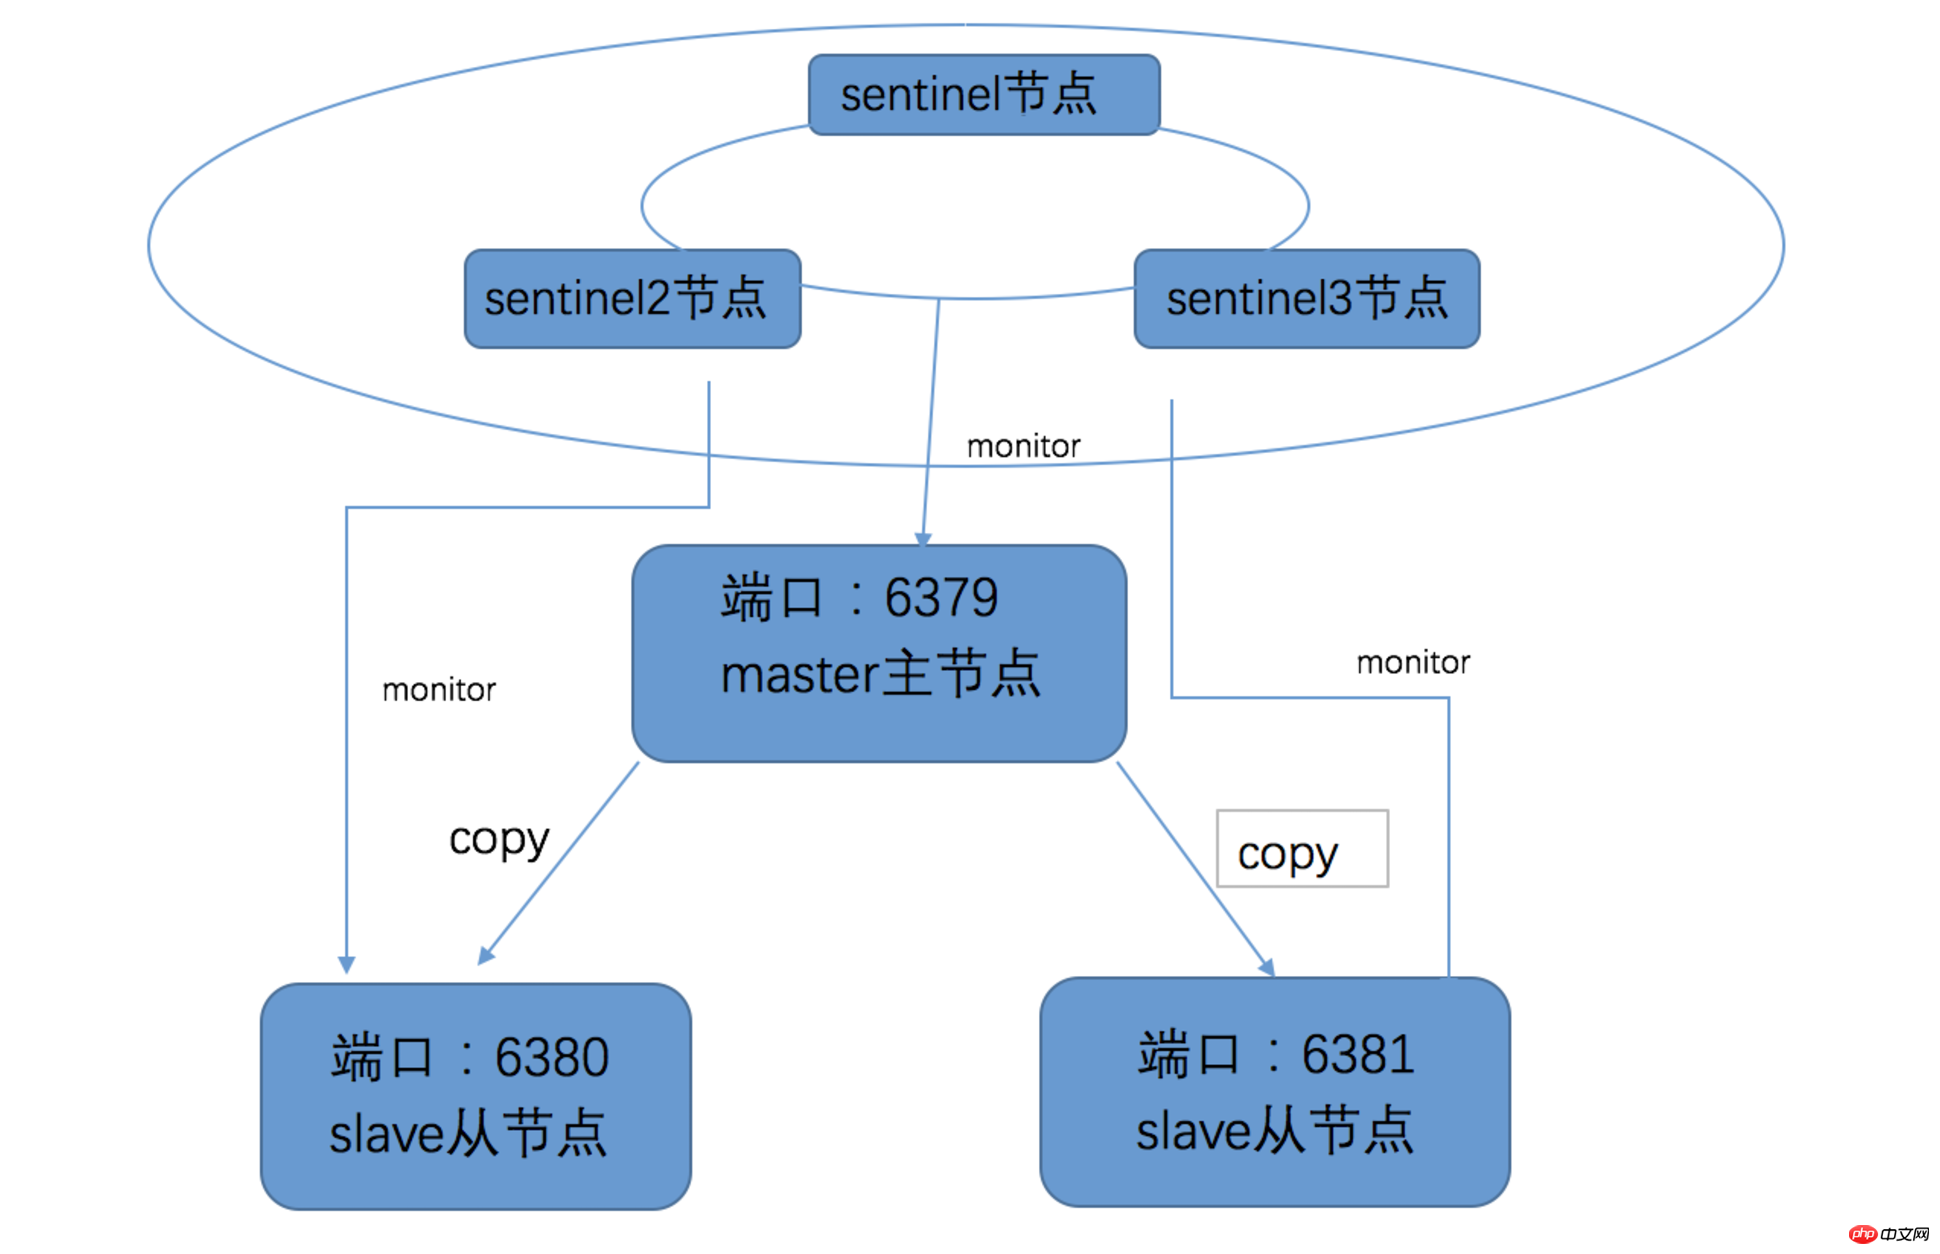
查看26379端口的Sentinel节点监控的主节点信息
查看目前redis的进程ps -ef | grep redis
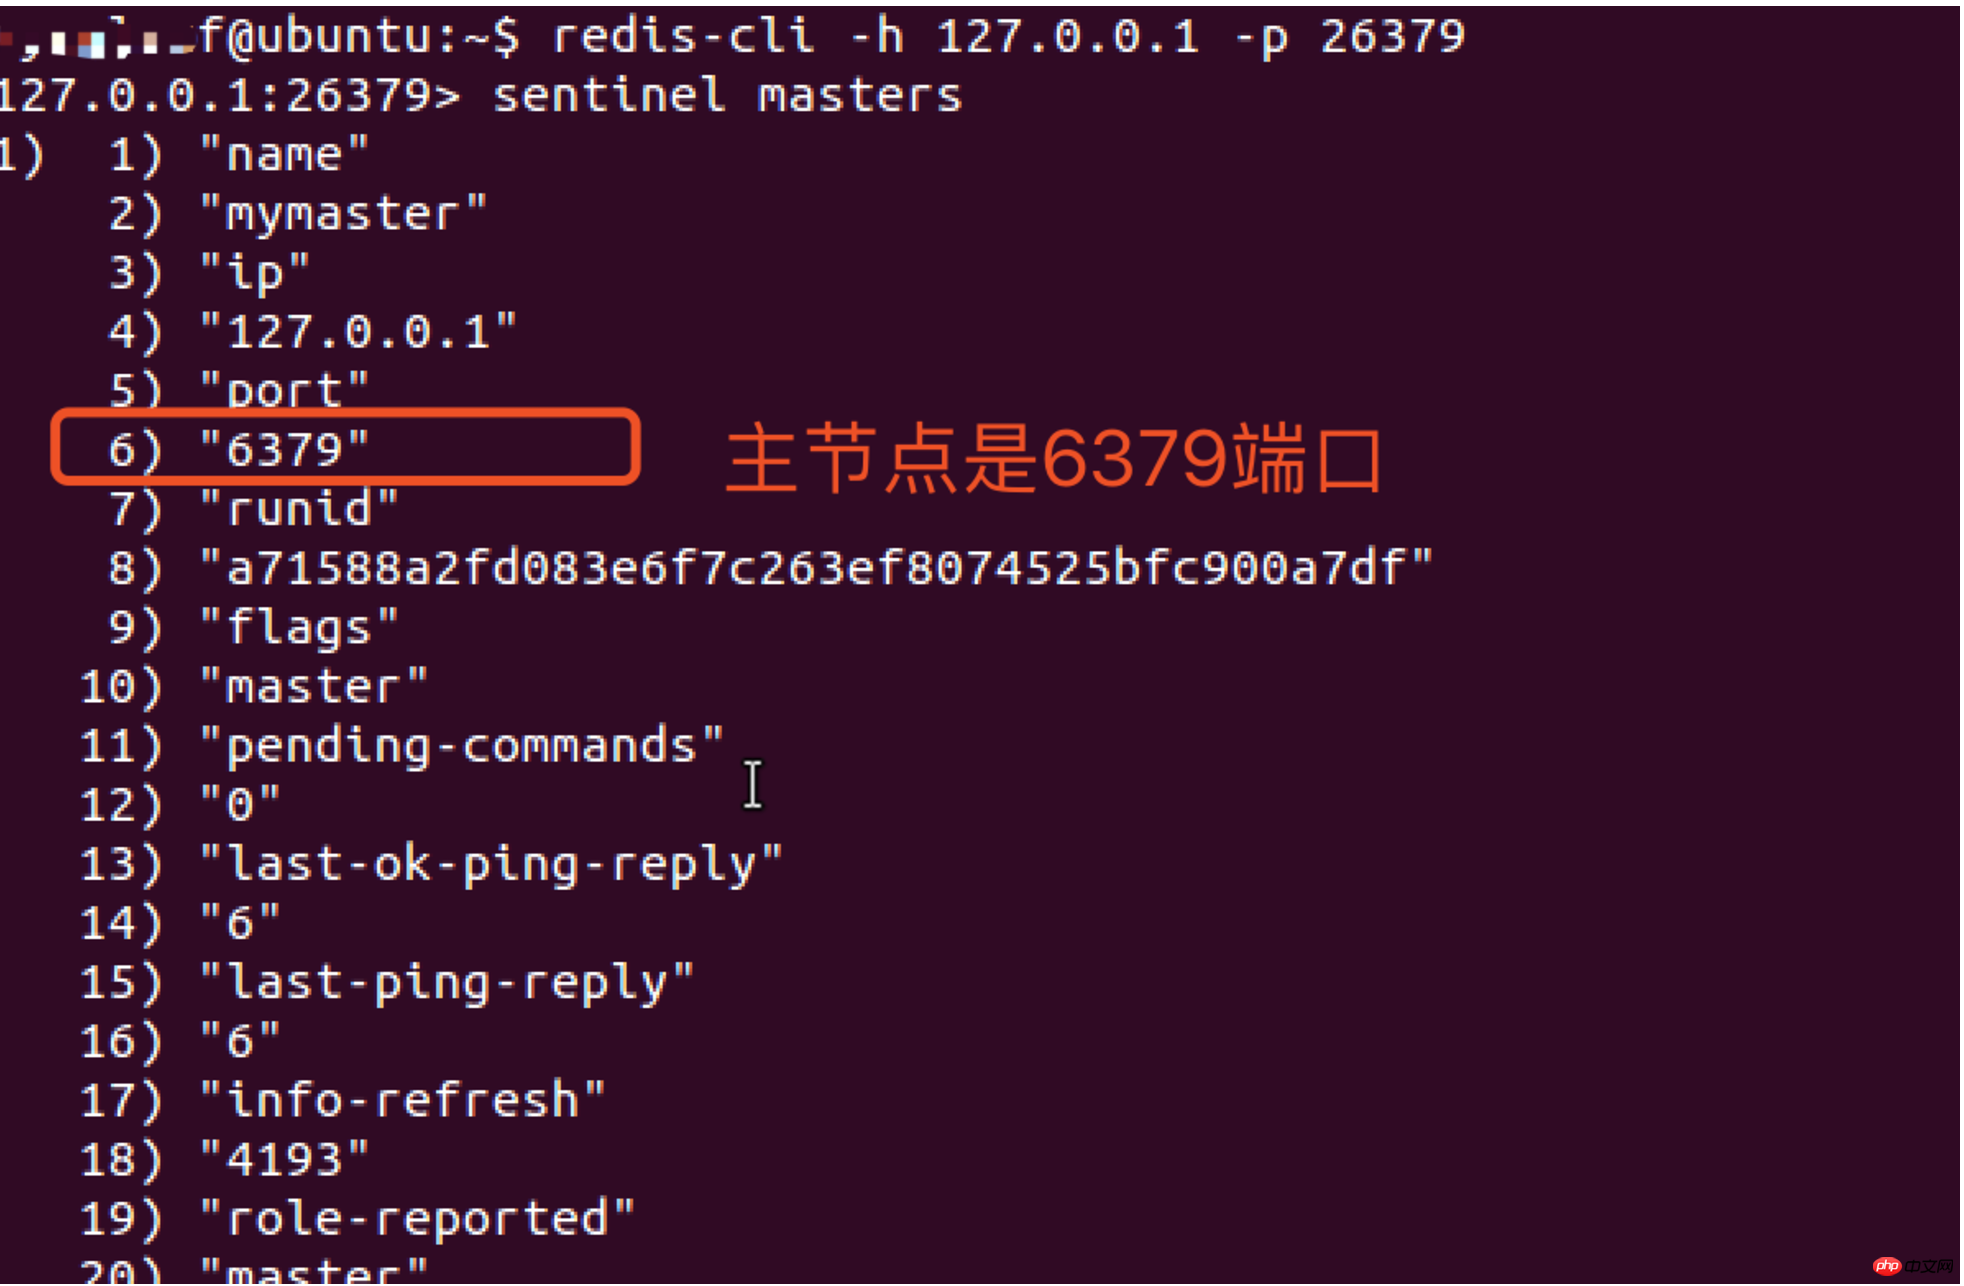
Interrupt redis master node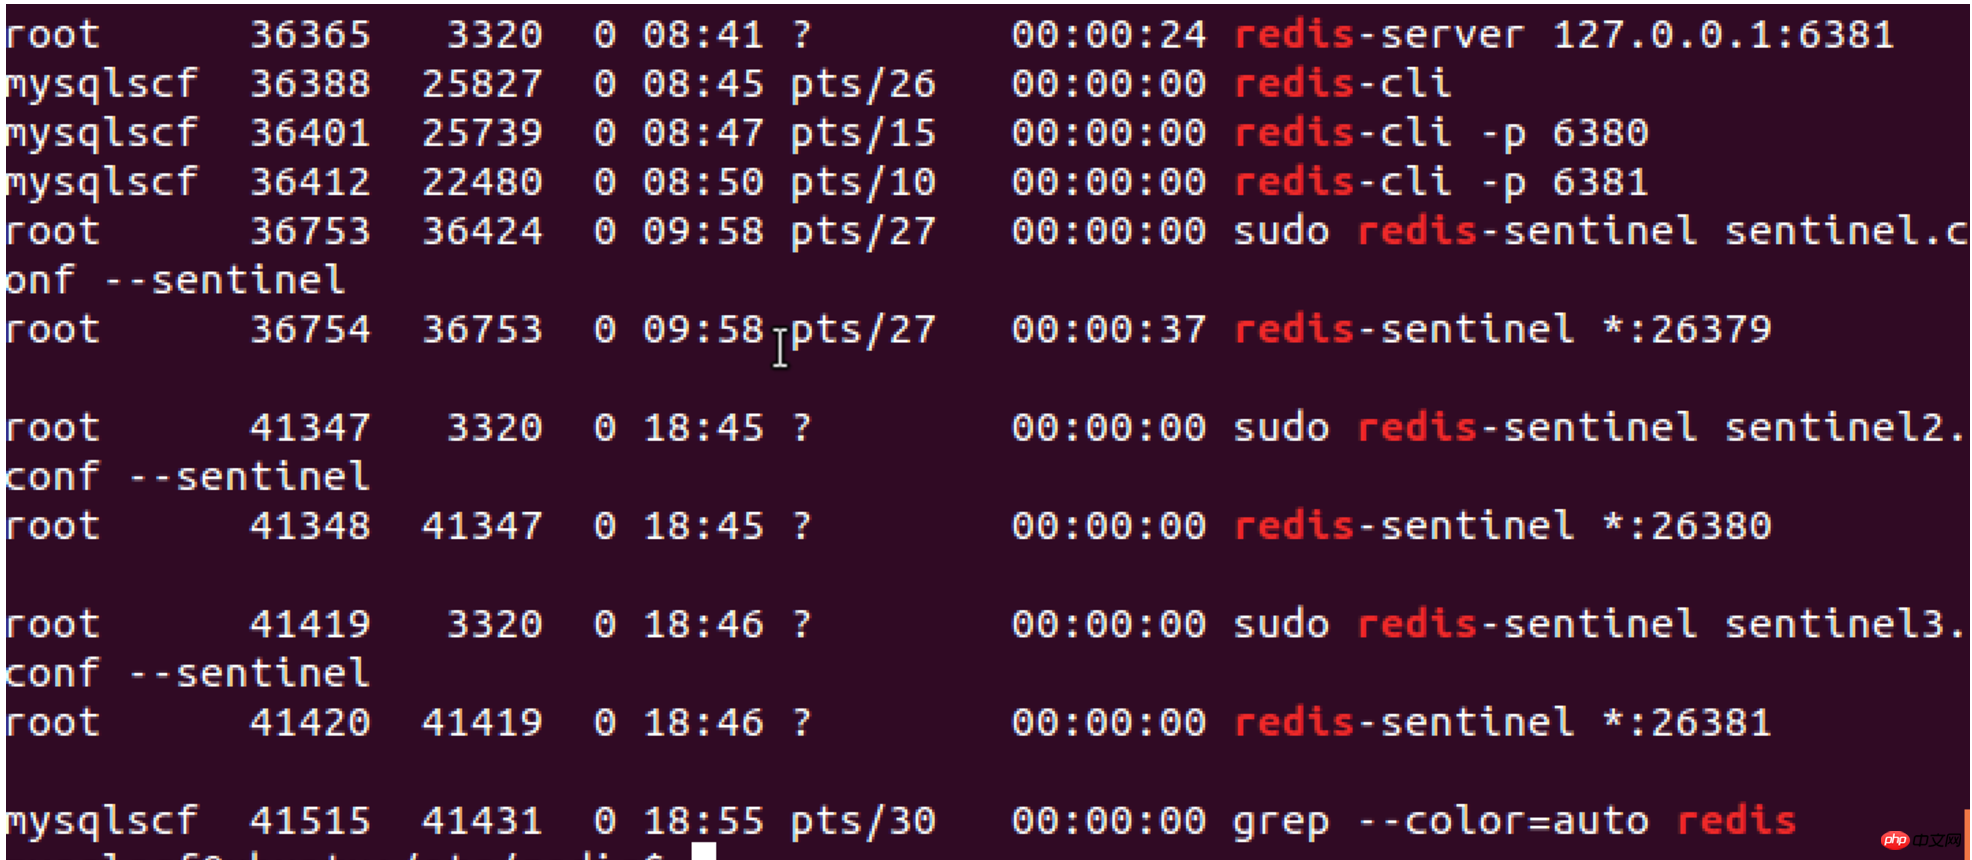
之前我们sentinel监控的主节点是6379这个端口,这时候我们kill这个端口的进程,或者使用shutdown命令: redis-cli -h 127.0.0.1 -p 6379 shutdown 过了30秒之后查看26379端口的Sentinel节点监控的主节点信息,发现主节点信息变成了6380端口的redis(之前的从节点)
Verification Whether the main node of redis changes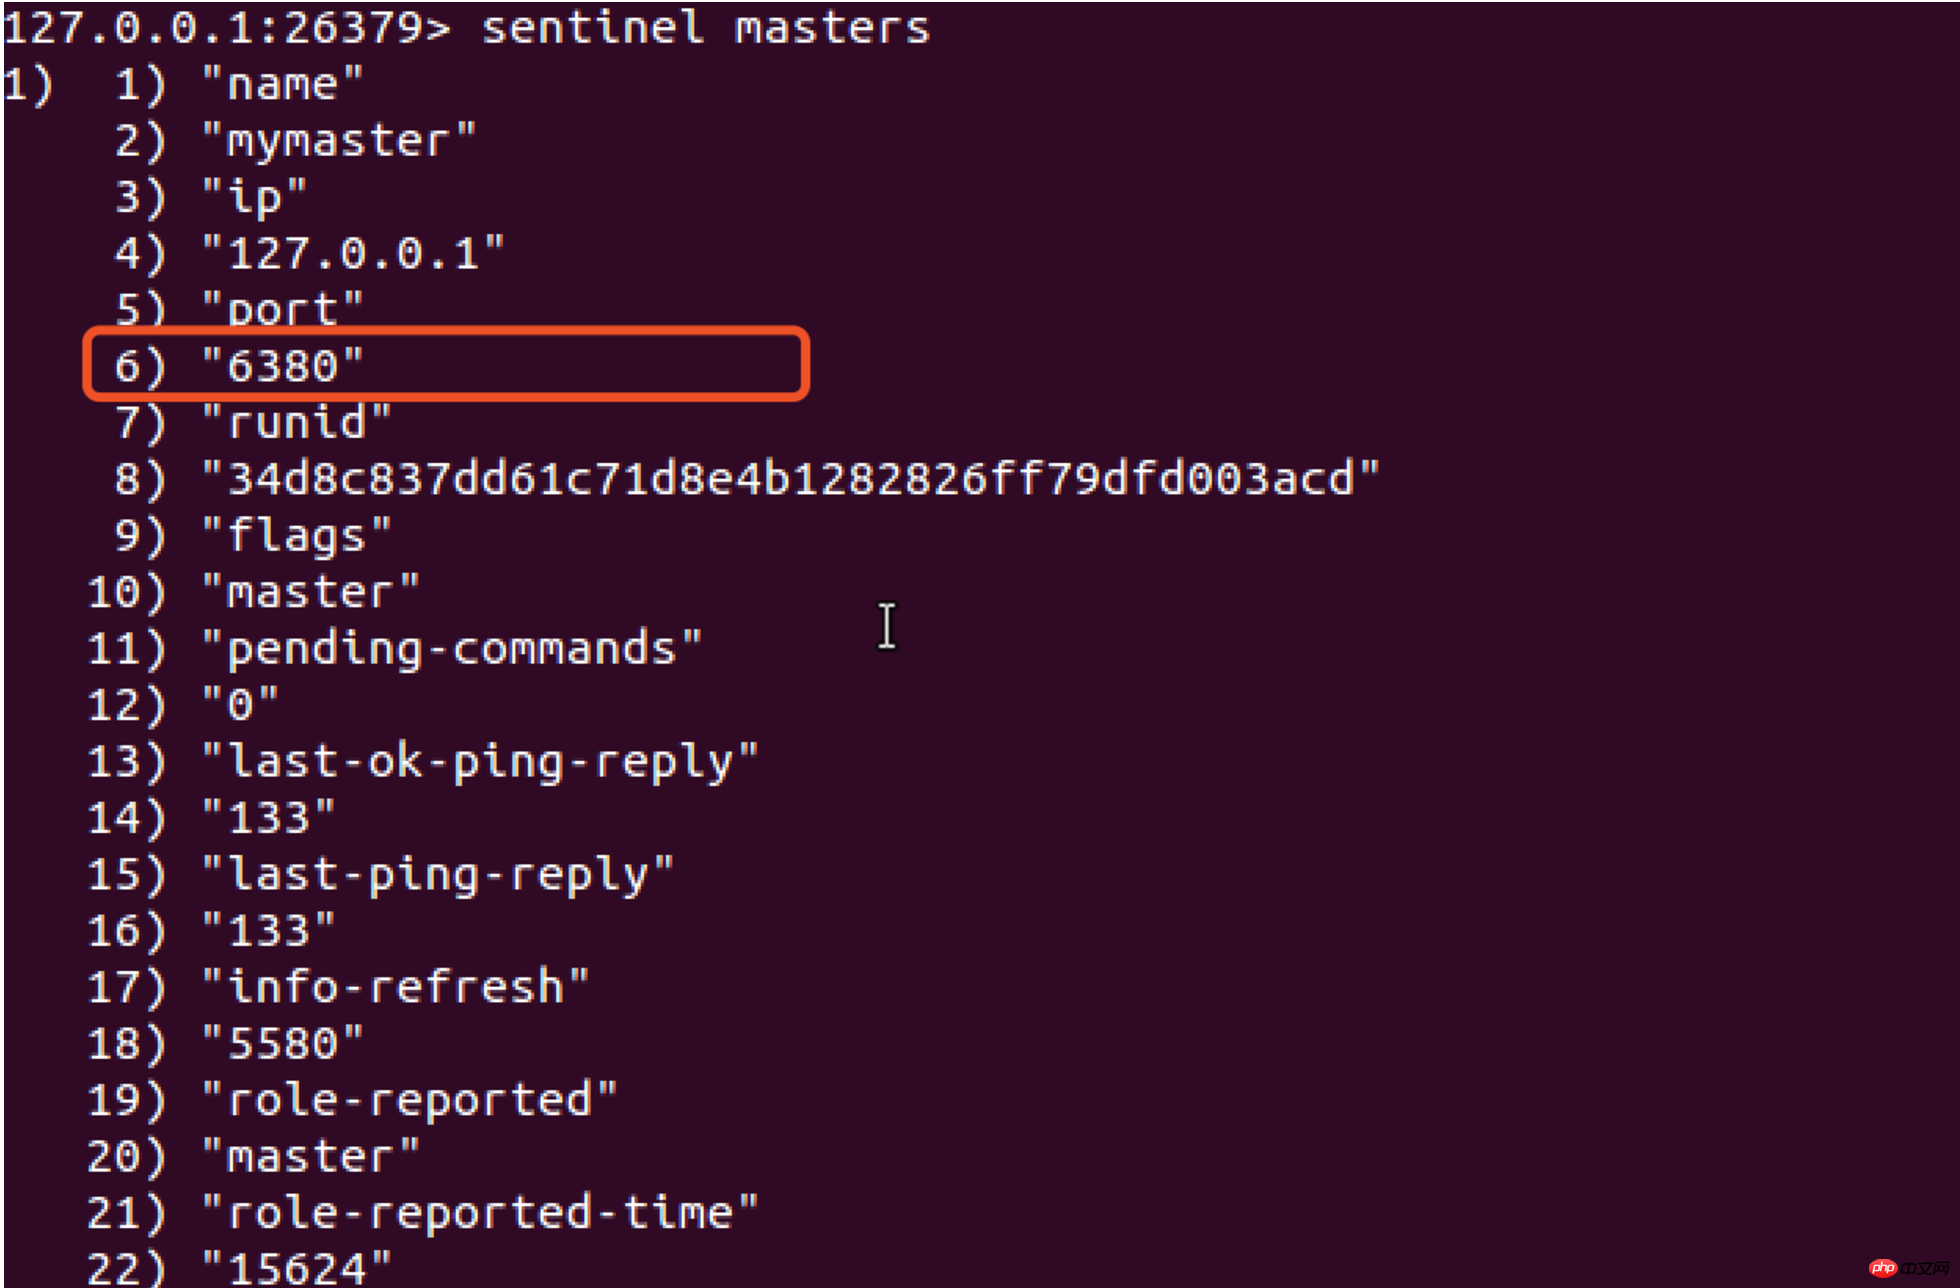
验证6380端口的redis变成主节点,此时我们在6380 的redis上设置一个key值,在6381端口的redis上验证是否能获取到该key值
此时发现,6380变成了主节点,6381从节点没有变化,还是从节点。 下面我再次启动6379端口的redis

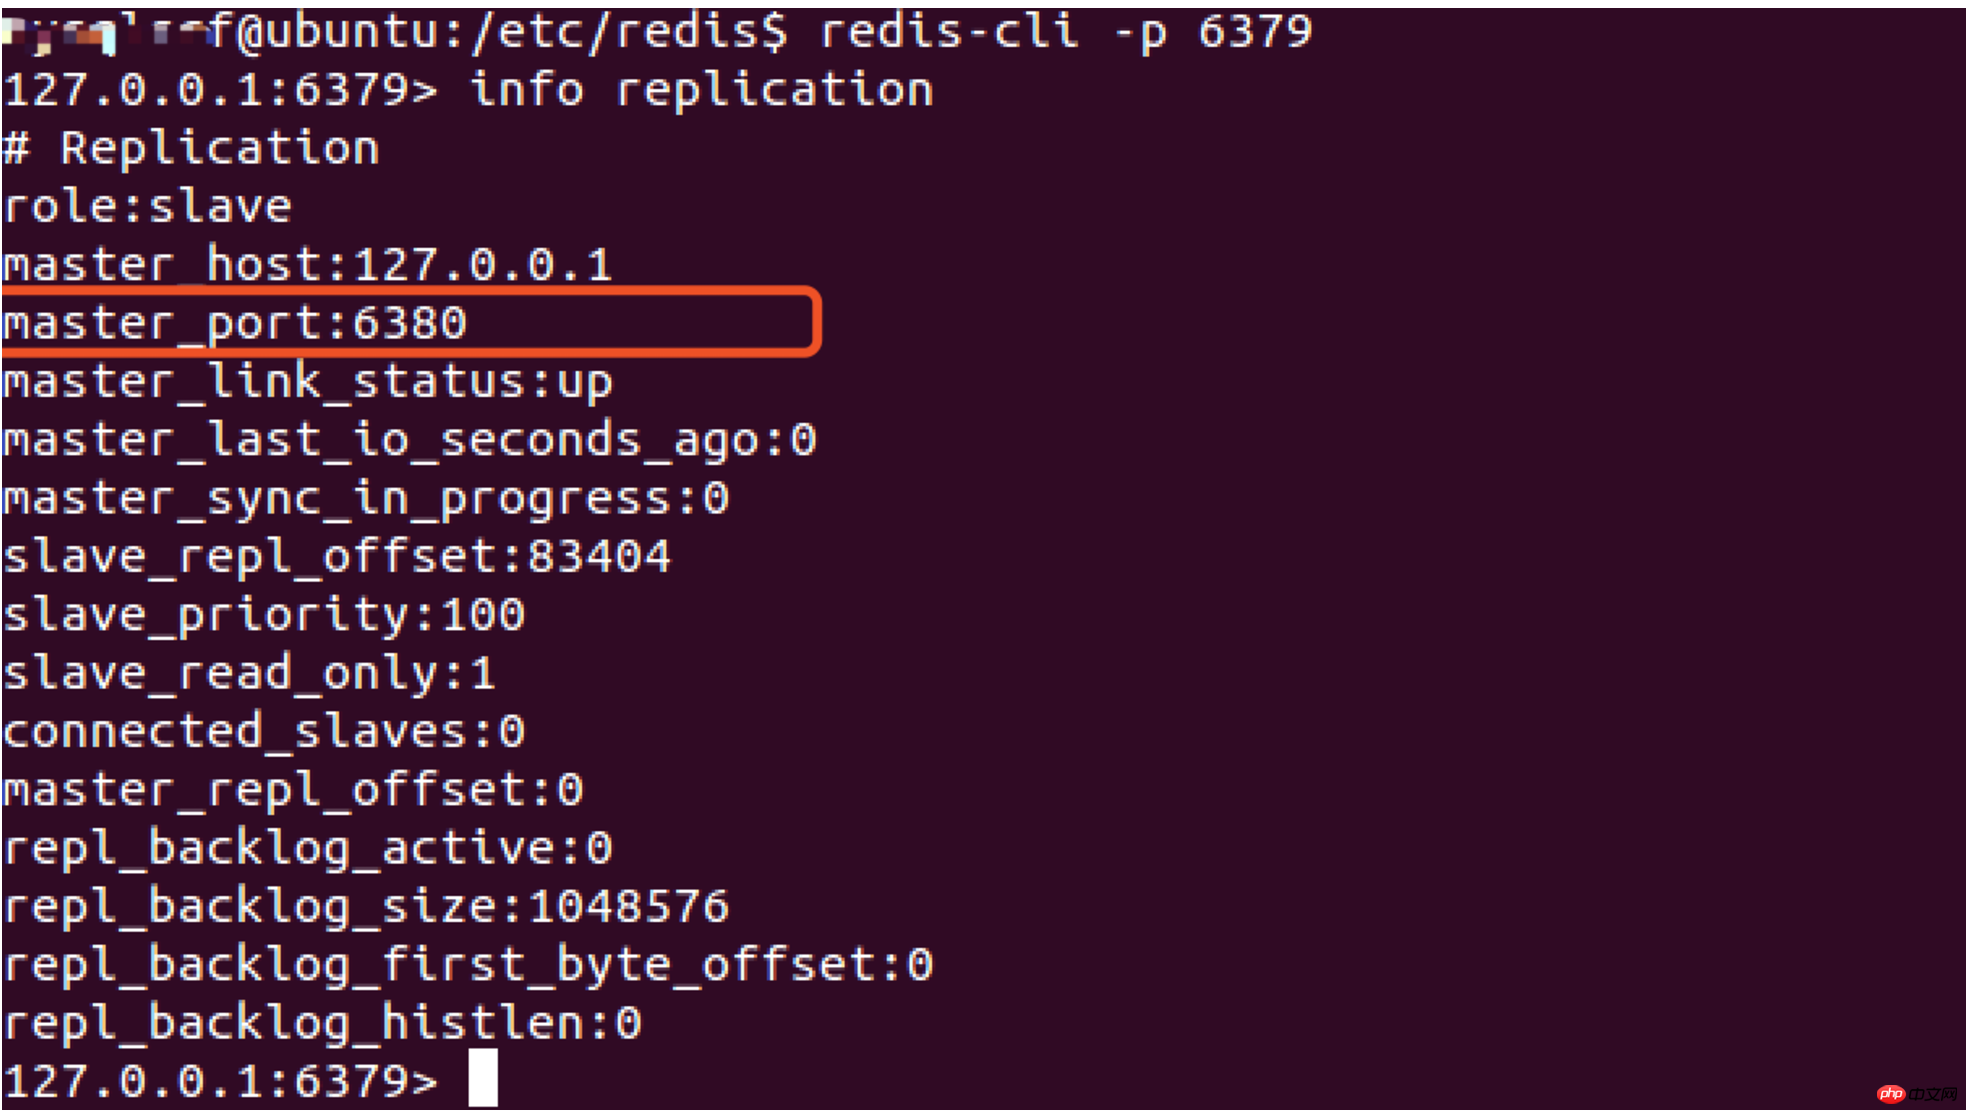
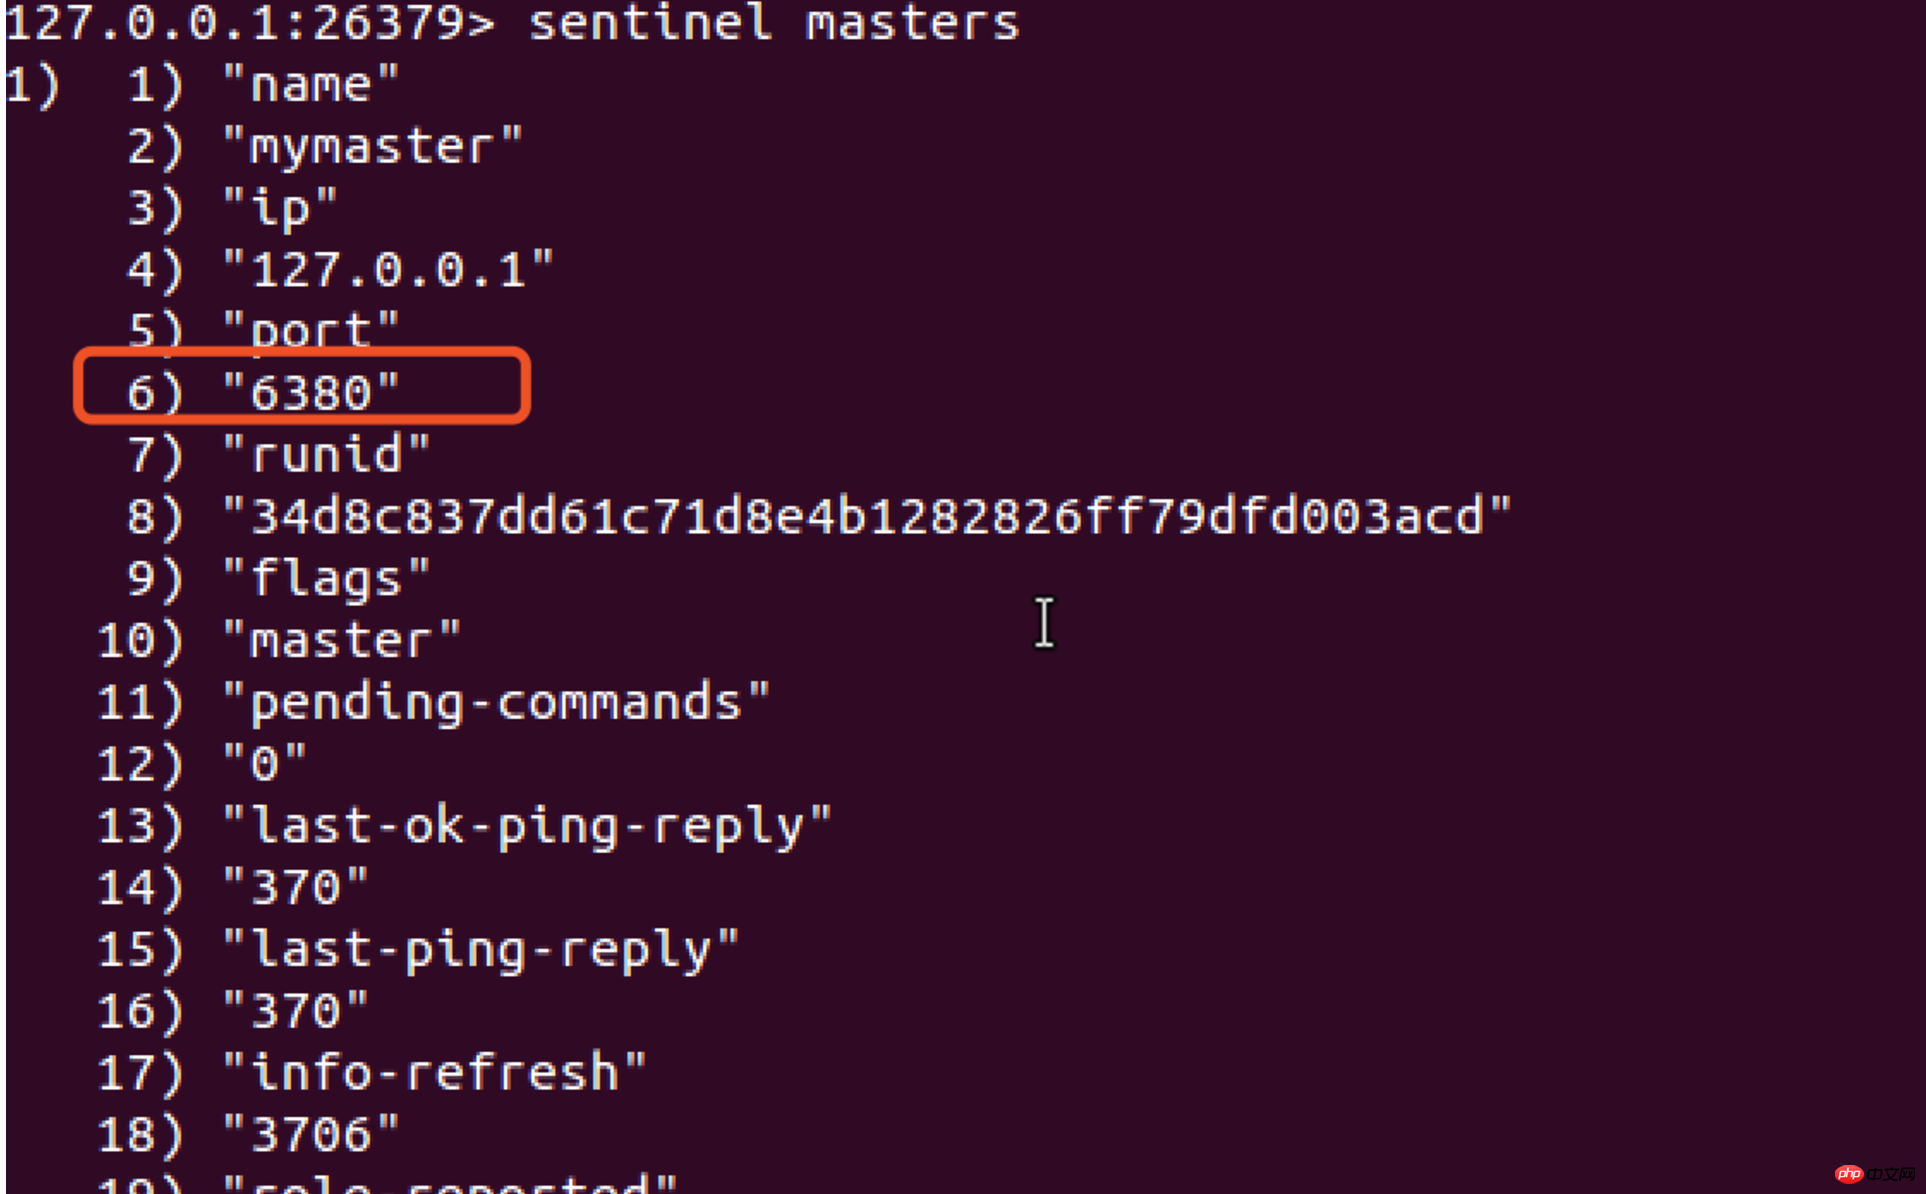
发现原先的主节点6379已经变成了从节点,而它的主节点变成了6380。此时我们再回过头看下26379的监控节点变化,还是6380端口。
To this point sentinel That’s it for the introduction. Any shortcomings are welcome to be corrected.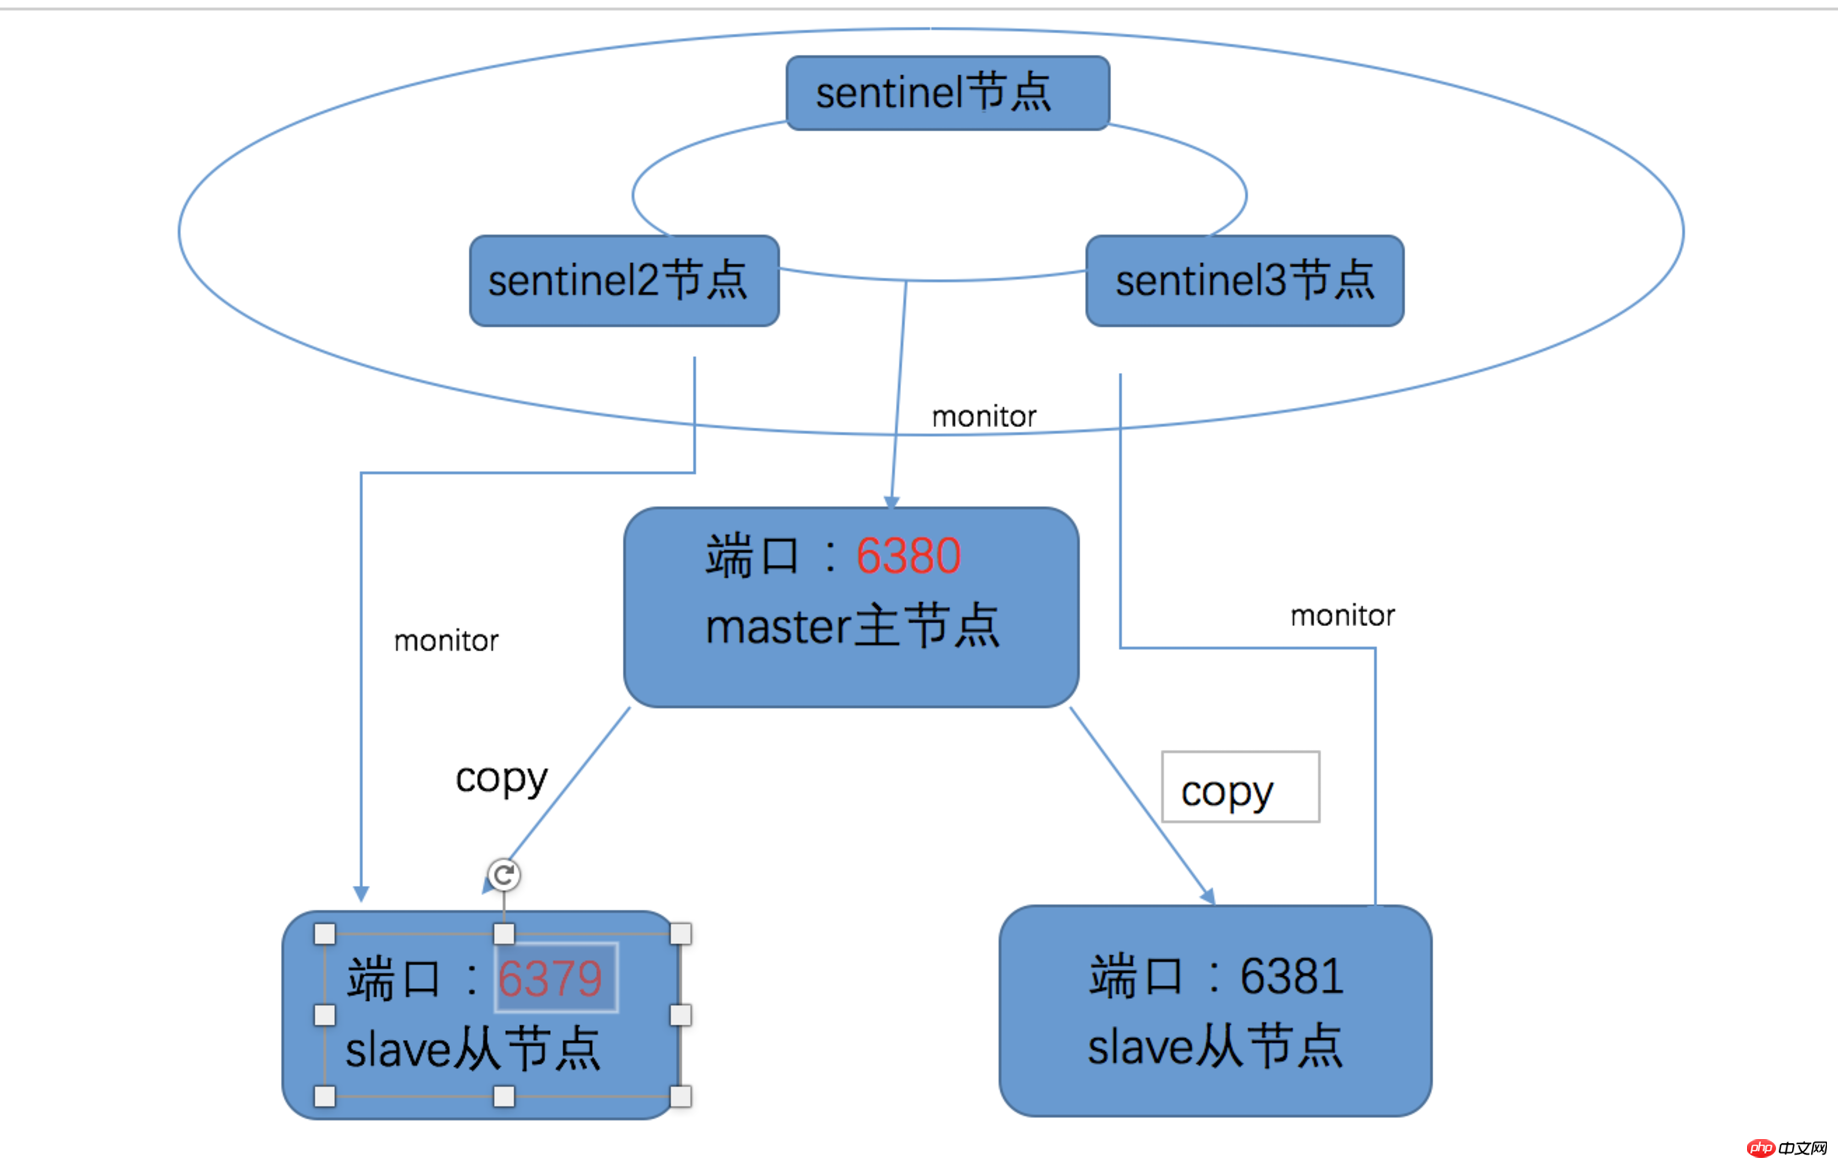
The above is the detailed content of Redis Detailed Introduction to Sentinel. For more information, please follow other related articles on the PHP Chinese website!
 Commonly used database software
 What are the in-memory databases?
 Which one has faster reading speed, mongodb or redis?
 How to use redis as a cache server
 How redis solves data consistency
 How do mysql and redis ensure double-write consistency?
 What data does redis cache generally store?
 What are the 8 data types of redis


