

This time I will show you how to use Koa in Node.js to implement user authentication.What are the precautions? Here are practical cases. Let’s take a look. .
1. Prerequisite knowledge
Token-based authentication
Koajs Chinese Documentation
Koa Framework Tutorial
2. Environment
Microsoft Visual Studio 2017 Integrated Development Environment
Node .js v8.9.4JavascriptRunning environment
##3. Start working and improve step by step
1. Create a basic static resource server and infrastructure The following is the basic code to implement a static server and a handler when token verification is abnormal. Below we will gradually add registration, login, and information functions under this basic code.const path = require('path'); // 用于处理目录路径 const Koa = require('koa'); // web开发框架 const serve = require('koa-static'); // 静态资源处理 const route = require('koa-route'); // 路由中间件 const jwt = require('jsonwebtoken'); // 用于签发、解析`token` const jwtKoa = require('koa-jwt'); // 用于路由权限控制 const koaBody = require('koa-body'); // 用于查询字符串解析到`ctx.request.query` const app = new Koa(); const website = { scheme: 'http', host: 'localhost', port: 1337, join: function () { return `${this.scheme}://${this.host}:${this.port}` } } /* jwt密钥 */ const secret = 'secret'; /* 当token验证异常时候的处理,如token过期、token错误 */ app.use((ctx, next) => { return next().catch((err) => { if (err.status === 401) { ctx.status = 401; ctx.body = { ok: false, msg: err.originalError ? err.originalError.message : err.message } } else { throw err; } }); }); /* 查询字符串解析到`ctx.request.query` */ app.use(koaBody()); /* 路由权限控制 */ // 待办事项…… /* POST /api/register 注册 */ // 待办事项…… /* GET /api/login 登录 */ // 待办事项…… /* GET /api/info 信息 */ // 待办事项…… /* 静态资源处理 */ app.use(serve(path.join(dirname, 'static'))); /* 监听服务器端口 */ app.listen(website.port, () => { console.log(`${website.join()} 服务器已经启动!`); });
Login interface, other resources do not require authentication, and the information interface requires authentication.
/* 路由权限控制 */ app.use(jwtKoa({ secret: secret }).unless({ // 设置login、register接口,可以不需要认证访问 path: [ /^\/api\/login/, /^\/api\/register/, /^((?!\/api).)*$/ // 设置除了私有接口外的其它资源,可以不需要认证访问 ] }));
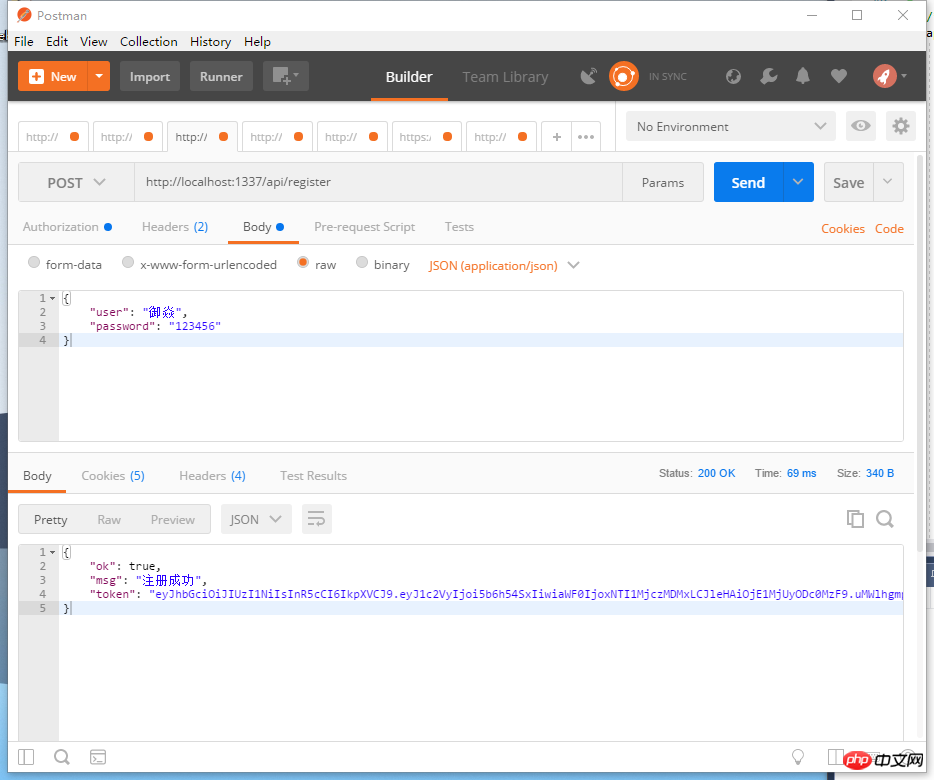
/* POST /api/register 注册 */ app.use(route.post('/api/register', async (ctx, next) => { const body = ctx.request.body; /* * body = { * user : '御焱', * password : '123456' * } */ // 判断 body.user 和 body.password 格式是否正确 // 待办事项…… // 判断用户是否已经注册 // 待办事项…… // 保存到新用户到数据库中 // 待办事项…… // 是否注册成功 let 是否注册成功 = true; if (是否注册成功) { // 返回一个注册成功的JOSN数据给前端 return ctx.body = { ok: true, msg: '注册成功', token: getToken({ user: body.user, password: body.password }) } } else { // 返回一个注册失败的JOSN数据给前端 return ctx.body = { ok: false, msg: '注册失败' } } })); /* 获取一个期限为4小时的token */ function getToken(payload = {}) { return jwt.sign(payload, secret, { expiresIn: '4h' }); }
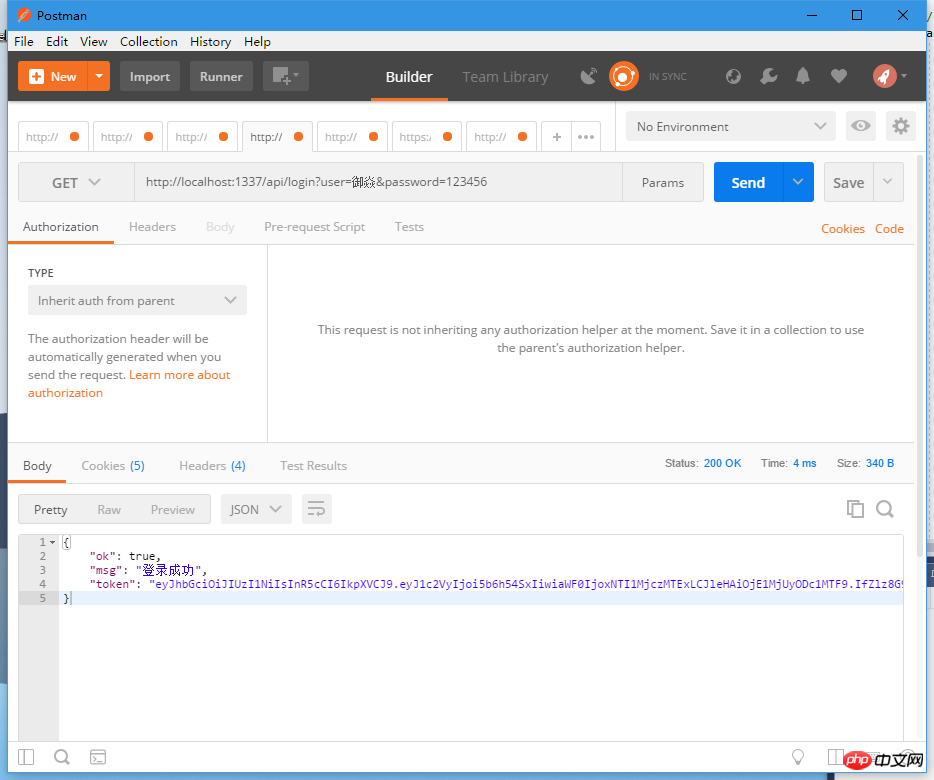
/* GET /api/login 登录 */ app.use(route.get('/api/login', async (ctx, next) => { const query = ctx.request.query; /* * query = { * user : '御焱', * password : '123456' * } */ // 判断 query.user 和 query.password 格式是否正确 // 待办事项…… // 判断是否已经注册 // 待办事项…… // 判断姓名、学号是否正确 // 待办事项…… return ctx.body = { ok: true, msg: '登录成功', token: getToken({ user: query.user, password: query.password }) } }));
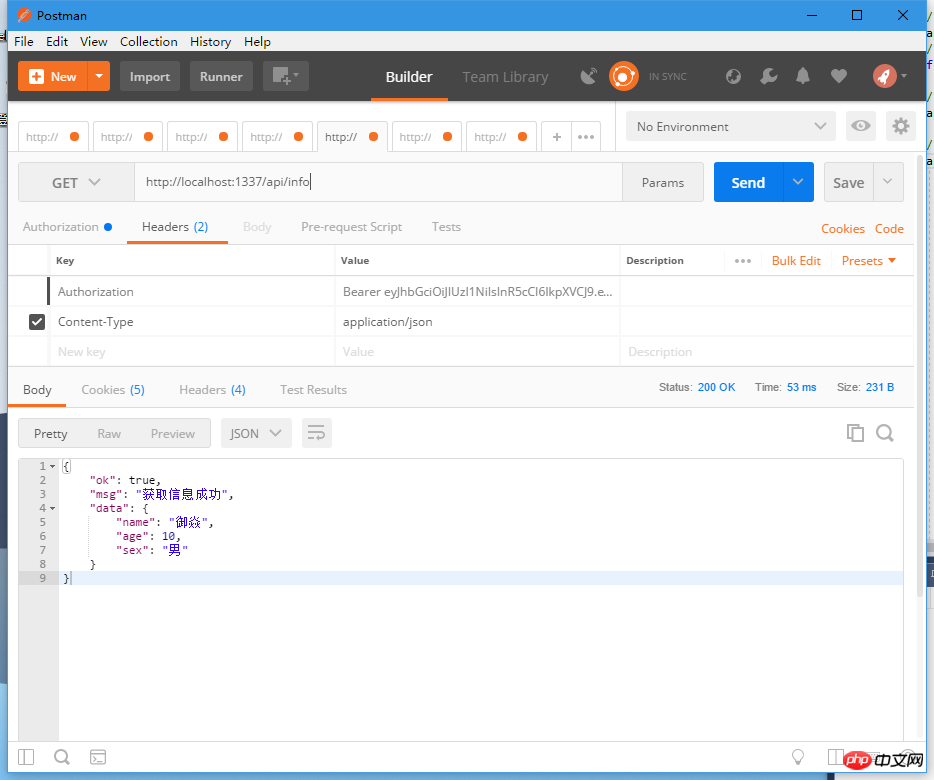
/* GET /api/info 信息 */ app.use(route.get('/api/info', async (ctx, next) => { // 前端访问时会附带token在请求头 payload = getJWTPayload(ctx.headers.authorization) /* * payload = { * user : "御焱", * iat : 1524042454, * exp : 1524056854 * } */ // 根据 payload.user 查询该用户在数据库中的信息 // 待办事项…… const info = { name: '御焱', age: 10, sex: '男' } let 获取信息成功 = true; if (获取信息成功) { return ctx.body = { ok: true, msg: '获取信息成功', data: info } } else { return ctx.body = { ok: false, msg: '获取信息失败' } } })); /* 通过token获取JWT的payload部分 */ function getJWTPayload(token) { // 验证并解析JWT return jwt.verify(token.split(' ')[1], secret); }
What are the ways to use js (with code)
3 ways to dynamically load JS files
The above is the detailed content of How to implement user authentication using Koa in Node.js. For more information, please follow other related articles on the PHP Chinese website!


![[Web front-end] Node.js quick start](https://img.php.cn/upload/course/000/000/067/662b5d34ba7c0227.png)


