This article mainly introduces the detailed example code of JAVA calling WCF service. The editor thinks it is quite good, so I will share it with you now and give it as a reference. Let’s follow the editor and take a look.
This article will solve the problem of calling WCF in Java. It still uses the WCF service hosted in IIS in the previous article. Originally, I planned to use axis. I am writing this article, but just before I started, I accidentally discovered the wsimport tool that comes in the java package. It is extremely refreshing to use and saves time in configuring the axis. So, just let it go
In fact, with wsimport, it is extremely simple to call wcf in java. Of course, this is based on using less complex services. If you also need to consider security verification, Issues such as publishing and subscribing are still relatively complex, but I am not going to write that much in these three articles. I just want to be able to really apply the three words of cross-platform in practice. Let's serve as a starting point.
1. Development essentials
So, as long as you are doing Java development, you don’t need to read this chapter, jdk+eclipse, or even don’t use eclipse , because the wsimport tool mentioned above is an executable program in the bin directory after Java installation. If the key uses axis, eclipse is only necessary.
2. Generate WCF client
uses the wsimport mentioned above. If you configure the java environment variables correctly, you can use it directly in the console Now, resume folder x:/workspace/EmployeeManager/client
Open the command line, cd to the directory x:/workspace/EmployeeManager/ created above, and then execute the command:
import –s client http://192.168.11.1/emp/EmployeeManagement.svc?wsdl, and then you will find that several files have been generated in the directory, including corresponding java entity class files, such as Employee.java, and ObjectFactory that generates complex entities. , because what is used here is not the basic types String, Int, etc., but types such as JAXBElement


3. Development program
1. Create a new JAVA project in eclipse, for example testproject
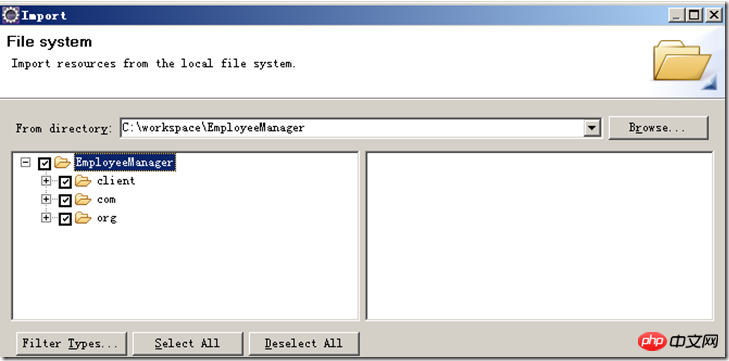
2. Right-click the src folder in the project and select Import
3. Click File System in General and click Next
4. Click just in the next step Directory of resume and select all folders

##
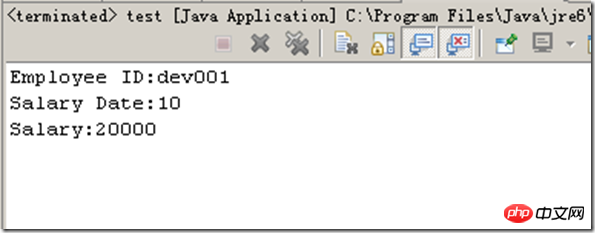
import org.datacontract.schemas._2004._07.contracts.*; import com.microsoft.schemas._2003._10.serialization.*; import org.tempuri.*; public class test { /** * @param args */ public static void main(String[] args) { //使用ObjectFactory帮助生成实体类对象 org.datacontract.schemas._2004._07.contracts.ObjectFactory factory=new org.datacontract.schemas._2004._07.contracts.ObjectFactory(); Employee emp=factory.createEmployee(); //设置属性,同样使用ObjectFactory帮助设置,因为这里的类型有别与基础类型 emp.setId(factory.createEmployeeId("dev001")); emp.setName(factory.createEmployeeName("James White")); emp.setDepartment(factory.createEmployeeDepartment("Development")); //调用的方法略显古怪,需要注意 EmployeeManagement empManagement=new EmployeeManagement(); IEmployeeManagement iempManagement=empManagement.getBasicHttpBindingIEmployeeManagement(); SalaryDetail salaryDetail=iempManagement.getSalaryOfLastMonth(emp); //输出结果 System.out.println("Employee ID:"+salaryDetail.getId().getValue()); System.out.println("Salary Date:"+salaryDetail.getDate().getMonth()); System.out.println("Salary:"+salaryDetail.getSalary().toString()); } }

The above is the detailed content of Introduction to the method of calling WCF service from JAVA. For more information, please follow other related articles on the PHP Chinese website!


