Today I am going to use CM to install the big data environment. I need several machines to use the same set of yum source, so I thought of mirroring Redhat The file is copied to the virtual machine, used in suspension, and finally shared with other virtual machines through http. Thinking about it later, this is really stupid. First of all, I have already suspended the image once when installing the virtual machine, so I only need to suspend it again in each virtual machine and directly configure the yum source. There is no need to copy the iso to the virtual machine to reduce disk usage. So now let’s talk about how to do it:
1. Check before installation. First, you need to make sure that your virtual machine has loaded the local image, as shown in the figure below:

Note:Use the ISO image file when selecting your installation system Use the location of the file. Note here that the status check indicates that you have imported the disc. To check whether you have successfully imported the file, you can check whether there is a RHEL_6.4 x86_64 Disc 1 file in the /media/ directory (Redhat is used here). If there is, it means the import is successful.
If there is nothing under the /media/ directory, it may be that the ISO is not suspended. You can use the following command to manually suspend it:
mount /dev/sr0 /media/cdrom 或 mount /dev/sr1 /media/cdrom
2. Configure yum source
1. Log in to the system as the root user and create the cdrom folder in any directory. The name can be customized. I created the cdrom folder under the /mnt folder. .
# mkdir /mnt/cdrom
2. Execute the following command in any directory:
# mount -o loop /dev/cdrom /mnt/cdrom/
It should be noted that /dev/cdrom was created when I installed the system before and was used to hang the image file. Now it is also hung in /mnt/cdrom. above. If the above command is executed successfully, you will see that the files in the /mnt/cdrom/ directory are exactly the same as the files in the /media/RHEL_6.4 x86_64 Disc 1/ directory, proving that the loading is successful.
3. Modify the yum source configuration file. It is recommended to delete all the files in the /etc/yum.repos.d/ directory and create a new one with .repo as the suffix. file, the command is as follows:
# cd /etc/yum.repos.d/# rm -rf *# touch yum.repo# vim yum.repo
Then copy the following content to the yum.repo file
[rhel] name =Red Hat enterprise Linux 6baseurl=file:///mnt/cdrom enable=1gpgkey=1gpgkey=file:///mnt/cdrom/RPM-GPG-KEY-redhat-release
Explain the meaning of configuration a little bit:
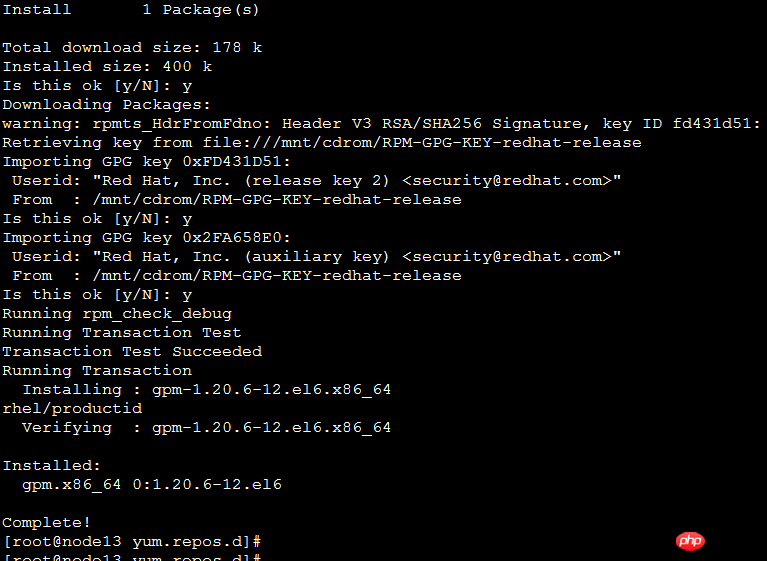
4. After the above configuration is completed, the yum source has been configured. Next, you can test the command: yum install gpm. After pressing Enter all the way, you will see Complete!, which means it has been used. The yum source successfully installed gpm, proving that the installation was successful.

Another method is introduced:
First create the dvd directory in the /mnt directory (actually this step According to personal preference, the directory name is up to you, just remember to synchronize it later)
[root@localhost ~]# mkdir /mnt/dvd
Then mount the image to the created directory (To find the cdrom file in /dev, the image must be loaded into the virtual machine. Usually after installation, if we do not make changes, it is usually loaded)
[root@localhost mnt]# mount / dev/cdrom /mnt/dvd
Then delete all existing configuration files in /etc/yum.repos.d (of course, you'd better back up first), and then use the following command, create a new file, the suffix must be .repo, the file name can be arbitrary
[root@localhost my]# vim /etc/yum.repos.d/local.repo
in Write the following content in the configuration file
[RHEL6] //Warehouse name, optional
name=all rhel6 packages //Name, optional
baseurl=file:///mnt/dvd //Source The path is very important. Fill it in according to your actual situation. This path should be filled in according to the location of the rpm package. Some are in the Server directory
enable=1 //Enable this yum source
Finally, import the public key and you’re done
The above is the detailed content of Two methods to explain how to configure local yum source for Redhat HAT in VMware. For more information, please follow other related articles on the PHP Chinese website!


