


The birth of a web application based on flask is the fourth article. This article mainly introduces how to interconnect flask and mysql. It has certain reference value. Interested friends can refer to
Chapter 1 implements part of the login function. The reason why it is called a partial function is because it is definitely not allowed to write the user name and password as fixed values. A whole function requires at least registration, login, password modification, etc., which requires providing a The ability to store these values into the database.
The current mainstream databases are divided into two types, namely relational databases and NoSql databases. For small and medium-sized systems, the performance and ease of use of the two databases are equivalent, and they are both good choices.
Basic configuration
The flask integration package of the SQLAlchemy database framework, flask-SQLAlchemy, is used here to perform database operations.
SQLAlchemy is a very good framework that simplifies database operations. It provides high-level ORM and low-level SQL functions, which is very convenient to use.
The installation method is the same as the previous type, or the pip command:
pip3.6 install flask-sqlalchemy
After the installation is completed, modify the default configuration part, first import the package:
from flask.ext.sqlalchemy import SQLAlchemy
Then configure the link string:
app.config["SQLALCHEMY_DATABASE_URI"]='mysql://root:1234@localhost/cblog'
Configure automatic commit of changes after the request is completed:
app.config["SQLALCHEMY_COMMIT_ON_TEARDOWN"]=True
Instantiate SQLAlchemy:
db=SQLAlchemy(app)
Model settings
After the installation is complete, continue to improve the login example, modify the default.py file, and add the User model (class) and Role model (to show association)
Role class
class Role(db.Model): #需继承模型
 __tablename__="roles" #db中表明,如果不设置,则会与class同的默认名
 id=db.Column(db.Integer,primary_key=True) #SQLAlchemy要求必须有主键,一般命名为id即可
 name=db.Column(db.String(50),unique=True) #表示name为字符串,不重复
users=db.relationship("User",backref='role') #关联user模型,并在user中添加反向引用(backref)User class
class User(db.Model):
 __tablename__="users"
 id=db.Column(db.Integer,primary_key=True)
 username=db.Column(db.String(50),unique=True,index=True) #此列带索引
 password=db.Column(db.String(50))
role_id=db.Column(db.Integer,db.ForeignKey("roles.id")) #外键指向roles表中的id列The following needs to be considered how to execute it. It must be convenient and whether the logic code can be invaded. This is The requirements cannot be hard-coded into the logic code. For example, the code to determine the db status is passed as a parameter to app.run(). At this time, the shell comes in handy
Configuration script
If you want flask to support command line scripts, you first need to install the flask-script extension:
pip3.6 install flask-script
Modify the code of default.py:
from flask.ext.script import Manager
mamager=Manager(app)
....
if __name__=='__main__':
 #app.run(debug=True)
 mamager.run()
After modification, run it again :
python default.py
It was found that it did not run successfully, but there was a prompt:

You can see that parameters are required at the end, respectively shell (execution Script), runserver (start service) and help
Start the service below:
python default.py runserver
Service successfully executed
More database configuration
But at this time, when accessing the site (127.0.0.1:5000), a 500 error will appear, indicating that there is no mysql module. Why is this? Obviously the reason is that the mysql driver is not installed. Use the pip command to install the driver:
pip3.6 install MySQL-python
An error is found and the displayed content is (only win system here):
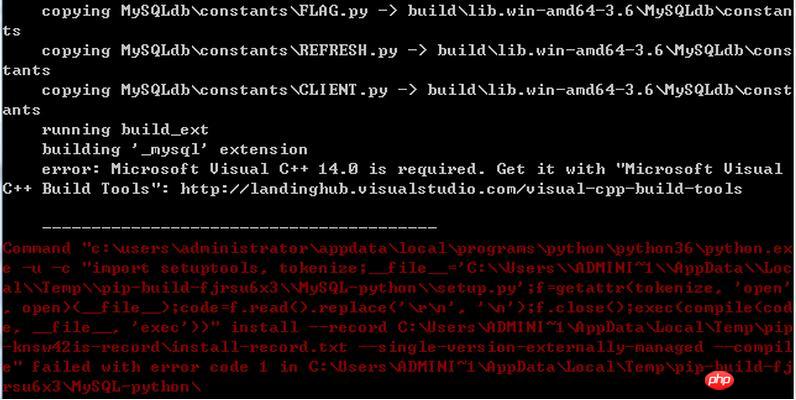
According to the prompts, install the c++ tool package and follow the download address on the prompts
landinghub.visualstudio.com/visual-cpp-build-tools
After the download is completed, it will be directly an exe file , install
After restarting, I installed MySQL-python and found that it was still not possible. After going through Baidu, I found that the MySQLdb library only supports up to python2.7 and no longer supports 3.x. Then I have to use other methods. Use PyMySQL library:
pip3.6 install PyMySQL
Then modify the code of default.py and add two lines:
import pymysql
pymysql.install_as_MySQLdb()
Enter the source code and pay attention to this line:
sys.modules["MySQLdb"] = sys.modules["_mysql"] = sys.modules["pymysql"]
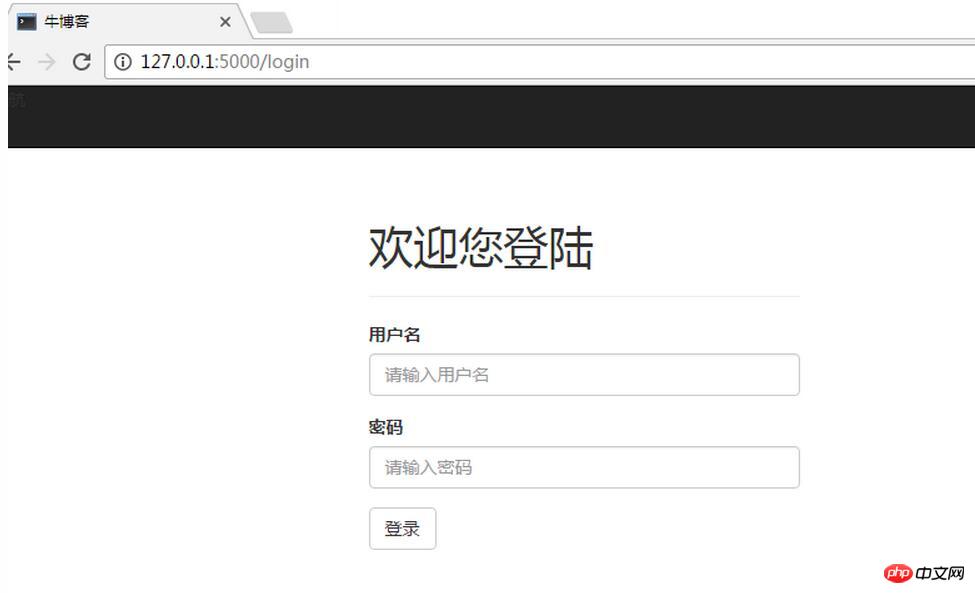
You can successfully use and connect to mysql.
Enter the connection in the browser and enter the site correctly.
Next, use shell to create the database table and enter the root directory of default.py:
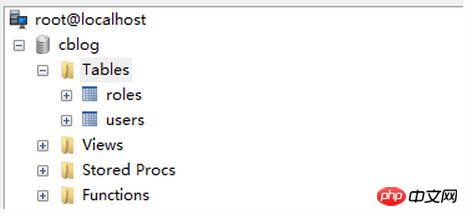
python default.py shell
from default import db
db.create_all()
If no error is reported at this time, the database table should be created. :
Database migration
Then the problem comes. At this time, modify the model, yes It will not be reflected in the db, so what should I do if I modify it? For now, it is also very simple:
db.drop_all()
db.create_all()
But this is only used for debugging now. If there is already data in the db, this will definitely be unbearable. At this time, it is the turn of the database migration plug-in Migrate is here. The first thing is still the same. You need to install it:
pip3.6 install flask-migrate
As before, modify the default.py file for configuration after installation:
from flask.ext.migrate import Migrate,MigrateCommand
migrate=Migrate(app,db) #配置迁移
mamager.add_command("db",MigrateCommand) #配置迁移命令Then use the init command to initialize the migration warehouse
python default.py db init
The command line displays:
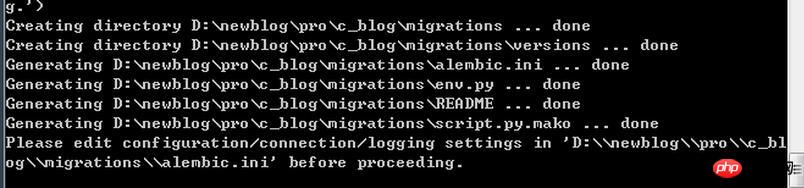
Then add the migrations directory:
indicates the migration file Initialization has been completed.
migrate框架提供了一些命令来进行迁移操作,分别为(使用default.py文件举例):
#根据差异创建迁移
python default.py db migrate -m "说明"
#改动差异
python default.py db upgrade
#取消差异改动
python default.py db downgrade
回到表单
接下来看看登录如何与数据库关联起来,修改login方法内的代码:
@app.route("/login",methods=["POST"])
def loginPost():
 username=request.form.get("username","")
 password=request.form.get("password","")
 user=User.query.filter_by(username=username,password=password).first() #数据库查询
 if user is not None:
 session["user"]=username
 return render_template("/index.html",name=username,site_name='myblog')
 else:
 flash("您输入的用户名或密码错误")
return render_template("/login.html") #返回的仍为登录页执行结果非常完美。
一些总结
下面是一些关于python和db相连的总结性的东西
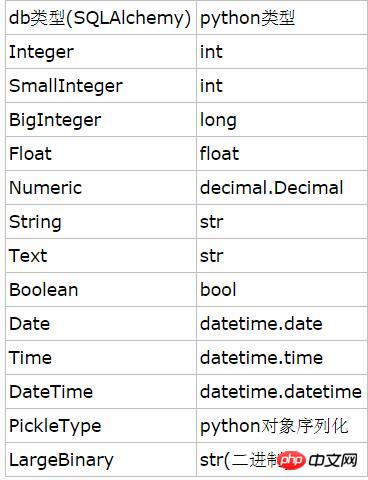
数据类型
列选项

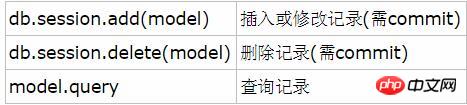
数据库操作
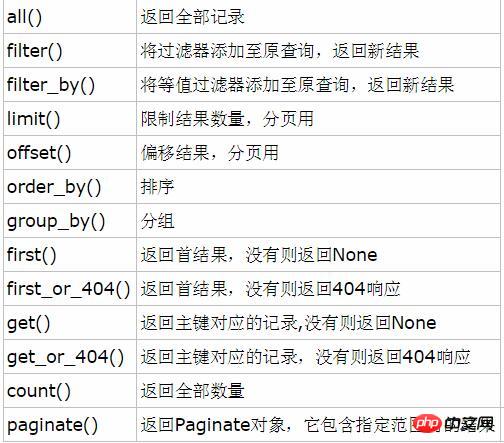
查询过滤器
经过这几章,登录功能已经基本完成,在下一章中将讲解用户注册的相关功能。
The above is the detailed content of Detailed explanation of examples connecting flask and mysql (python). For more information, please follow other related articles on the PHP Chinese website!


![[Web front-end] Node.js quick start](https://img.php.cn/upload/course/000/000/067/662b5d34ba7c0227.png)


